Application interface
Getting started
Note: this document describes the general look of the application interface, which is a common concept when working with different types of documents. Documents that describe products are used as the example.
When you sign in to the application, you land on the "Discussions" page, where you can see the incoming messages for the user you signed in as. To go to the module you need, click the menu button in the upper left corner.
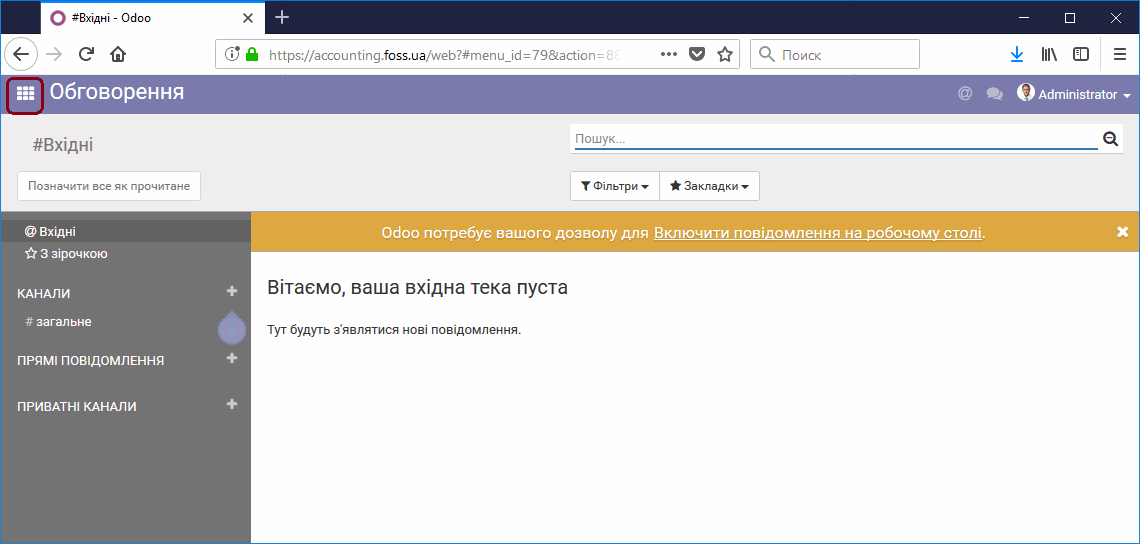
Application interface
Application modules
In the menu that opens, we see the modules included in the application. New modules can be added to extend the functionality of the application. To go to any module, click it with the mouse cursor. Depending on your permissions to work with the application and on the application settings, this list of modules may differ.
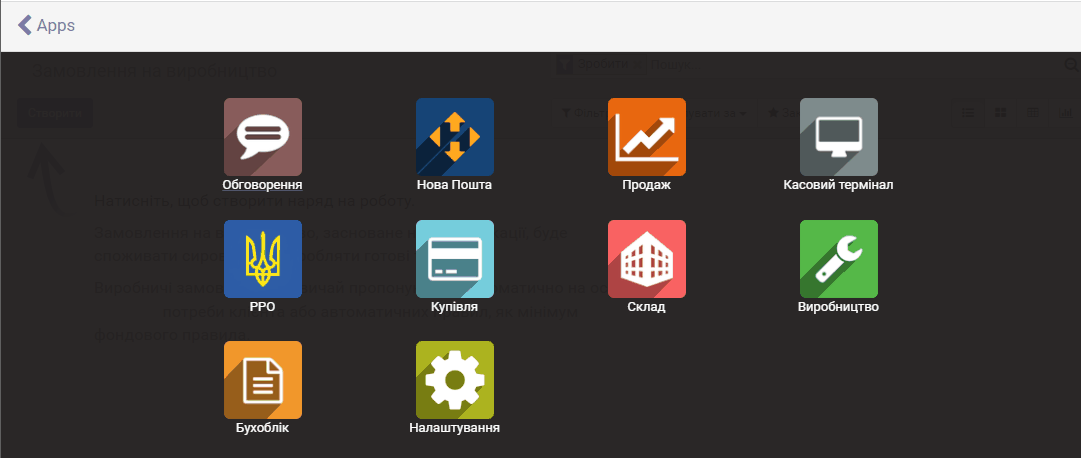
Control panel
After you select a module, the control panel opens with the menu items of that module.
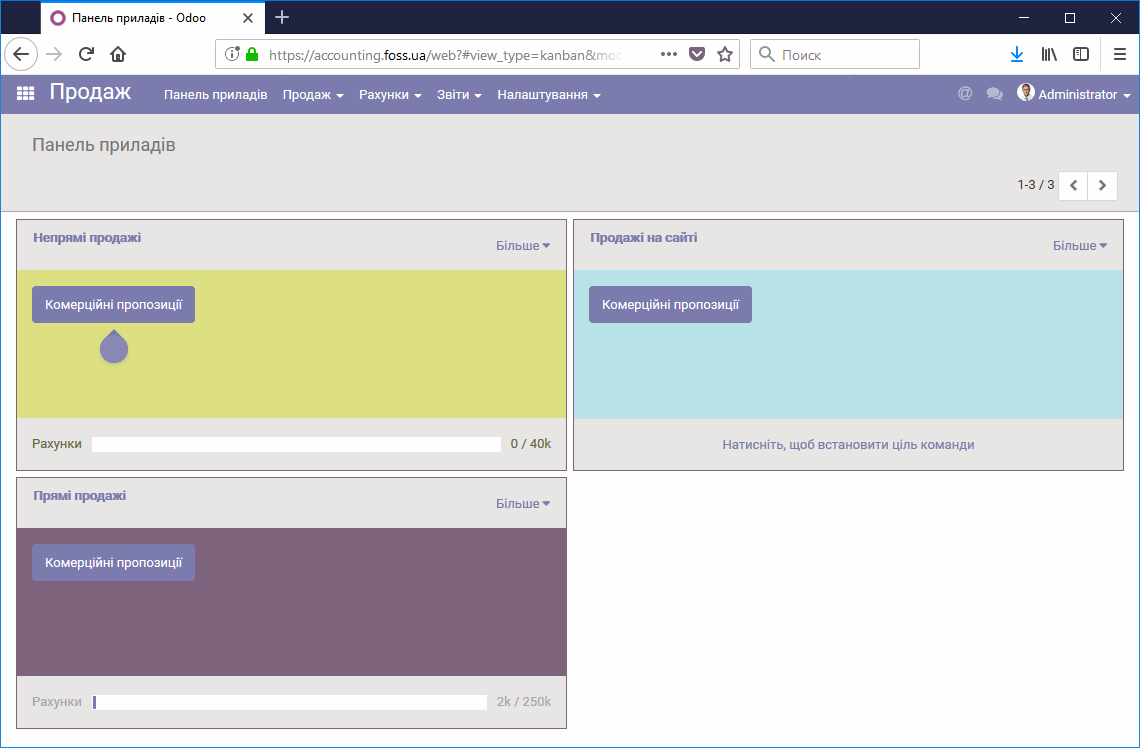
Control panel view
By clicking "More" in the Control panel window that opened, you can go to any of the items shown in this window.
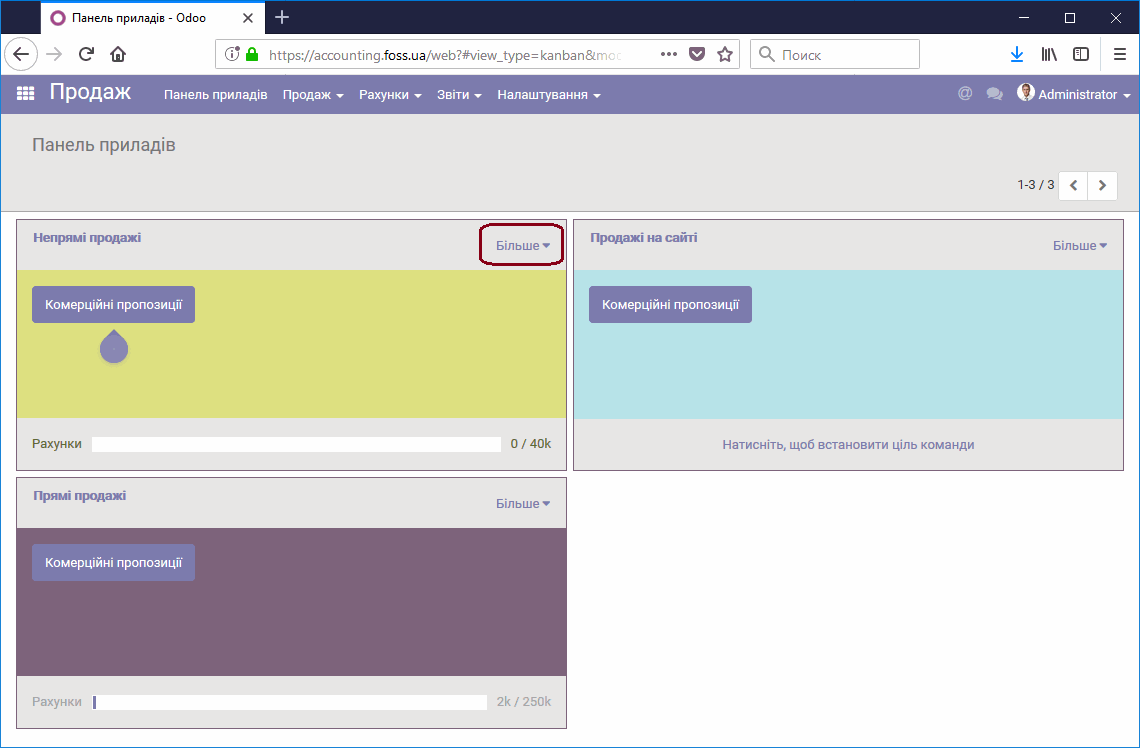
Control panel, details
The strip of colored squares lets you change the color of the quick access menu according to your preferences.
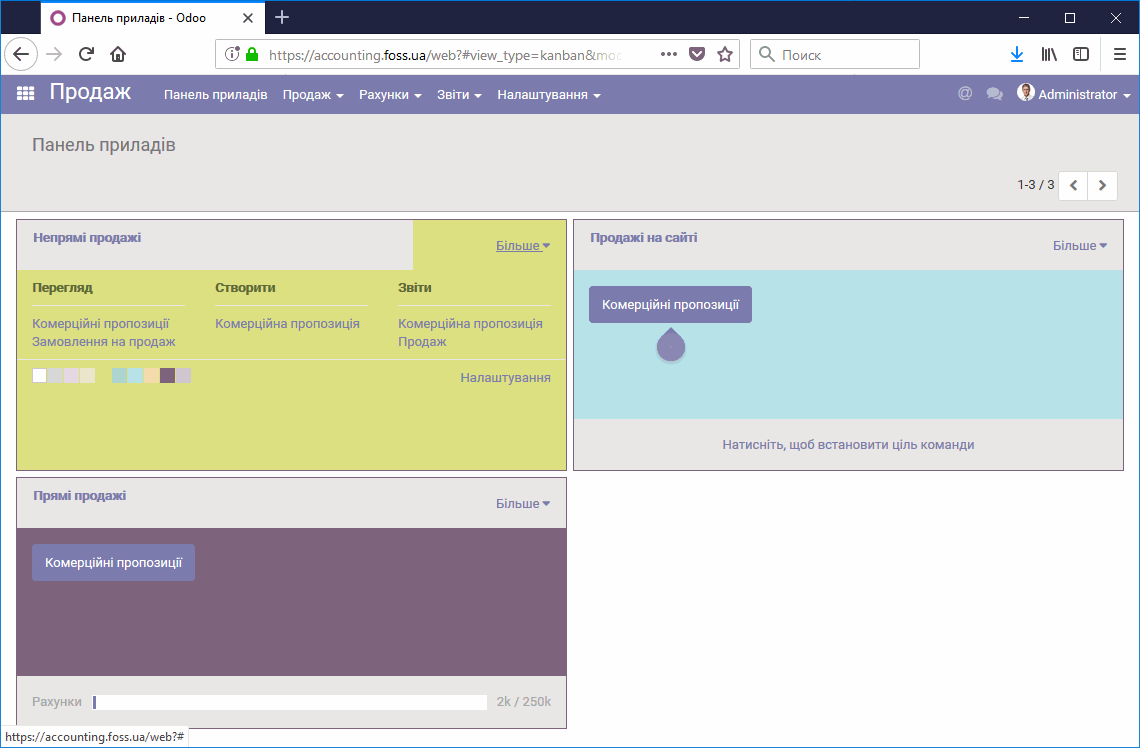
Changing the color in the control panel
In the drop-down menu item, you can go to one of the sections of this menu by clicking it with the mouse cursor.
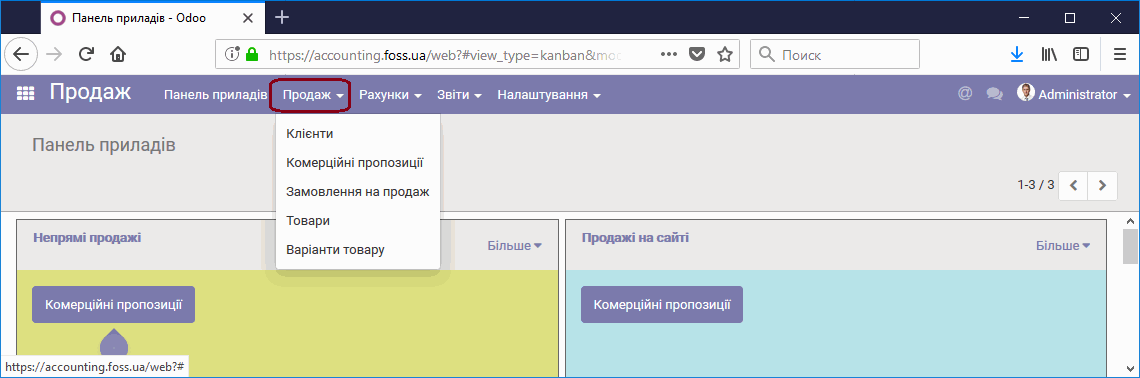
Menu items
Object lists
After you go to the selected menu section, you see a table with the items of this menu item. Here you can create new data and view existing data. You can also change the table view and customize it using the "Filters", "Group by" and "Favorites" items. These items are turned on and off by clicking the magnifying glass.
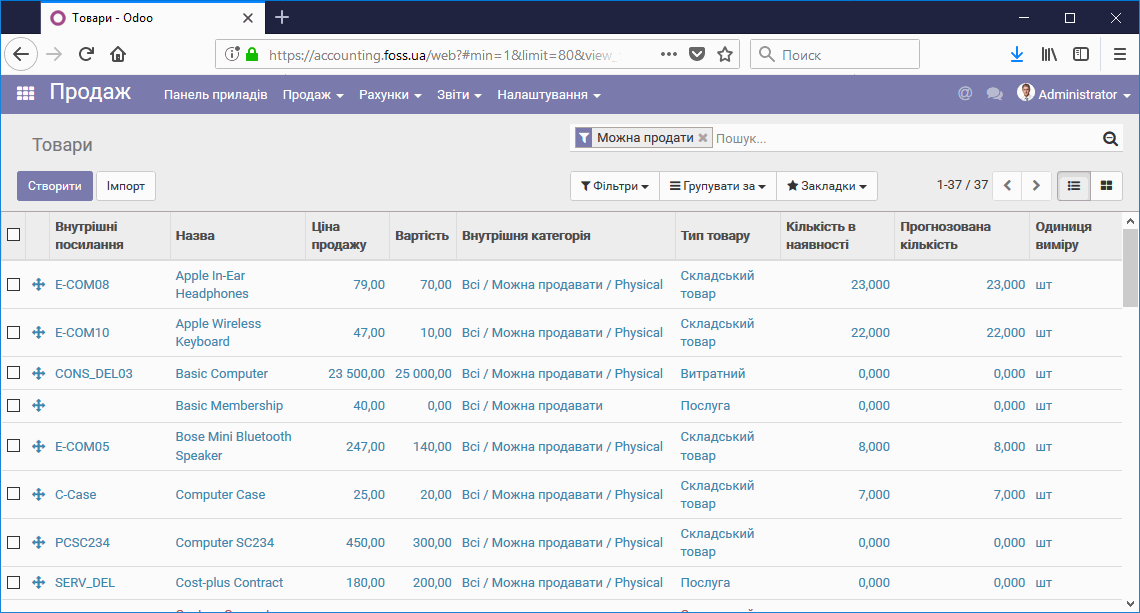
Product list
You can change the table view using the view switch buttons in the upper right corner.
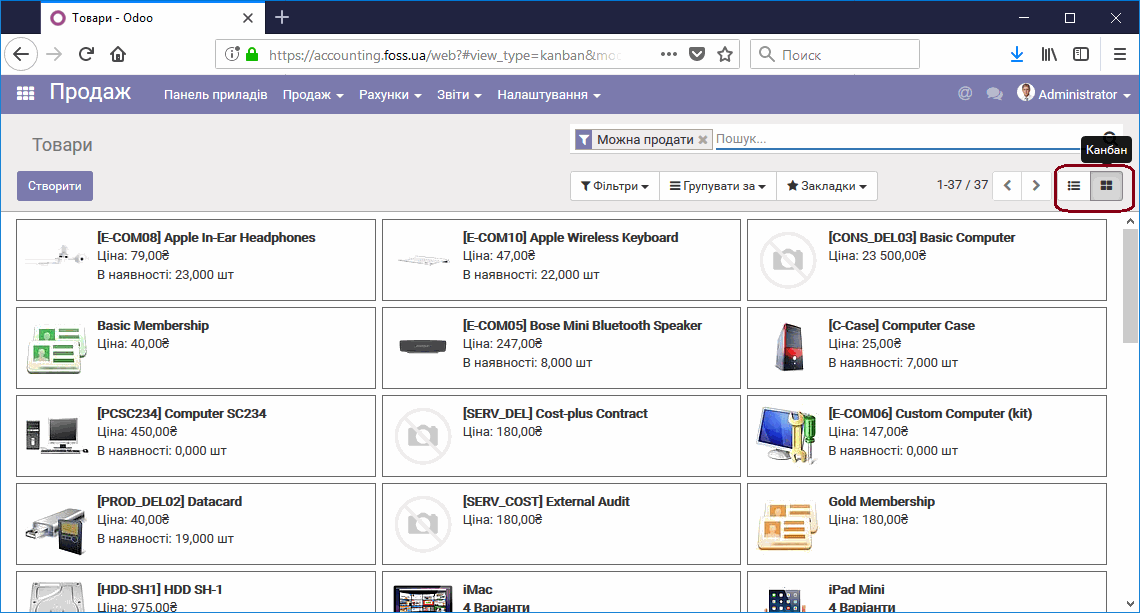
Product list, icons
The search bar is used for quick search. You can choose which field to search by directly in the quick search menu.
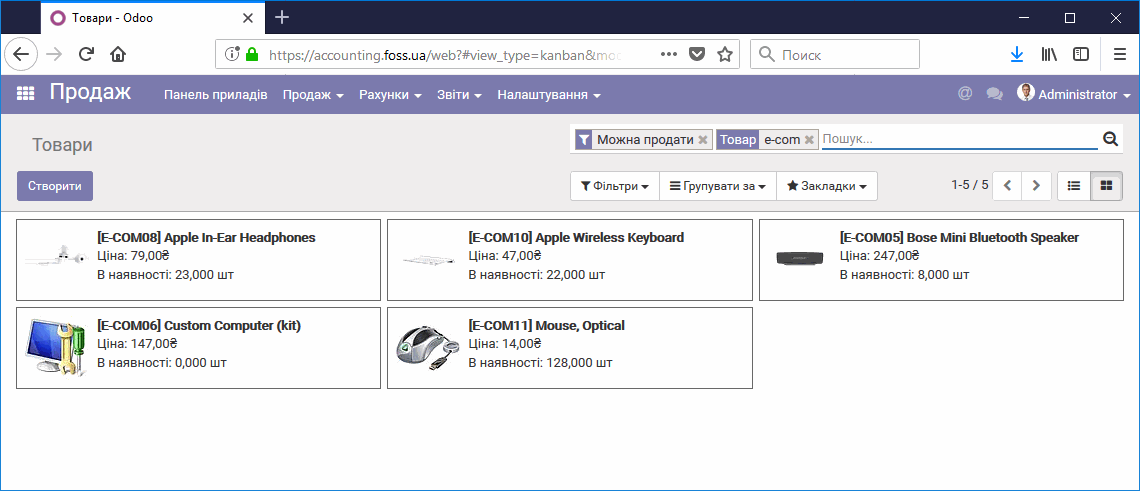
Quick search
After selecting the "Filters" mode, you can use predefined filters or create your own filter. After the filter is applied, the application shows the list of items that match the filter conditions in the visible part of the window.
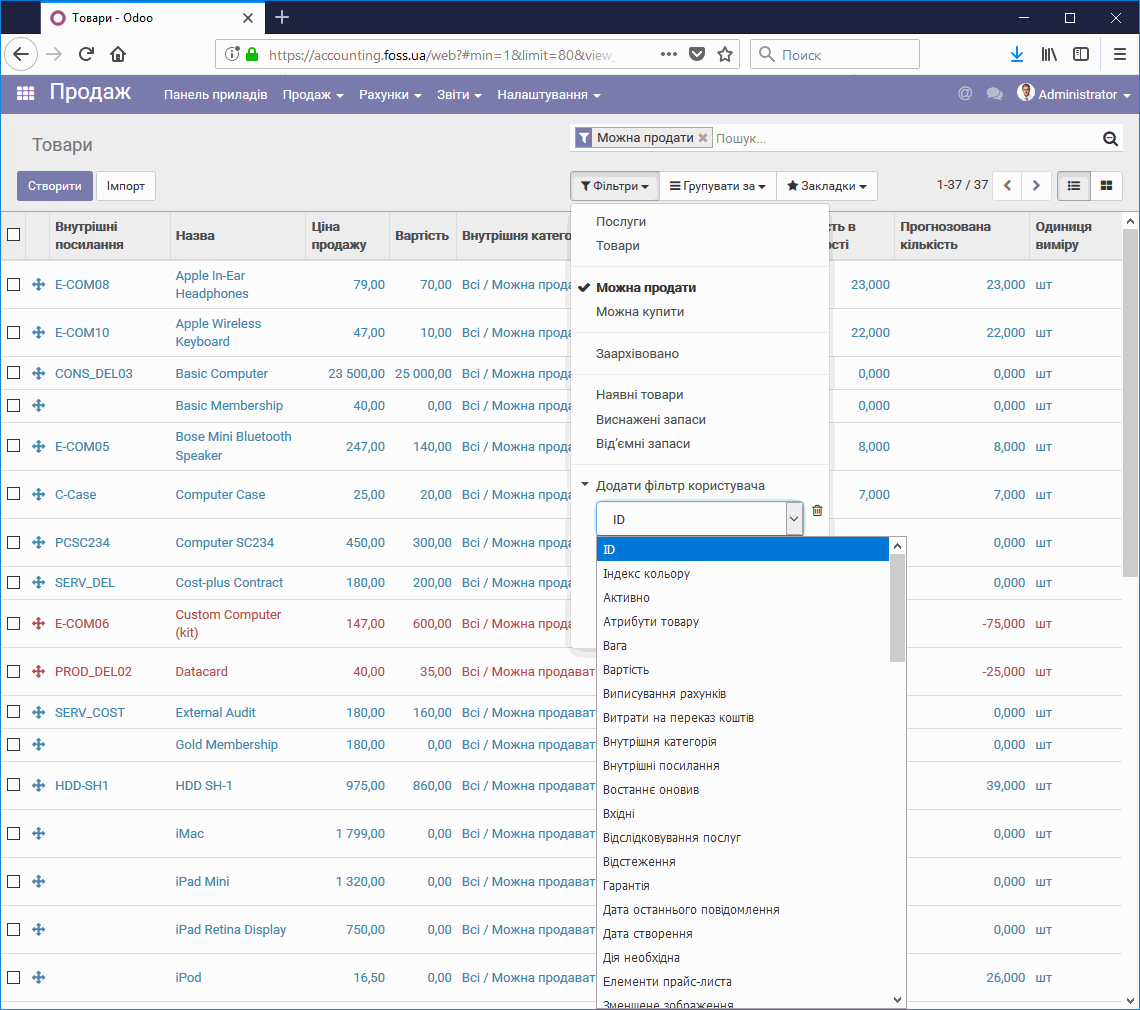
Selecting a filter
You can group the list items by arbitrary groups. For example, the figure below shows the table view obtained when grouping by the product's internal category.
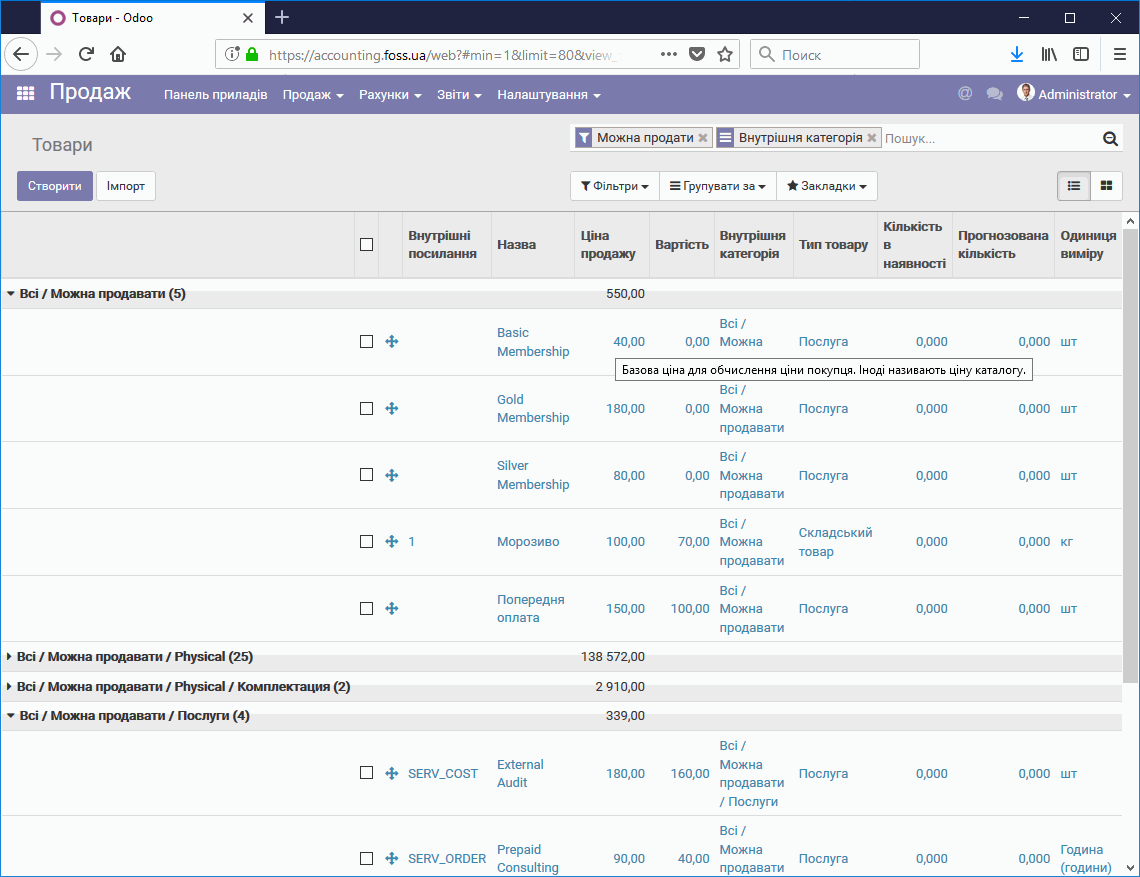
Grouping the views
There can be several grouping levels, as well as several search filter levels.
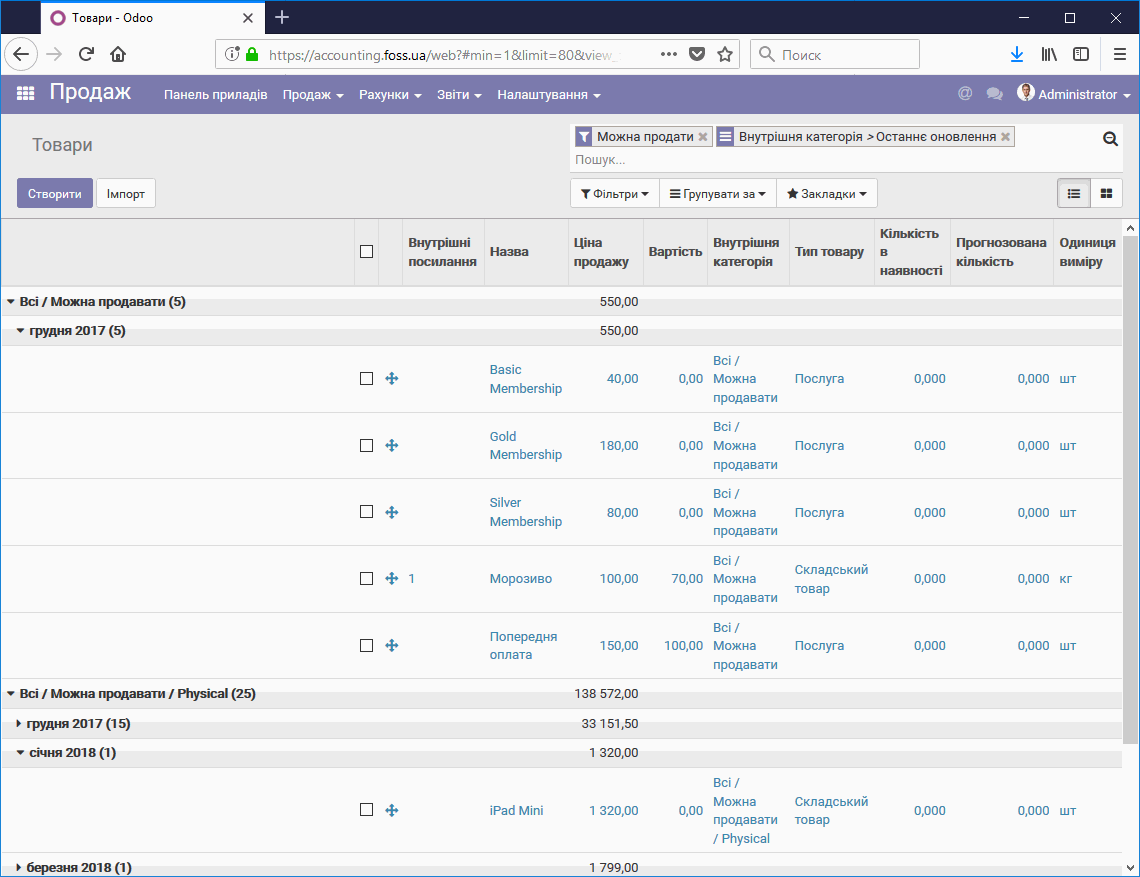
Multi-level grouping of the views
Using the "Favorites" button, you can set up the view that is applied by default when you open the corresponding table.
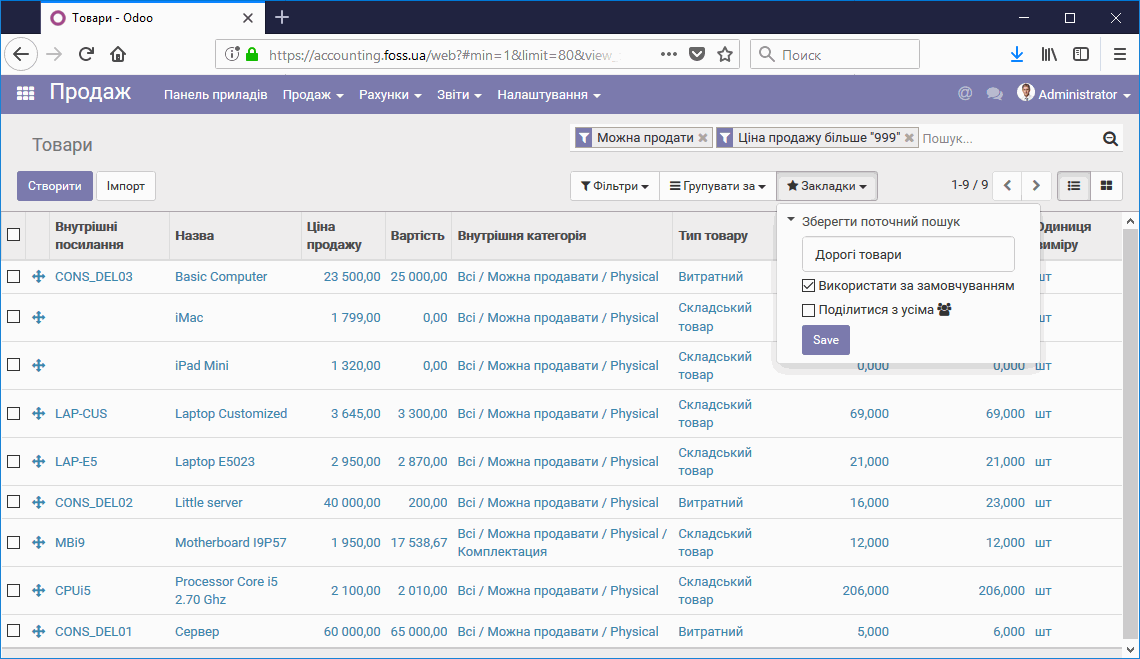
Setting up the default views
The figure below shows the table view that we set up in the previous step.
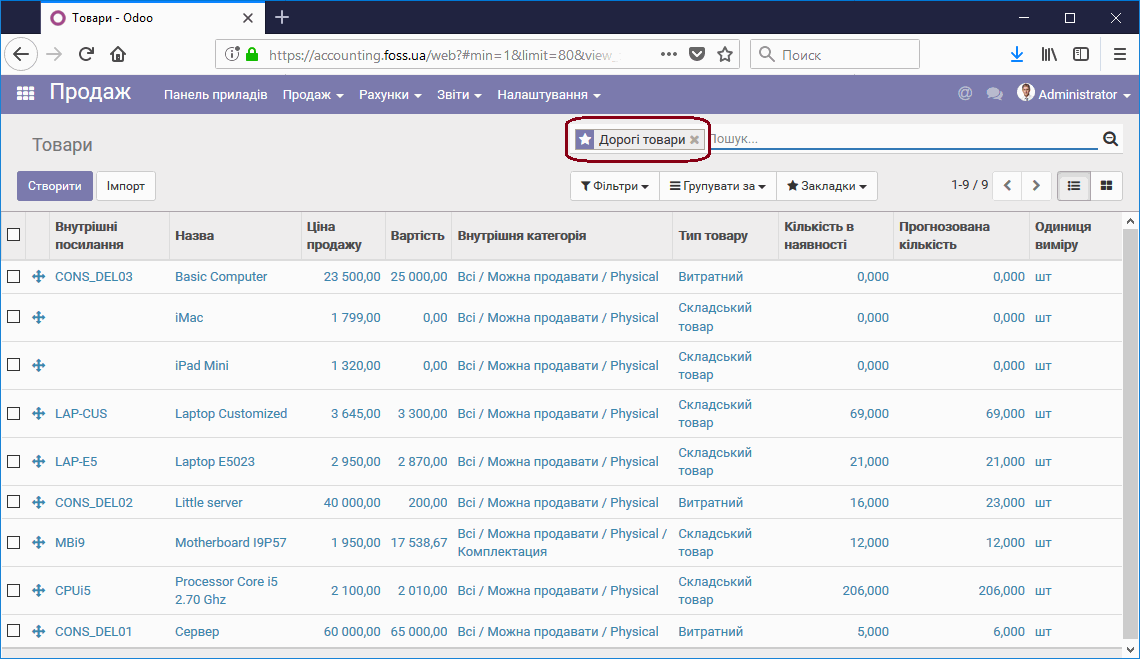
Default view
After selecting several list items, you can perform bulk actions on them that are available for these lists.
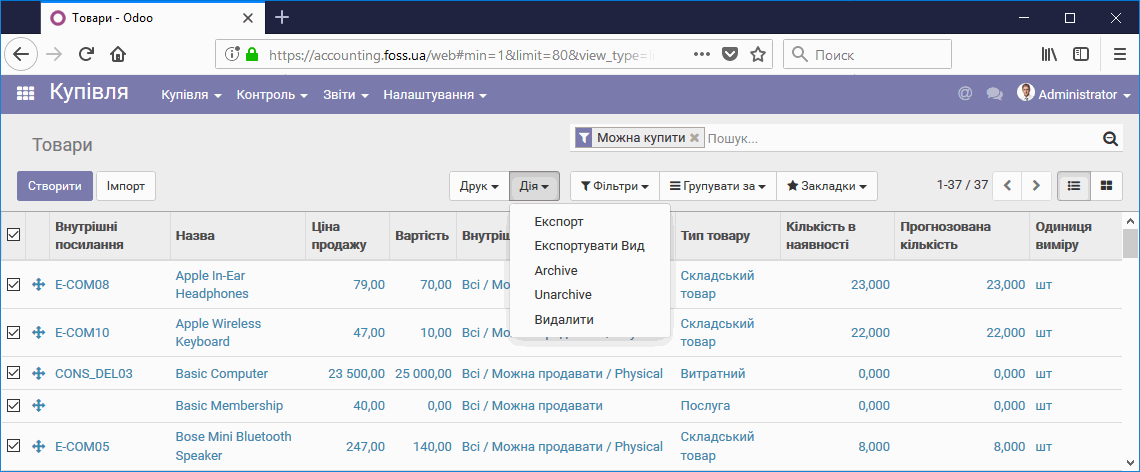
Actions on the selected group
Item form
By clicking the selected item in the table list, you open the form of this item. The item form shows various buttons that let you both perform actions on the item and view certain data.
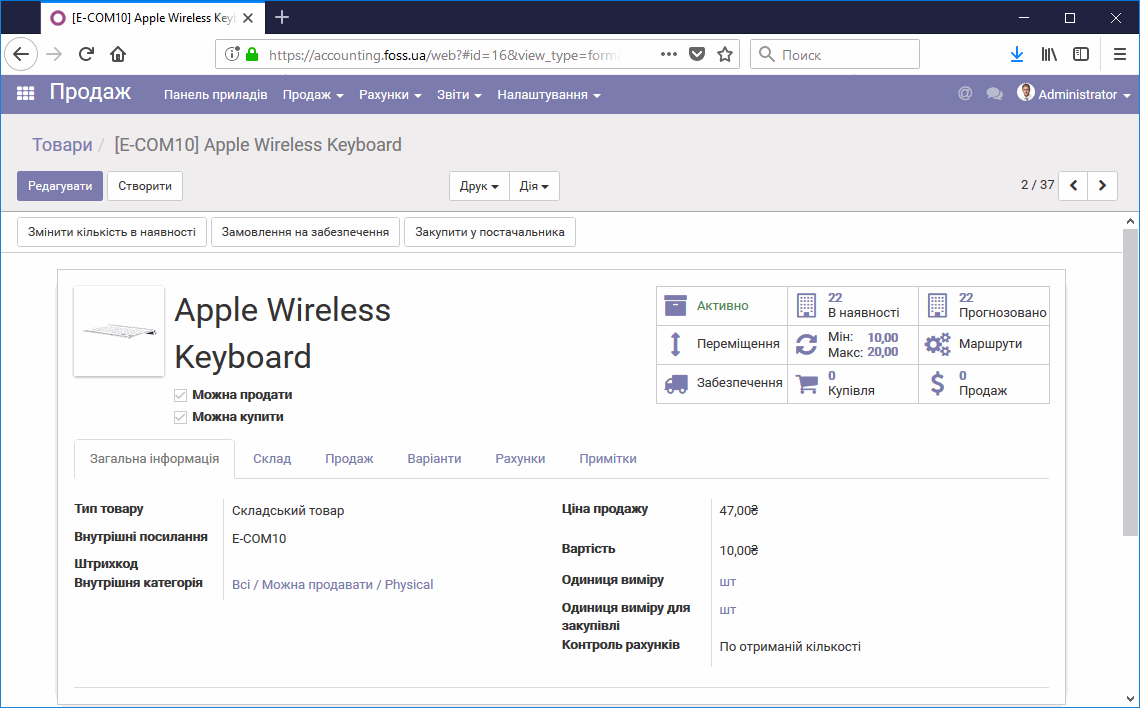
Item form
By clicking one of the buttons, you see the action or view that this button defines. For example, if you click the "On hand" button and then open the next window, you get information on when the product arrived and where it is stored. The sequence of opened documents is shown in the upper half of the item card, separated by a slash. By selecting any element, you can go back directly to the required document or list of documents.
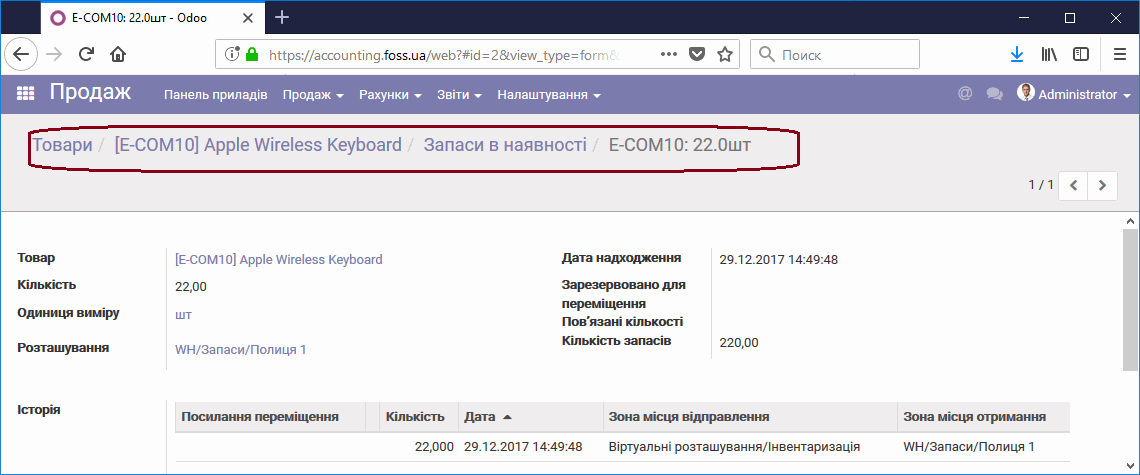
Sequence of opened items
To view the next list item, you do not have to leave the item card you are in and return to the list. Simply click the arrows in the upper right corner to go to the next or previous item. So, for example, it is clear that we are viewing the second item out of thirty-seven.
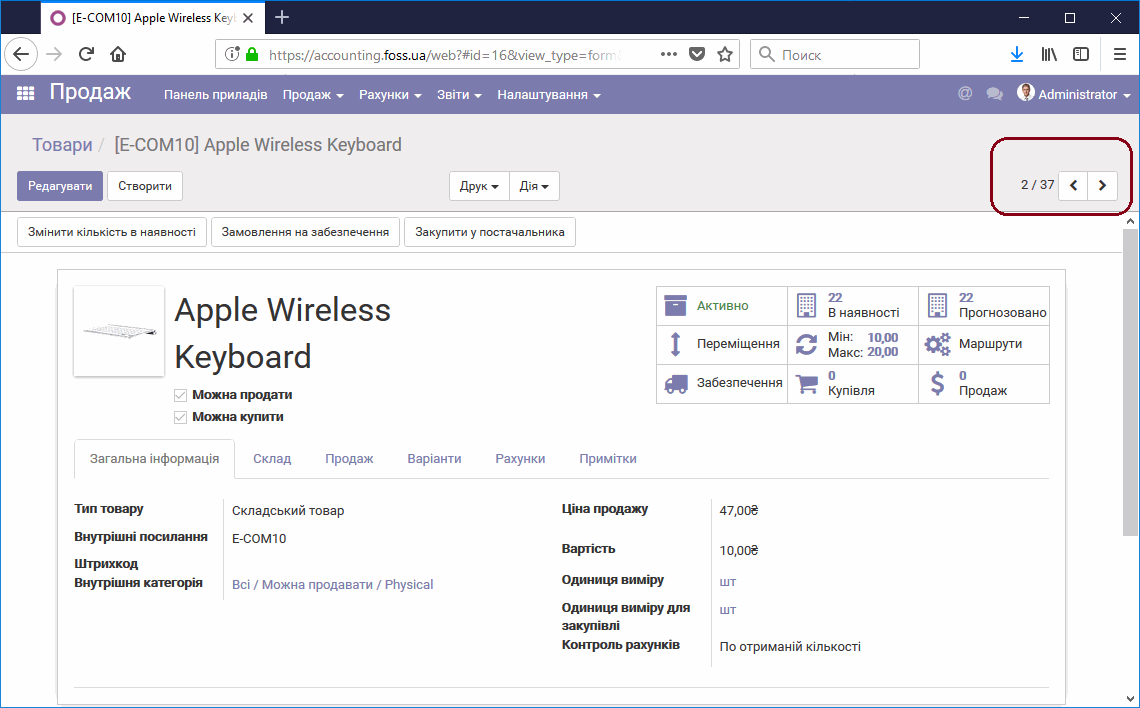
Moving between items
Module settings
If you have certain permissions to work with the application, you can set up the module in the "Settings" menu item. To do this, select the required item, enter the changes you consider necessary and click the "Apply" button in the upper left corner.
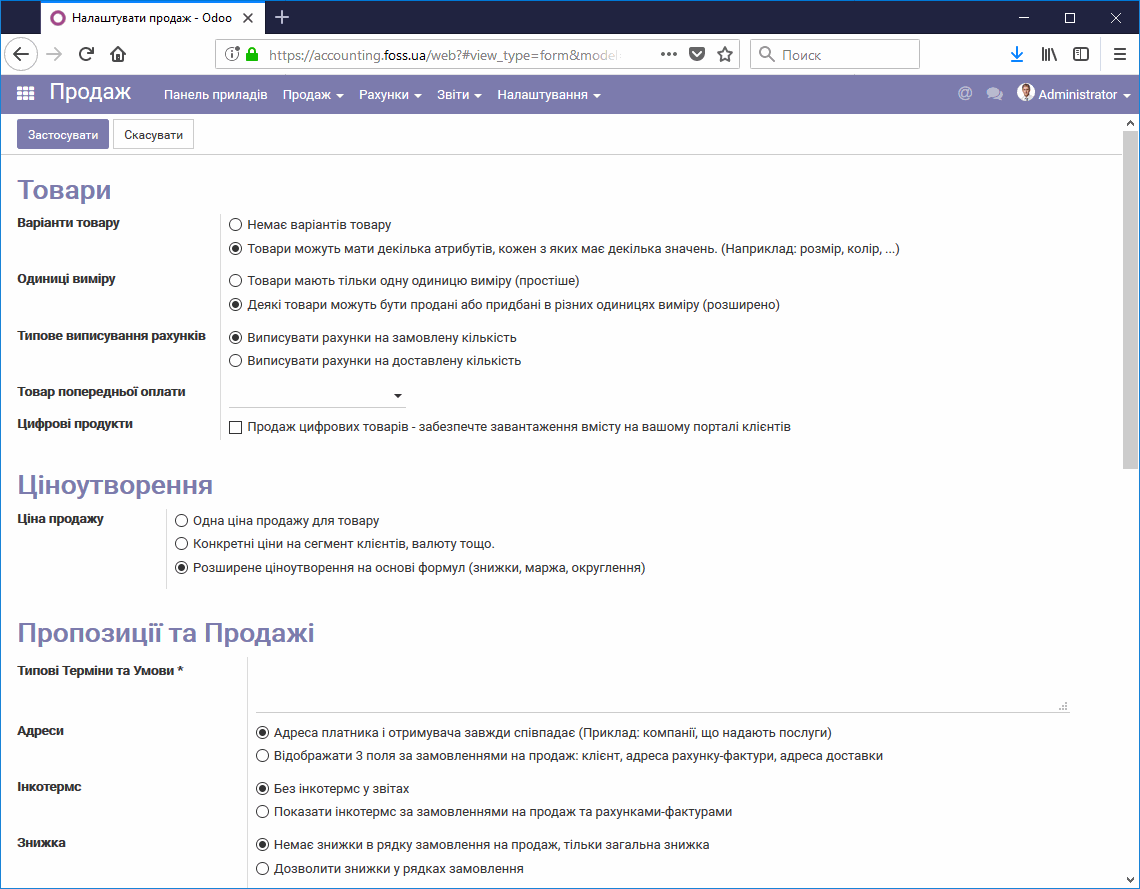
Application module settings window
Language settings
The application lets you choose the language you work in. To set the language, go to your account and select "Settings".
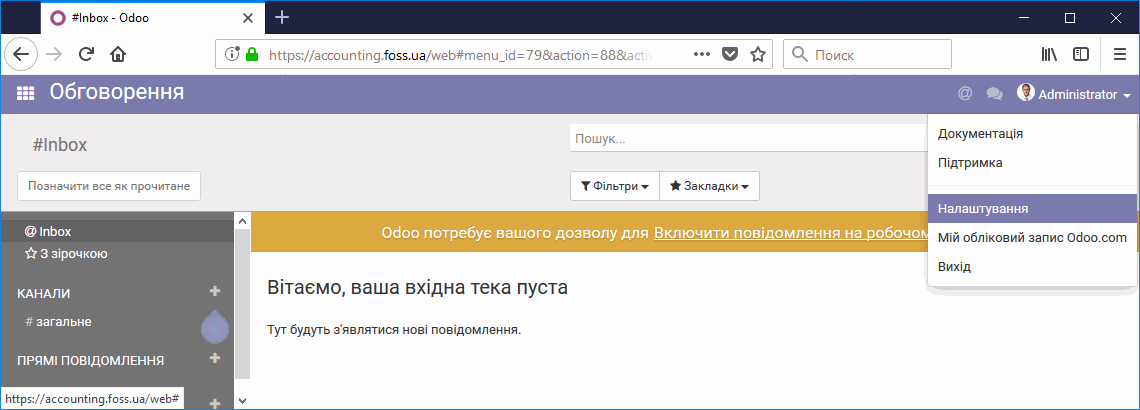
Account sign-in
Select the language you will use to work with the application.
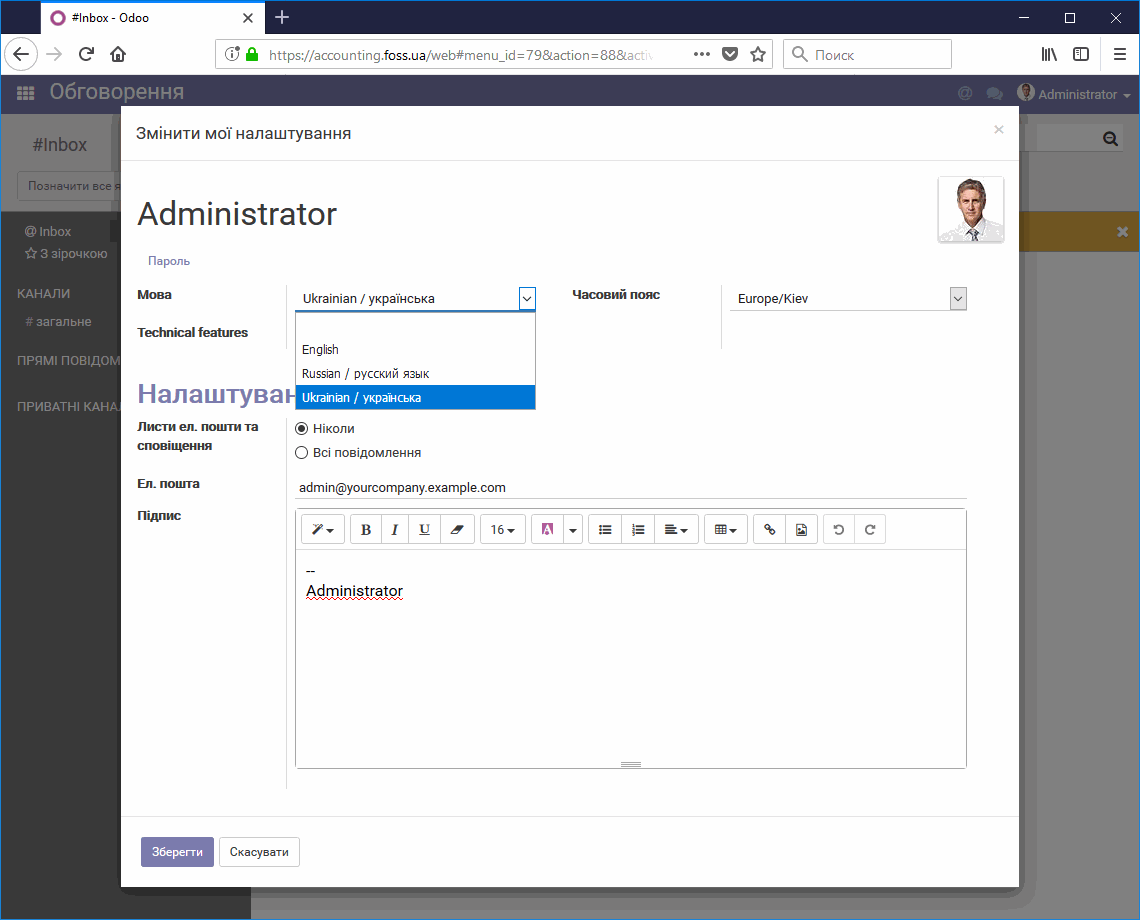
Selecting the application language
Working with several modules at the same time
In some cases you need simultaneous access to several different modules or different items of one module. To do this, open them in different browser tabs by right-clicking the link and selecting "Open link in new tab", as shown in the figure below. Here we have three modules open at the same time.
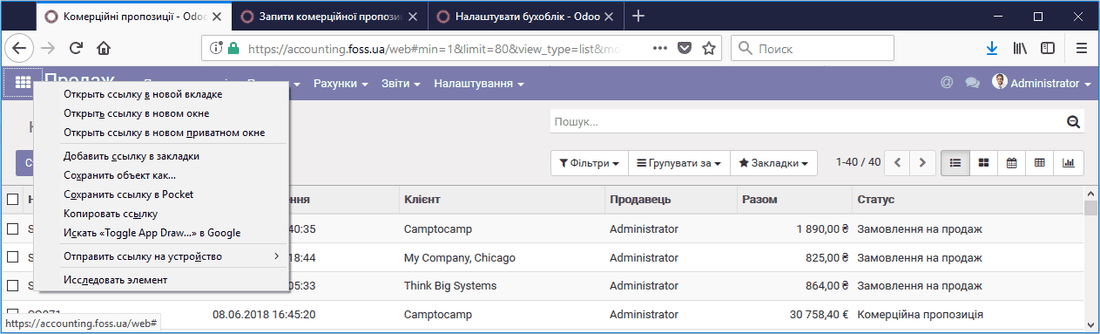
Working with several modules at the same time