Point of sale terminal settings
Some settings may be needed to work with the point of sale (POS) terminal. This article covers all the important and frequently used POS terminal settings.
General settings
Go to the Cash terminal module:
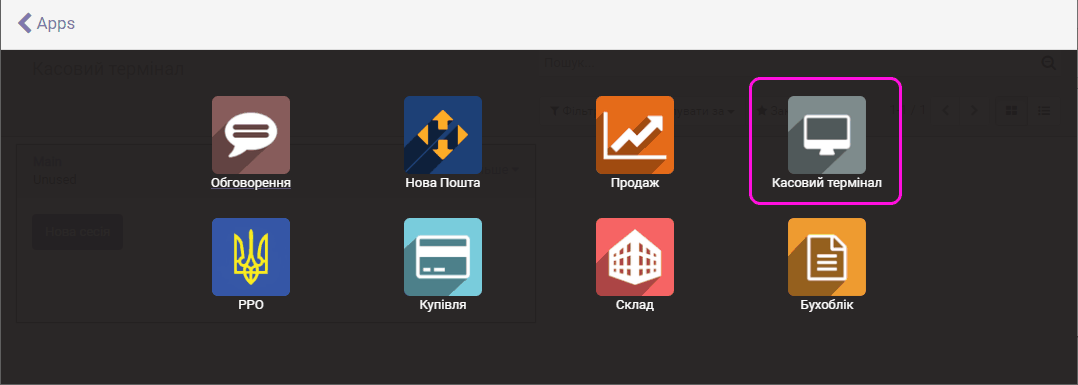
Select the menu item Settings/Settings. The general settings open; they apply to all cash registers that will be created.
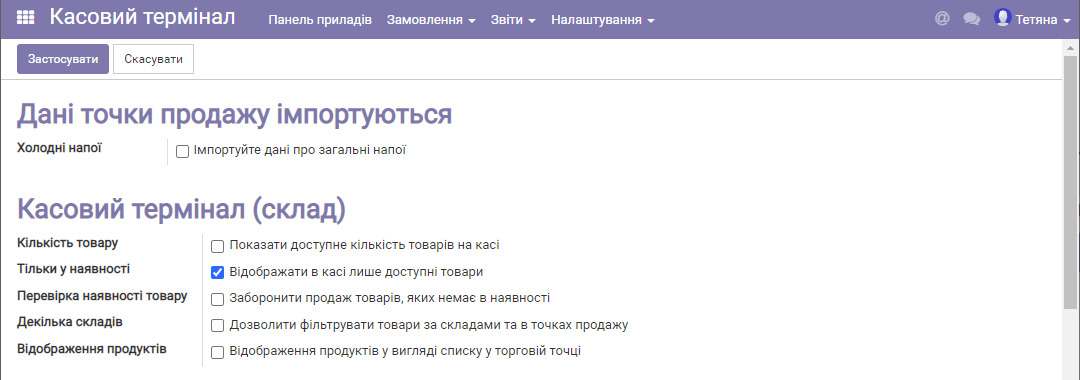
Below are the most important sections and settings, in order.
Attention! If some options are not covered here, we recommend not changing their checkboxes. Contact our technical support for details.
Section "Point of sale data is imported"
Option:
- Cold drinks - The option creates in the database products that belong to popular brands of cold drinks (including alcoholic drinks, milkshakes, hot drinks, and so on). At the cash register the drinks are split into the corresponding categories. This option can be recommended for cafes, bars, and the like:
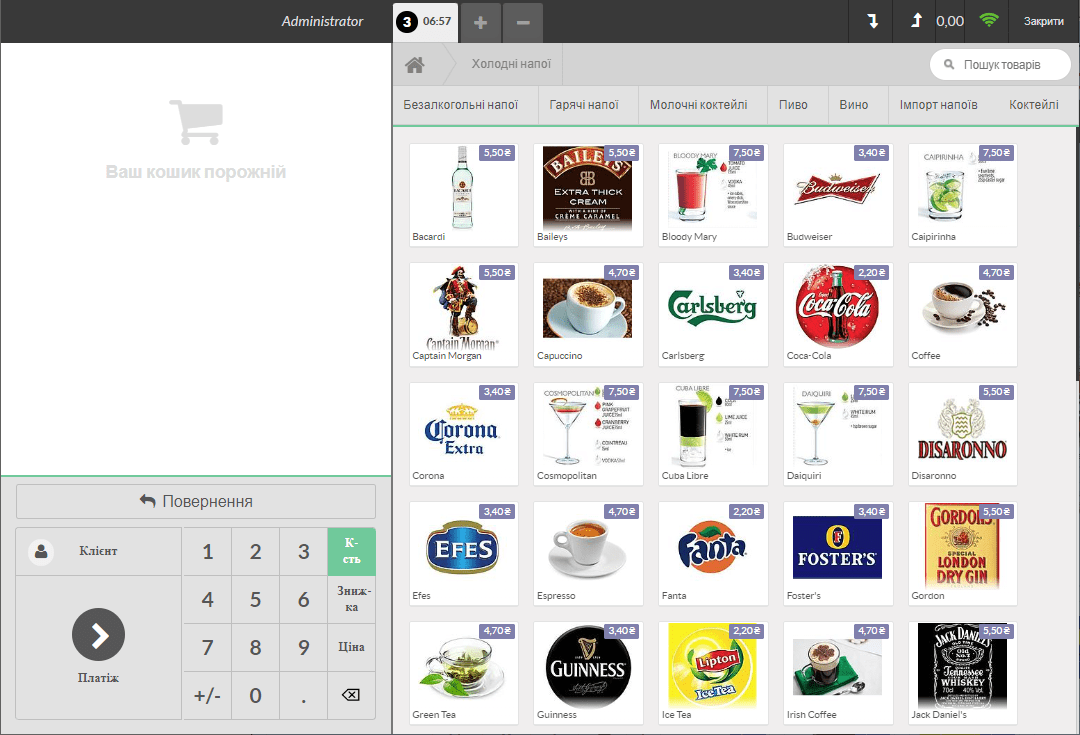
Section "Cash terminal (warehouse)"
Important options:
Product quantity - The option turns on the display of the available product quantity at the cash register.
In stock only - If you select this checkbox, the cash register shows only the products whose quantity is greater than 0.
Product availability check - The option forbids selling products into negative stock. That is, if the product quantity in the warehouse has become 0 and this checkbox is selected, the program does not allow you to add this product to an order.
Product display - turns on the display of products in the POS terminal as a list instead of a kanban board (the default). The list mode has no images, but products load faster when the cash register is opened.
Section "Cash terminal"
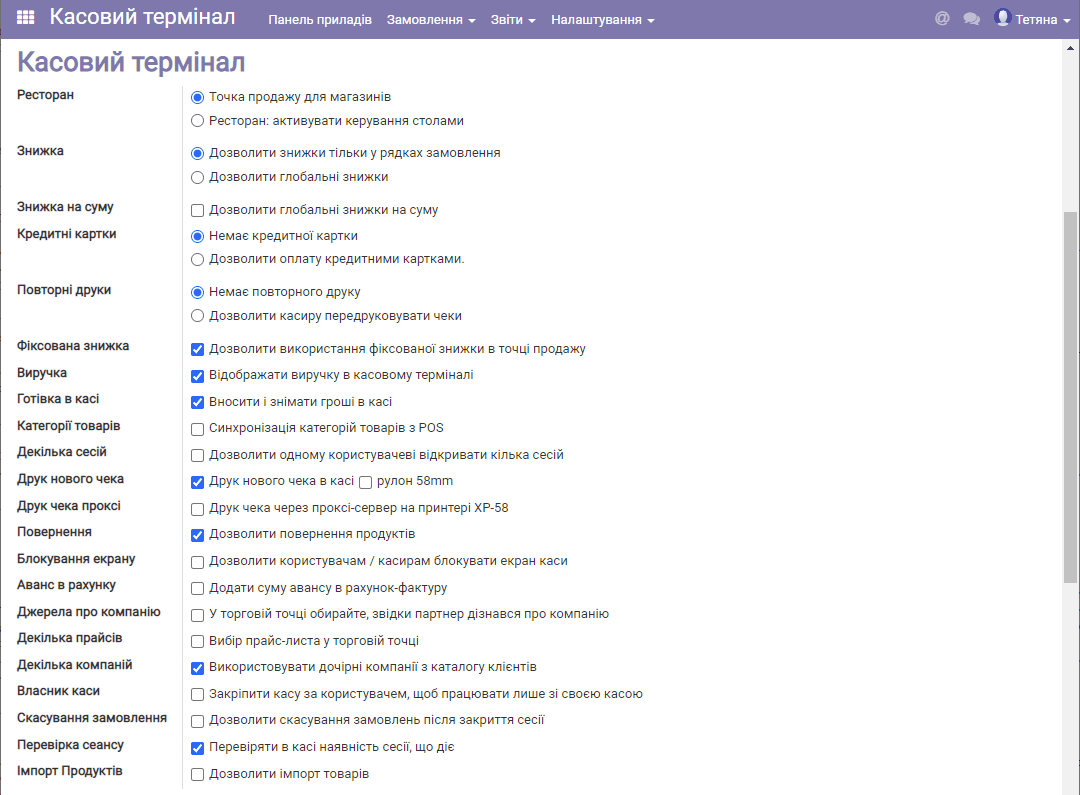
Important options:
Discount - You can choose how to apply discounts at the cash register: separately in the order lines (the default) or to the whole receipt (a global discount).
Discount amount - Turns on discounts both in the order lines and for the whole receipt.
Fixed discount - Allows discounts of a fixed amount at the cash register (not only a percentage of the amount).
Revenue - Turns on the display in the POS terminal of the revenue from the cash journal.
Cash in the register - Turns on the ability to deposit and withdraw cash in the POS terminal.
Product categories - Synchronizes the product category list at the cash register with the category list in the program (also available from the Sales, Warehouse and Purchases modules).
Multiple sessions - Allows one user to start several sales sessions (not recommended).
Print new receipt - Turns on receipt printing at the cash register; there is an option to send receipts to a printer with a 58 mm print tape width.
Returns - Allows returning products and money in the POS terminal.
Multiple price lists - Enables choosing at the cash register the price list used for the sale. Which price lists are used is set separately in the settings of each cash register. Please also contact our technical support beforehand so that we can enable this feature.
Multiple companies - Allows you to specify in the cash register settings which subsidiary company this cash register belongs to. Usually all cash registers belong to your main company.
Cash register owner - Allows you to specify in the settings of the selected cash register the user who will work with it (if you do so, nobody except this user and the system administrator can open this cash register).
Product import - Turns on importing products into the system from an external file.
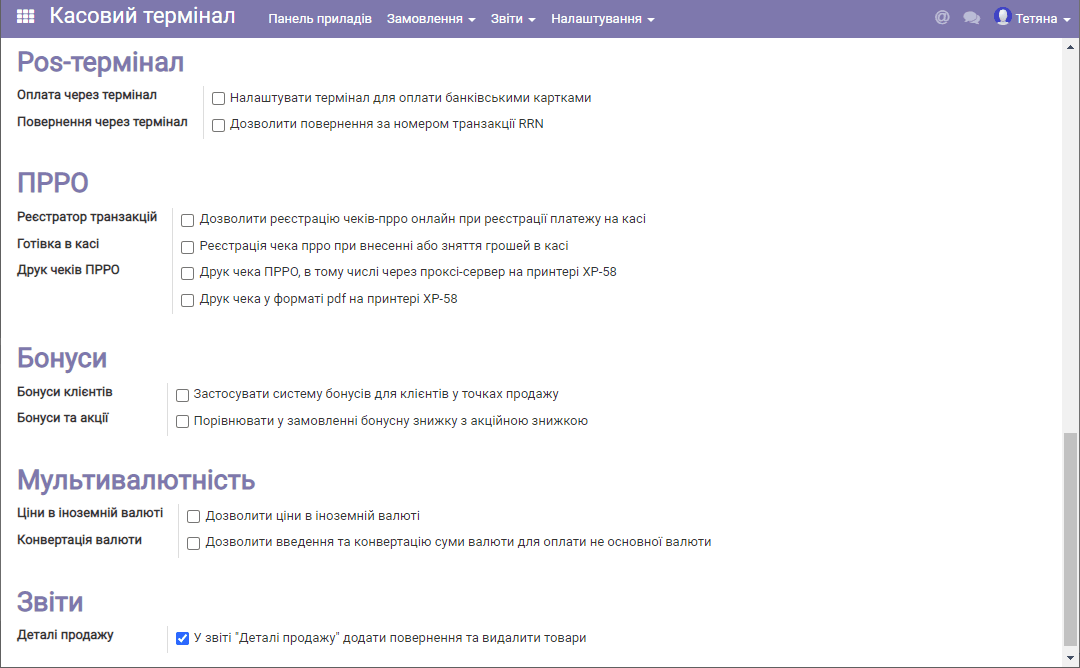
Section "PRRO"
Turns on all the features for working at the cash register with fiscalization. PRRO (software cash register) is described in a separate article on PRRO setup.
Important options:
Transaction recorder - The option turns on receipt fiscalization at the cash register.
Cash in the register - Turns on the ability to fiscalize cash deposit and withdrawal operations at the cash register.
Print PRRO receipts - Two options turn on the ability to print fiscal receipts on a 58 mm printer - contact us for advice.
Section "Bonuses"
Implements a bonus system at the cash register. Contact our support for advice on this topic.
Section "Multicurrency"
Allows you to use calculation in foreign currencies at the cash register. The corresponding setting must first be made in the Accounting module. Contact our support for advice on this topic.
Creating/editing a cash register. Settings of a single POS terminal
Select the menu item Settings/Cash terminal - the list of all terminals appears:

The program usually already has one POS terminal named Main. You can create as many POS terminals as you need. To do this, click Create.
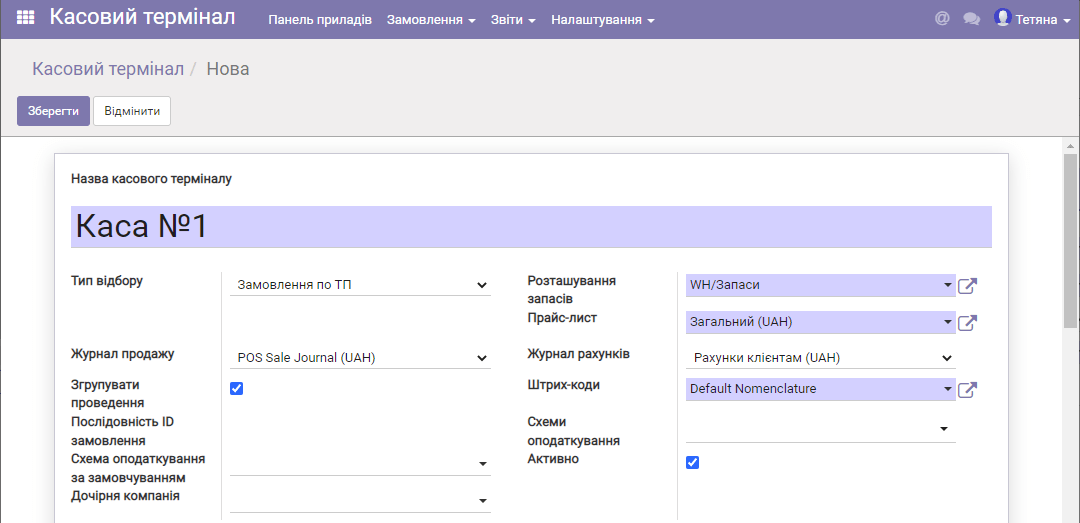
Fill in the fields as shown in the picture above, giving the POS terminal any name you like, and click Save. The POS terminal is now ready to work.
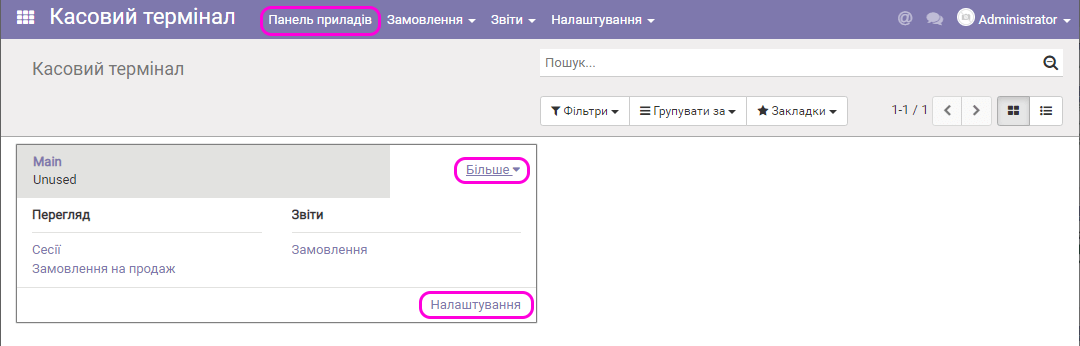
To edit the settings of a single cash register, select it on the dashboard, click More and Settings:
Main POS terminal settings
- Picking type - provides the ability to move products from the warehouse to the customer. Be sure to keep the value that is usually set: Orders by POS.
- Stock location - specifies the warehouse (location) from which products are taken for sale in this POS terminal.
- Price list - each POS terminal can have its own price list used for sales. A separate setting lets you use several price lists at the cash register.
- Sales journal - records of the operations of this POS terminal are created in this journal. Be sure to keep the value that is usually set: POS Sale Journal.
- Invoice journal - records of the invoices issued in this POS terminal are created in this journal. Be sure to keep the value that is usually set: Customer invoices.
- Subsidiary company - if you use subsidiary companies, you can specify here that this cash register belongs to a certain subsidiary. Then fiscalization is possible for the individual sole proprietors (FOP) that, for example, make up your company.
- Active - this checkbox turns this cash register on or off.
Section "Available payment methods"
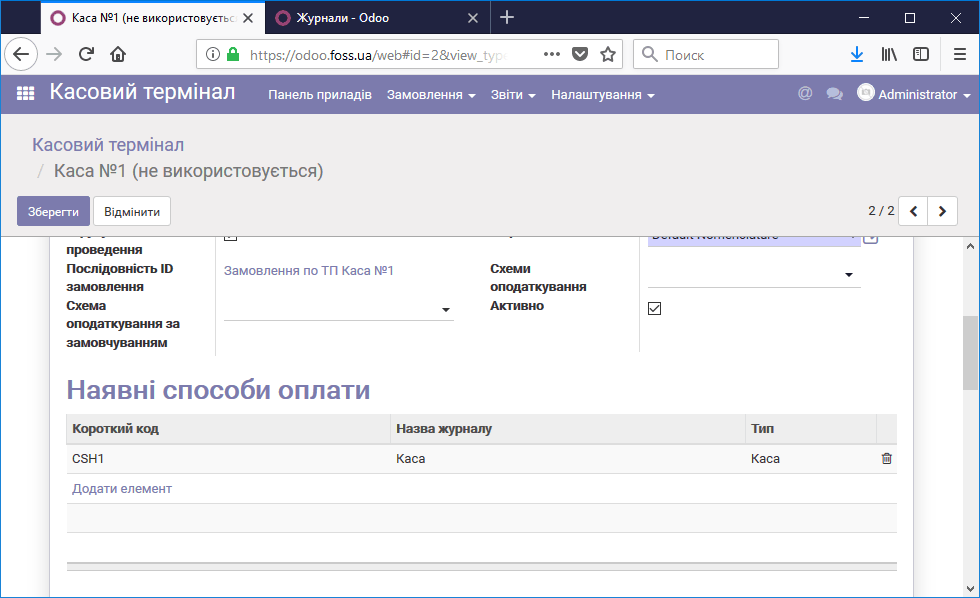
In this section you can add payment methods for this cash register. A payment method is a payment journal, which can be created with the tools of the Accounting module; a payment journal can also be created in the Cash terminal module, through the menu Settings/Payment methods. Usually the cash register has one payment method, Cash (a journal for recording cash payments).
Click Add an item. If you have other journals available for payment at the cash register, for example for non-cash payments, you can add them to the selected POS terminal as needed.
Section "PRRO"

This section appears in the cash register settings when the option "Transaction recorder" is turned on in the general settings of the "Cash terminal" module.
Its items serve the following purposes:
Use PRRO - By selecting Yes/No you can turn the use of PRRO on or off for this particular cash register. The general PRRO settings remain "on".
Business unit - the field for selecting your business unit.
Transaction recorder - the field for selecting the number of the fiscal recorder.
Cashier - the field for selecting the cashier who usually works at the cash register in PRRO mode.
For more details about PRRO setup, see the article.
Section "Features"
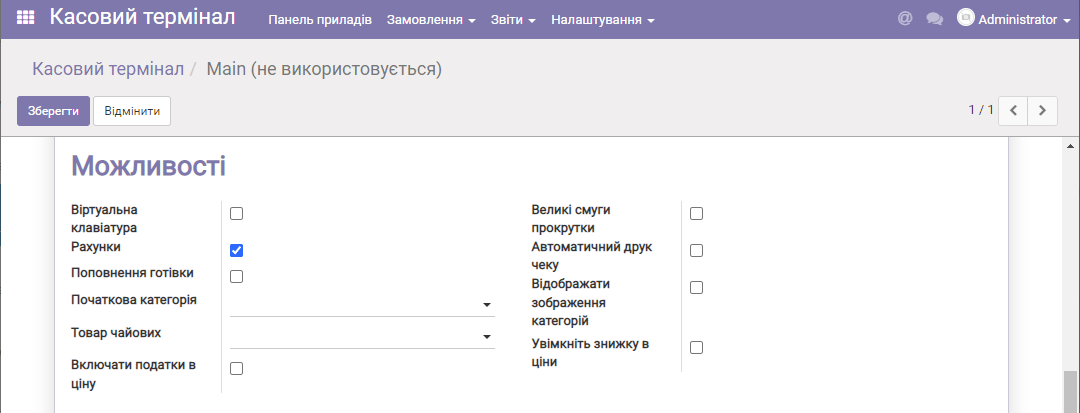
This section is used to extend the capabilities of the POS terminal. Let us look at some important items:
- Invoices - provides the ability to print invoices for customers directly from the POS terminal.
For the other features, contact our technical support for clarification.
Section "Hardware proxy/terminal"
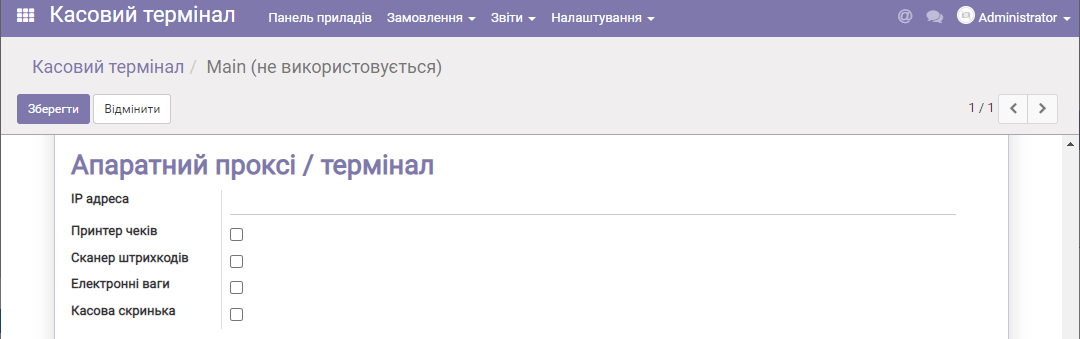
The settings of this section are used to connect peripheral devices to your cash register, such as a cash drawer, electronic scales, and so on. Contact our technical support for help with connecting retail equipment.
Section "Cash control"
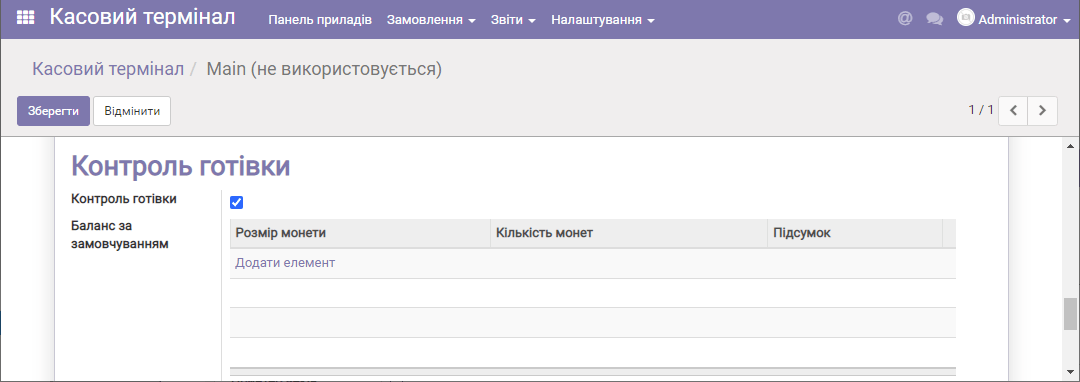
The "Cash control" checkbox must be turned on to be able to deposit and withdraw cash at the cash register. The other functions of the section, related to control of coins for change, are not supported at present.
Product categories
For the products sold through the POS terminal you can create your own categories, different from those used in the "Internal category" field of the product card. To create product categories for the POS terminal, select the menu Settings/Product categories and click Create:
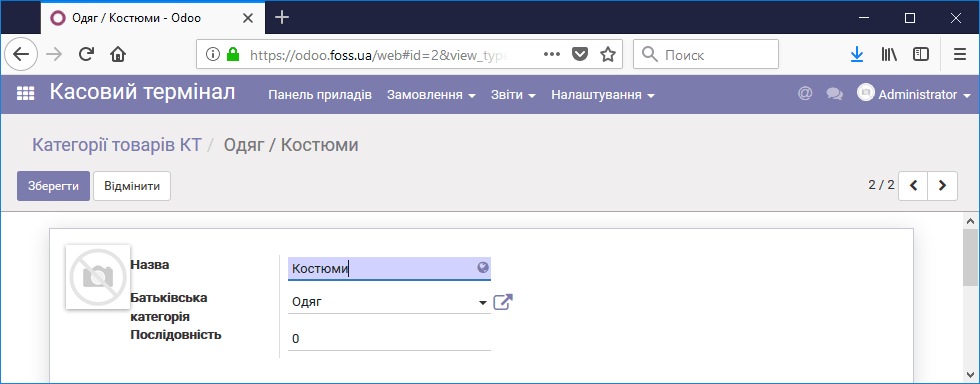
To include a product in the created category, open its card and select this category on the "Sales" tab:
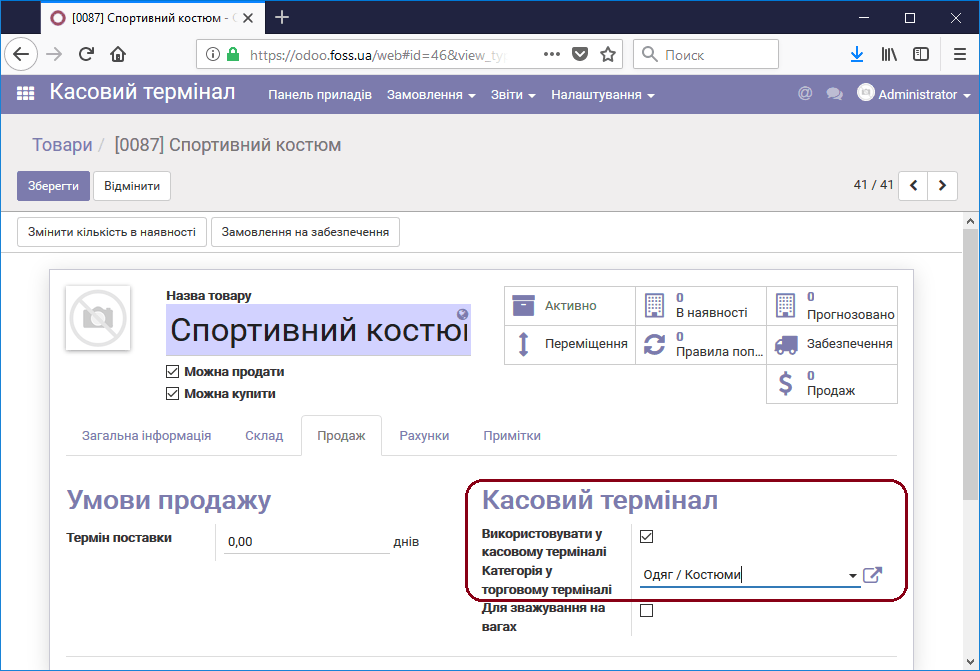
You can also use the general product categories set in the "Internal category" field of the product card. To do this, select the checkbox Product categories - Synchronize product categories with POS in the general settings of the module and save the changes.
After that, a new item POS category synchronization appears in the settings menu:
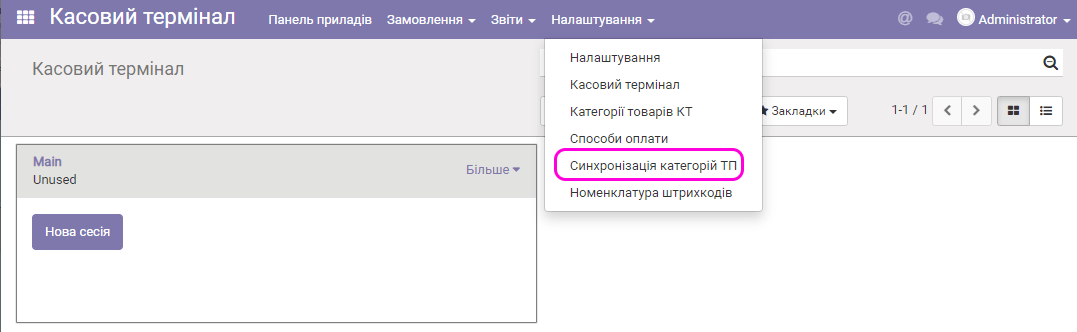
Select this menu item, click Start and wait for the category synchronization to finish. Then open the cash register: you will see the product categories above the products in the form of tabs, for example, as in this screenshot.
Payment methods
This settings menu item is used to define the payment methods (journals) that can be used in POS terminals; they are then selected separately for each POS terminal from the available list. Usually the settings have one payment method, Cash - that is, a journal for recording the cash with which customers buy products:
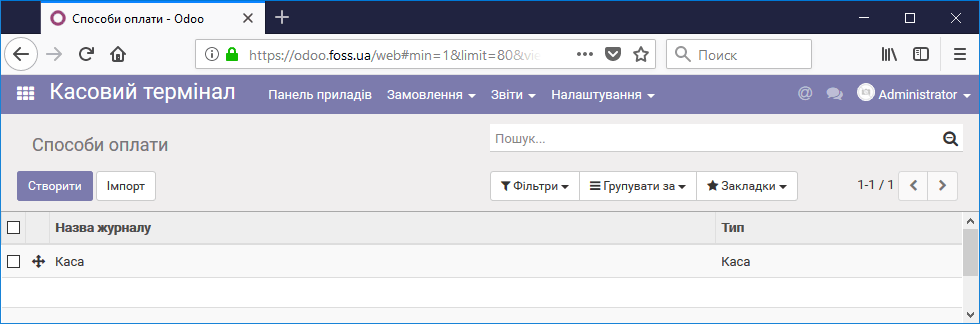
To create a new payment method, click Create:
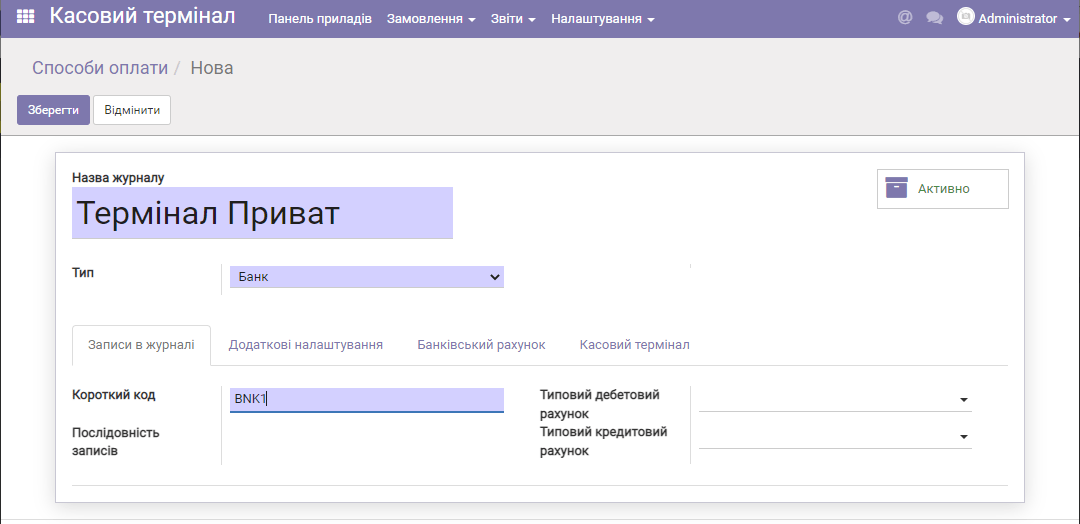
Enter:
The journal name - for example, Privat terminal (for accepting payments through a terminal).
Type - for cash journals select Cash, for non-cash journals select Bank.
Short code - the prefix for numbering the journal records, for example, BNK1
Click Save. After that, this payment method can be used in the POS terminal settings in the Available payment methods section.
Barcode nomenclature
This menu item and the related settings are needed for the barcode scanner to work correctly at the cash register. Leave them unchanged.