Working in the "Software cash register" package
To start working in the "Software cash register" package (PRRO, software cash register), you must register in the tax authority's account and make some preliminary settings. For more about registering with the tax authority, see the article.
Preliminary settings
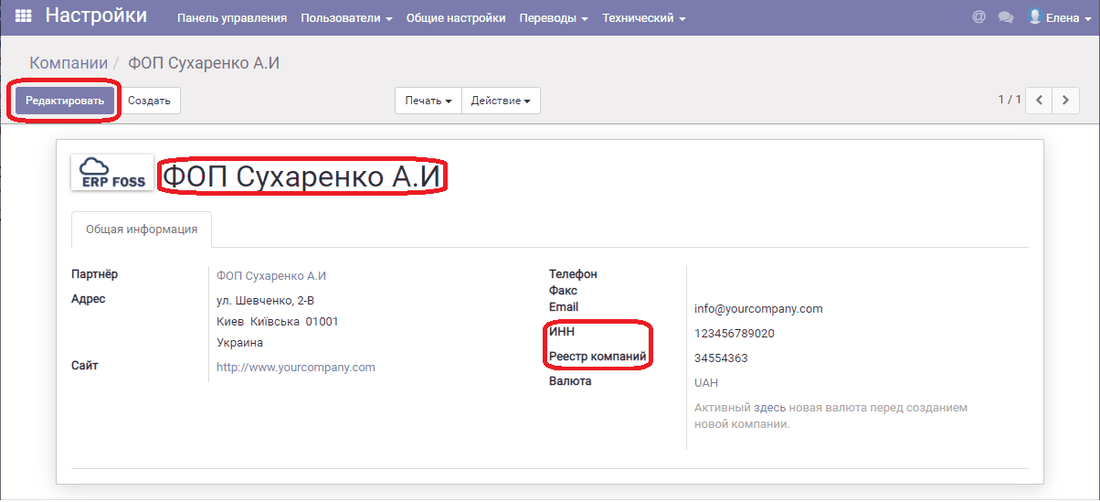
Create your company: to do this, go to the Settings module, menu Companies. The system usually has a company named My Company. Click Edit. Fill in the name, address, your TIN and EDRPOU code, using the same data that you used when submitting applications on the tax authority's website.
Go to the RRO module, select the menu item Settings/Business units and click Create. Create your business unit with the same name that was given in the form 20 OPP application on the tax authority's website. This is important!
Then, using the corresponding items of the "Settings" menu of the RRO module, create a Transaction recorder, enter the fiscal number that the tax authority assigned to your PRRO and the local number that you specified when submitting the application. Also create a Cashier. For more details, see the article.
Creating products (services) and payment methods
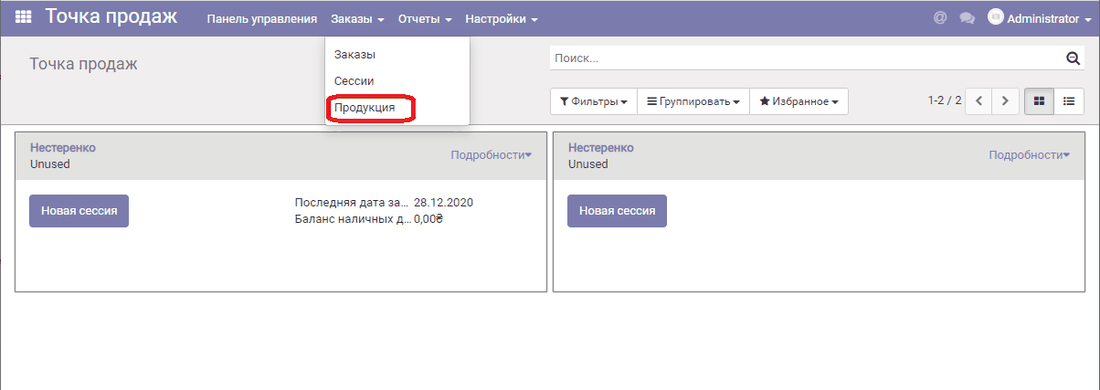
To start fiscalizing sales, you need to create the products (services) that you plan to sell. To do this, go to the Point of sale module, select the menu item Orders/Products and click Create. Fill in the product card and click Save. Enter all your products/services this way.
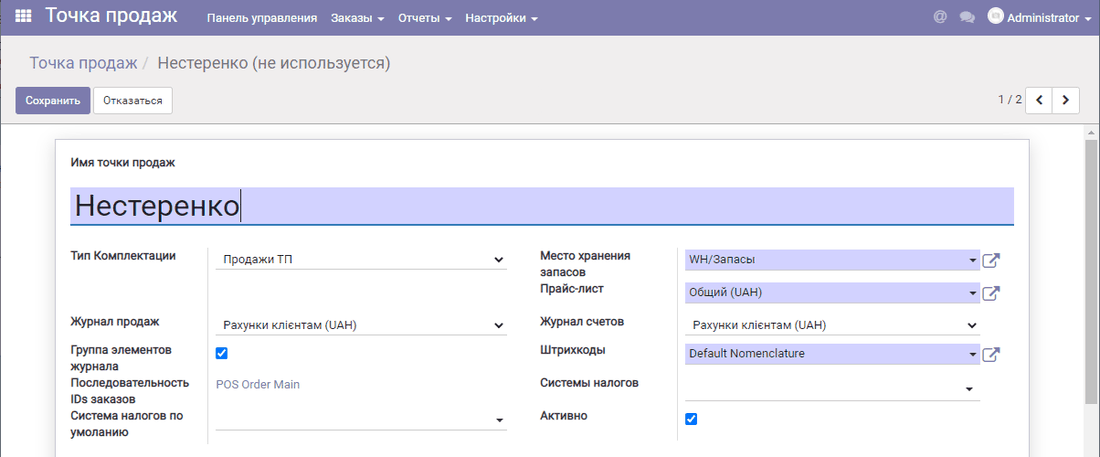
Then select the menu item Settings/Point of sale. You usually already have a point of sale named Main; click Edit and enter the Point of sale name.
Next, add the available payment methods if you have several.
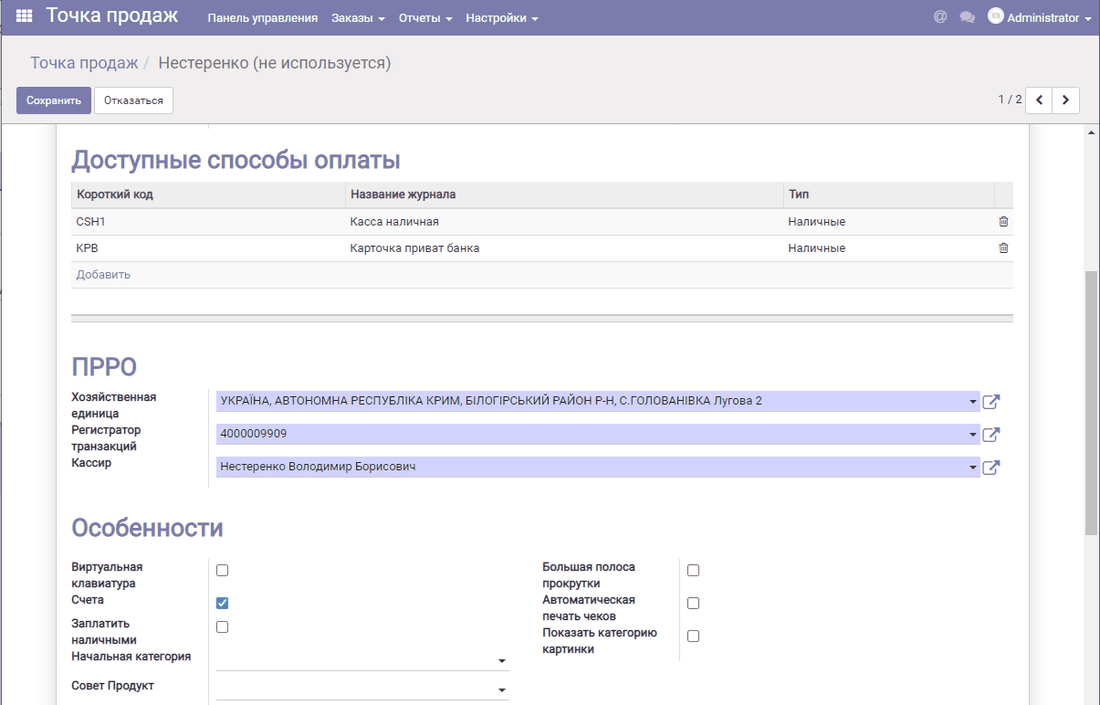
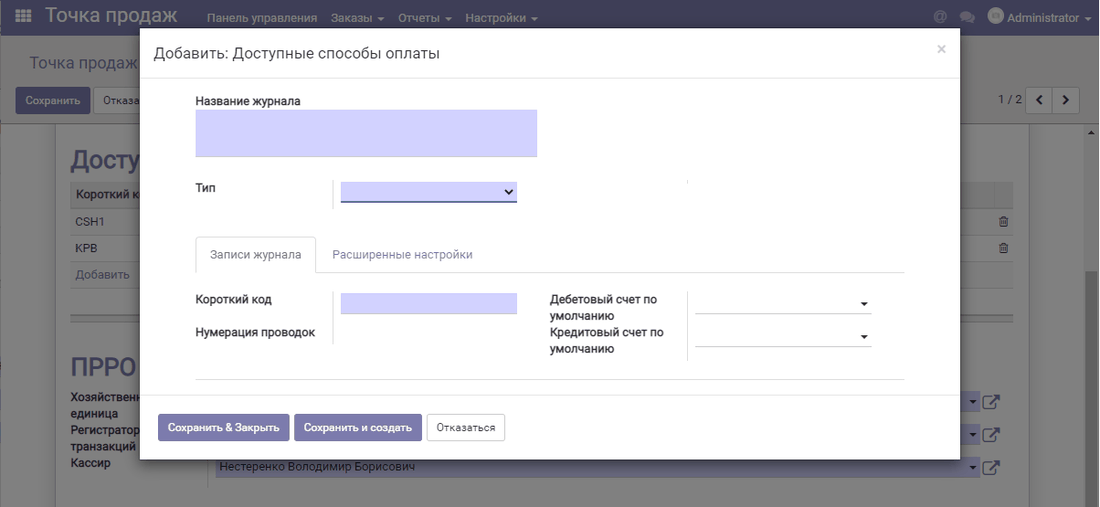
Usually one payment method is used: "cash register cash". If you have other payment journals, for example a PrivatBank or monobank card, or any other cards, you need to create additional journals. To do this, click Add/Create. Enter the Journal name, select the Type, enter a short code (of your choice) in English and click Save.
Starting sales - opening a shift
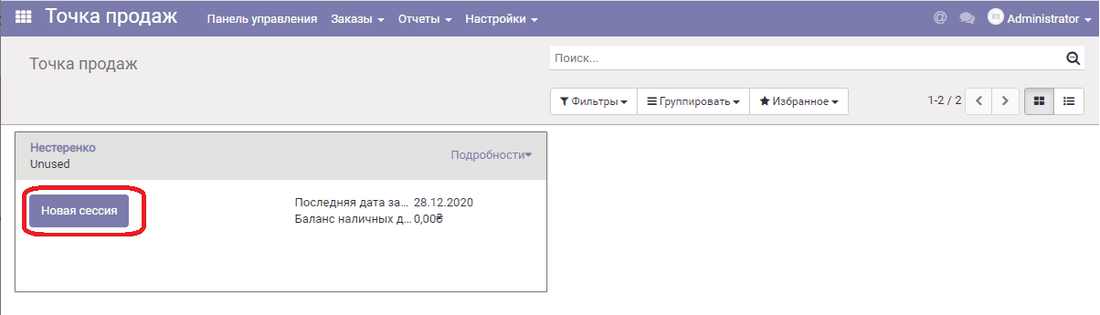
On the control panel, click New session.
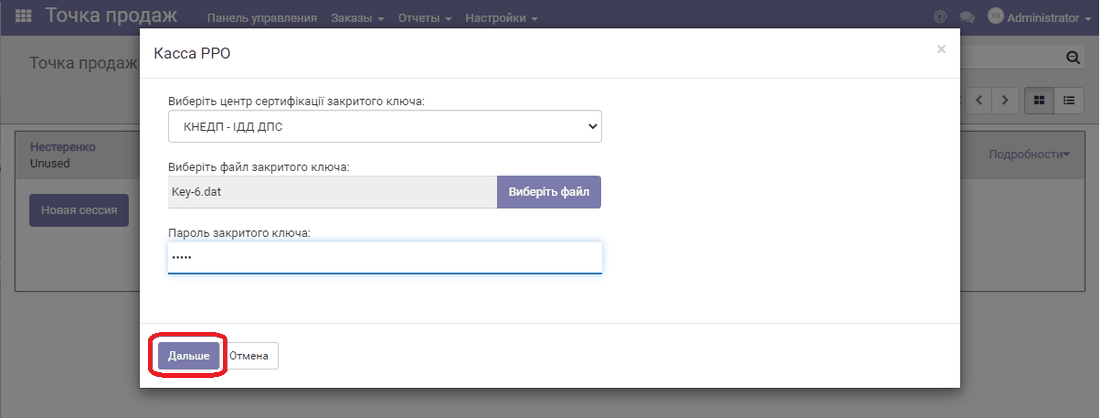
To open a shift, select the cashier's private key file, enter the password and click Next:
Fiscalizing sales. Working with receipts
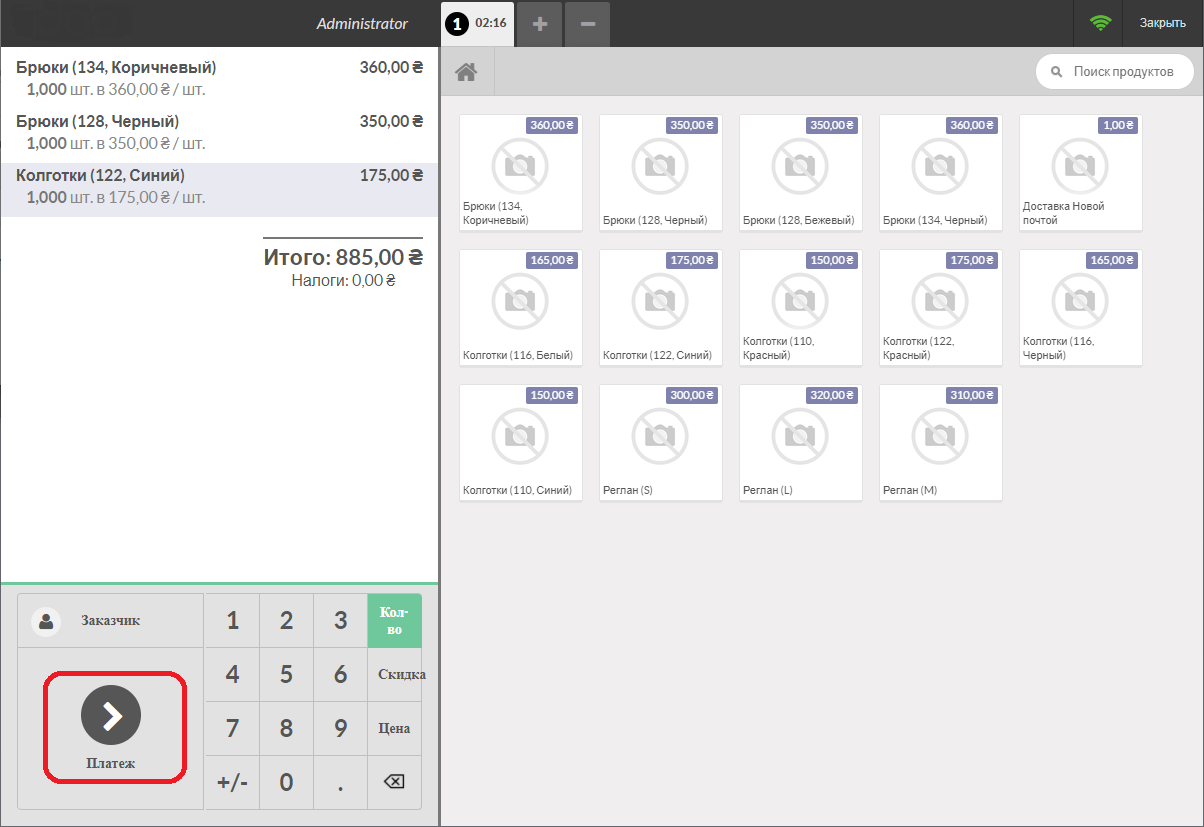
The cash register opens with your products or services. Select a product and click Payment:
Select the payment journal that will receive the payment and enter the payment amount:
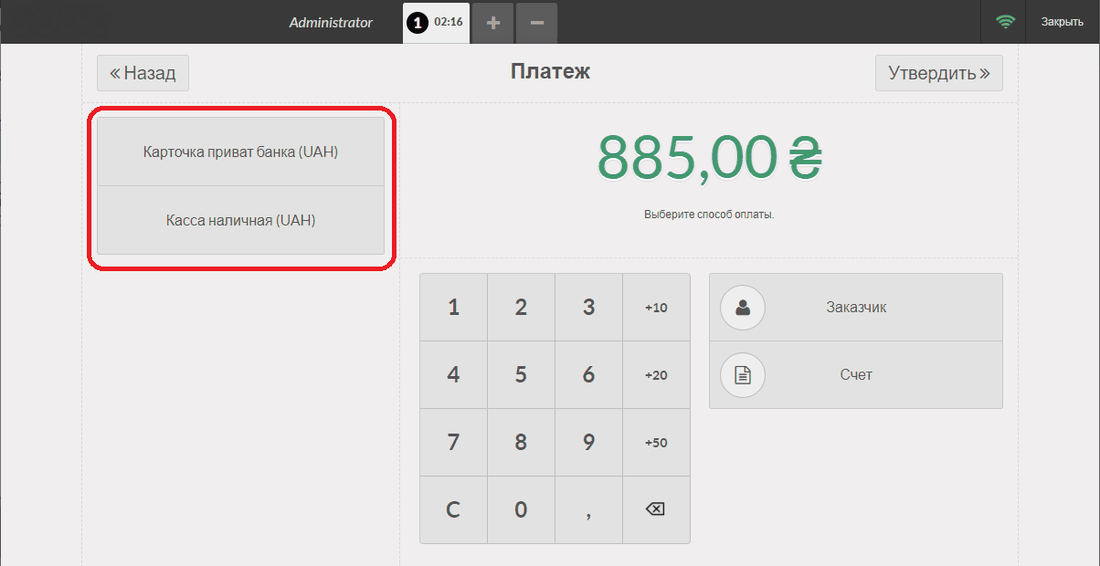
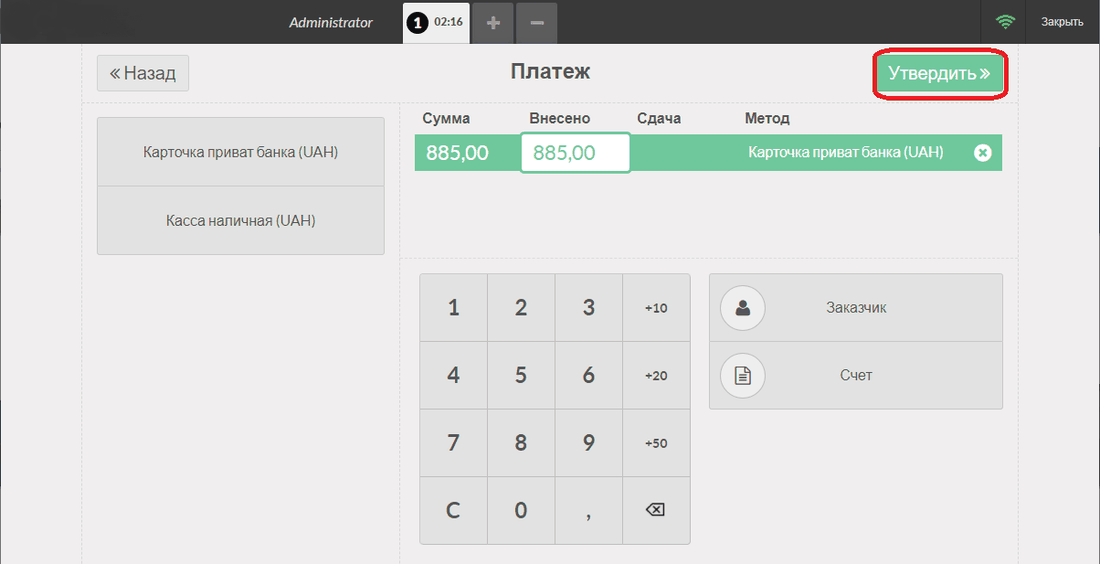
Then click Confirm.
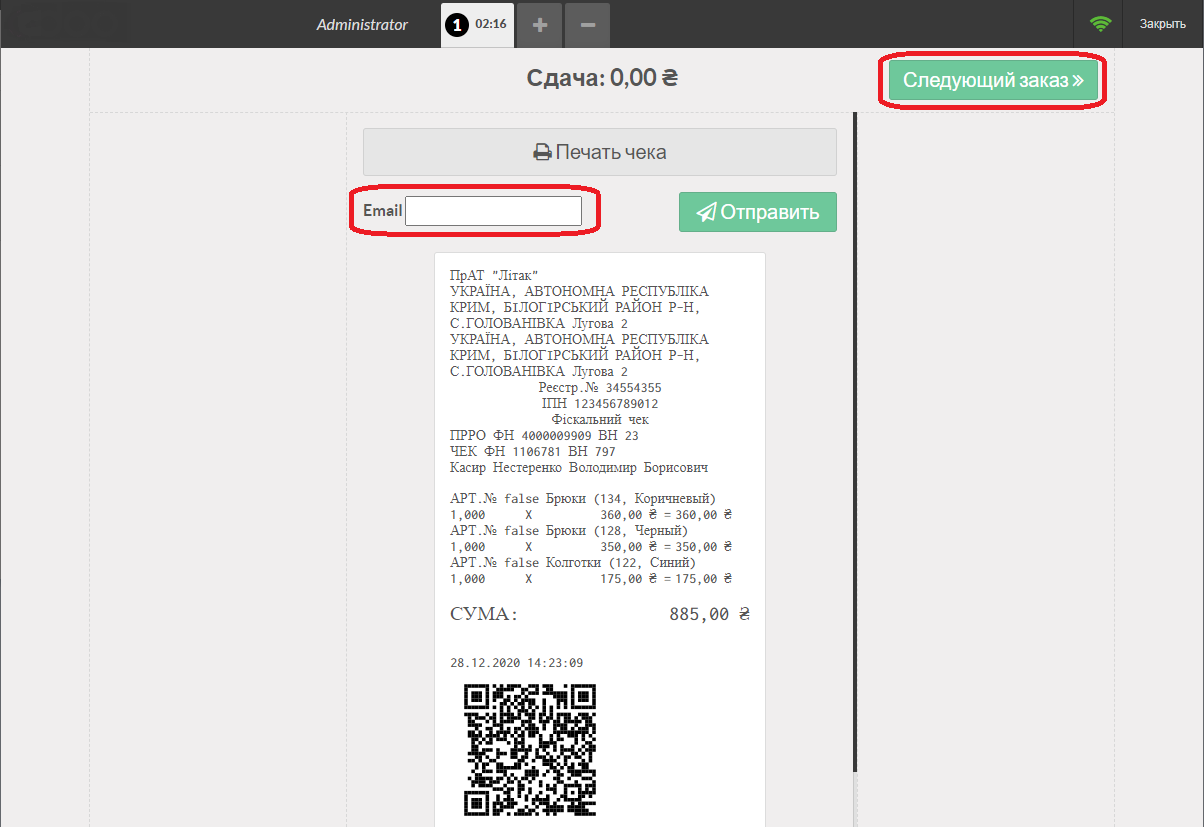
At this moment a request goes to the tax authority's server and a receipt with a fiscal number comes back.
You can then print it on a regular printer or a receipt printer, and also send it to the customer by email. To do this, enter the recipient's address and click Send.
Closing the shift. Sending the Z-report to the tax authority
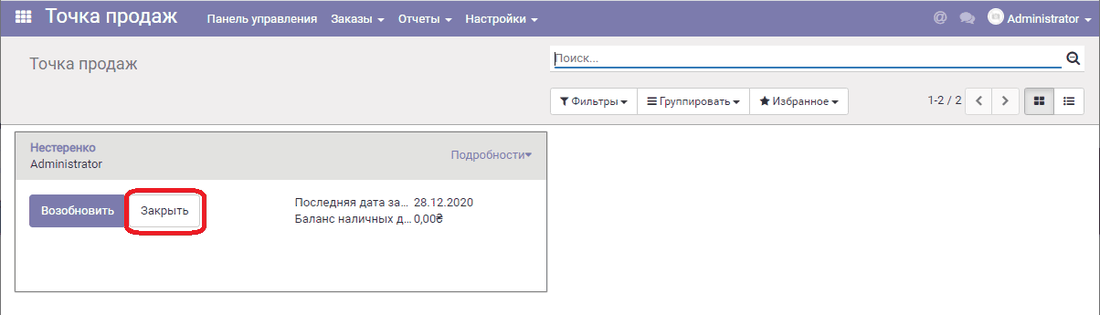
At the end of the working day, close the shift. To do this, click Close and Confirm.
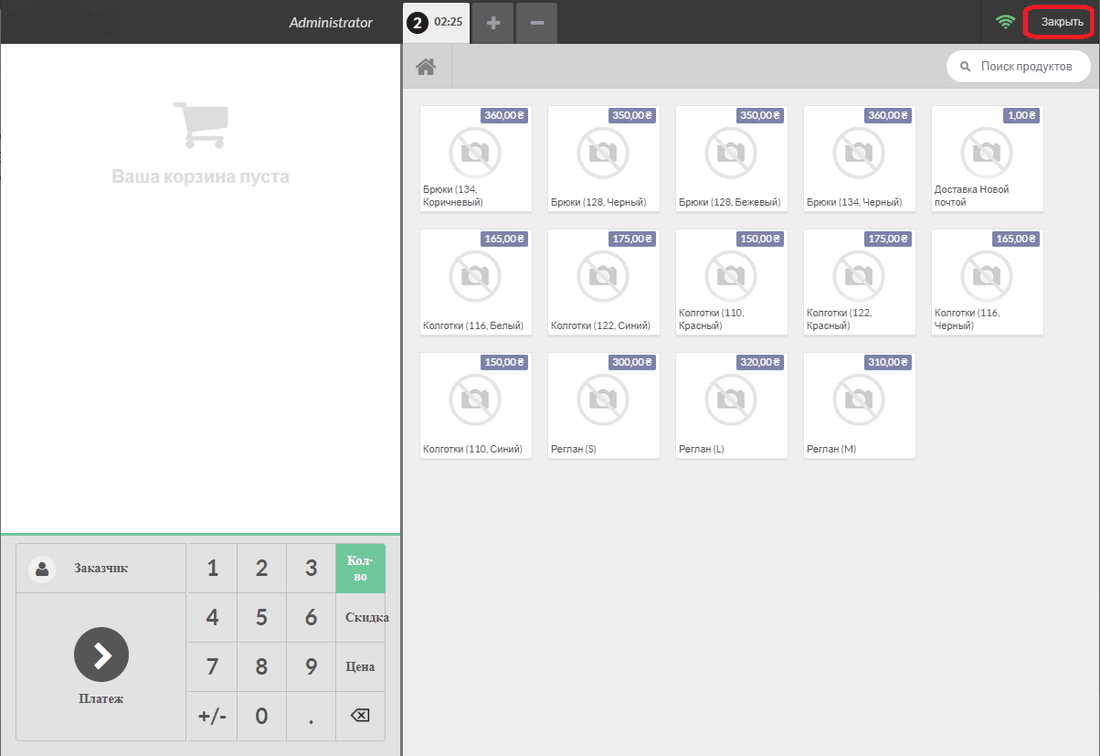
And then click Close once more.
A message appears saying that a Z-report will be created. Click OK.