Program settings
Introduction
This article covers the general program settings that you need to configure before you start working with it. Most settings are set by default and do not need to be changed. This article describes the settings that are important for the program to work correctly. To switch to the settings mode, select the Settings module.
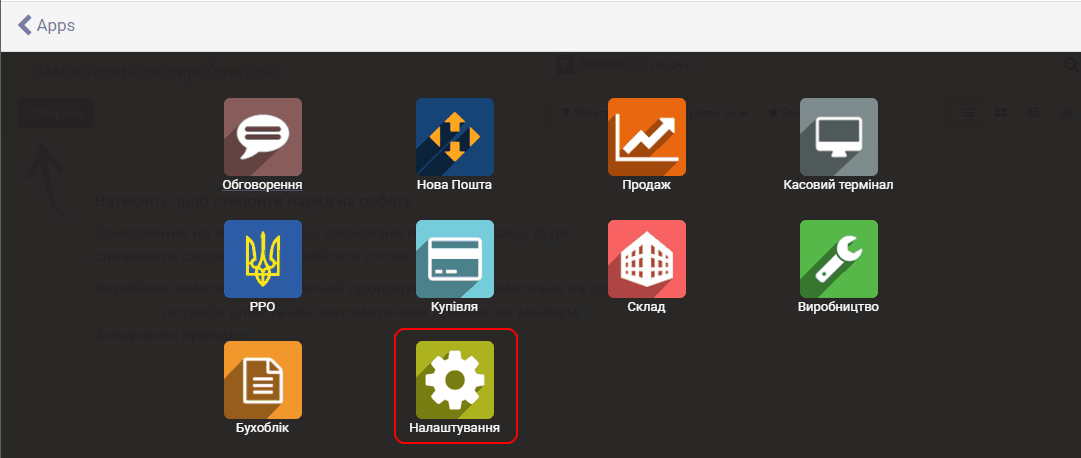
The control panel of the "Settings" module then opens.
User and company management
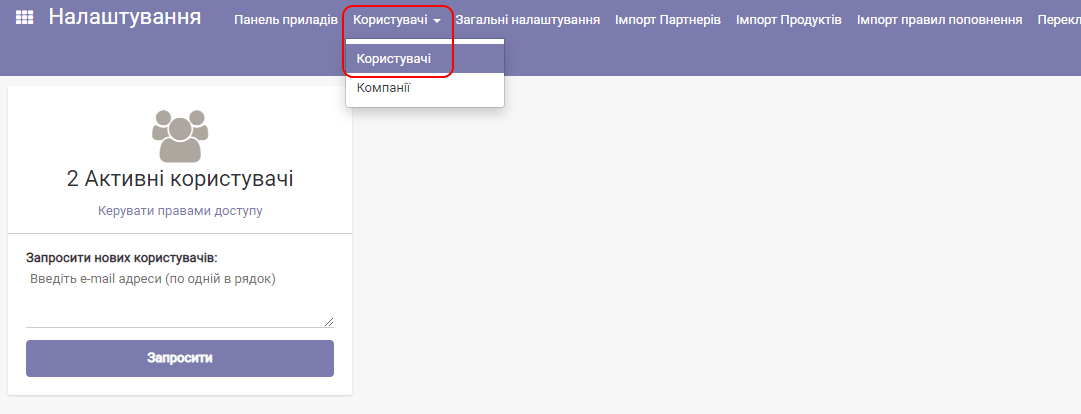
The Users menu lets you go to the management of program users or companies (in particular, the settings of your company, a sole proprietor (FOP)).
Users
By default, the program has one user with the name you entered during the initial registration in the program. This user has all rights to work with the program and access to all program modules. This user logs in with a login and password that match the email and password entered during registration. The name entered during registration is printed on the documents created by this user. If you do not like this name, rename it to your own first and last name.
Important! If the password you entered during the initial registration is not strong, we recommend changing the user's password after the first login to one that contains at least six characters. The password must be strong and contain letters and digits. Remember (write down) the password. Use strong passwords when you create new users.
In the commercial version, you can create a new user if you have paid for more than one user. In the demo version, you can create two more users in addition to the default user.
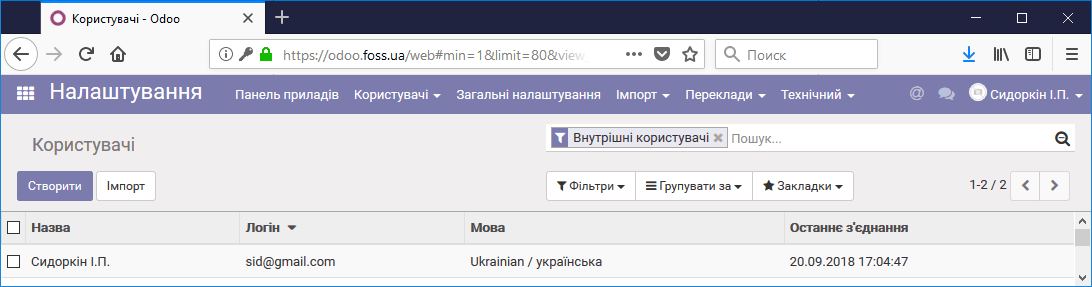
Default user
To create a user, click Create. Enter the user's details. In the Name field, it is better to enter the full name. This data appears in all reports and when emails are sent to your customers. The Email address field is used as the Login for logging in to the program. In the Application section, select this user's access rights to the program modules. Examples of access rights are given in the description of each module, for example, in the article Product purchases. Leave the Technical settings section unchanged. Click Save.
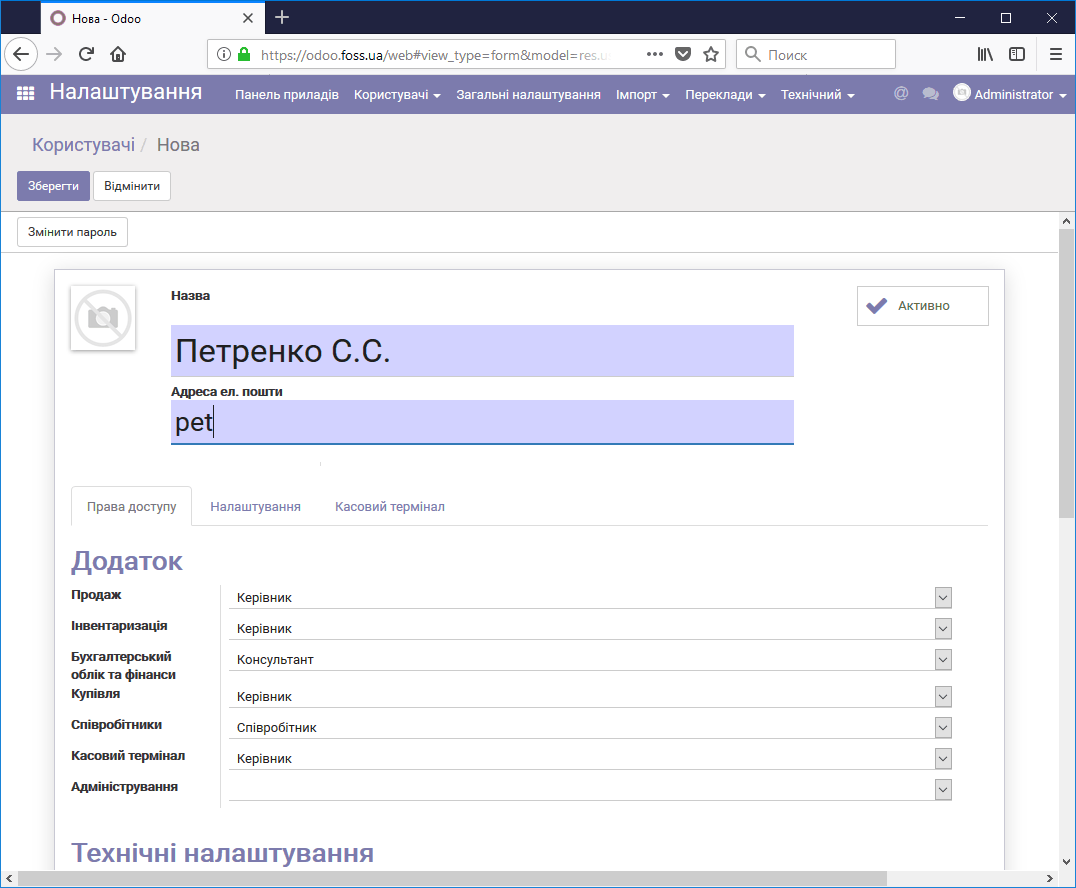
Creating a new user in the program
Go to the Settings tab and set the language this user will work in.
Note: it is better if all users in the program work in the same language.
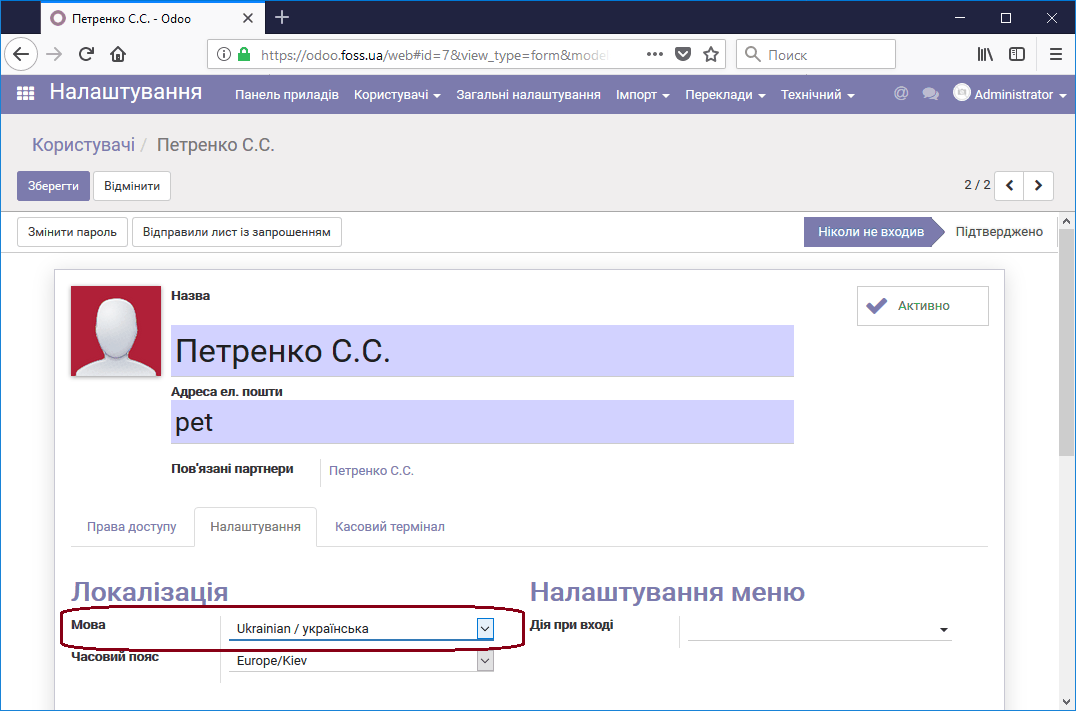
Setting the interface language
In the Email address field, enter your user's email details. If the user will not use email in the program, the details can be fictitious, but you must enter them. For more on how to set up email for users, see the article "Mail system setup".
Click Change password. Then enter a password that meets the conditions described above and save it.
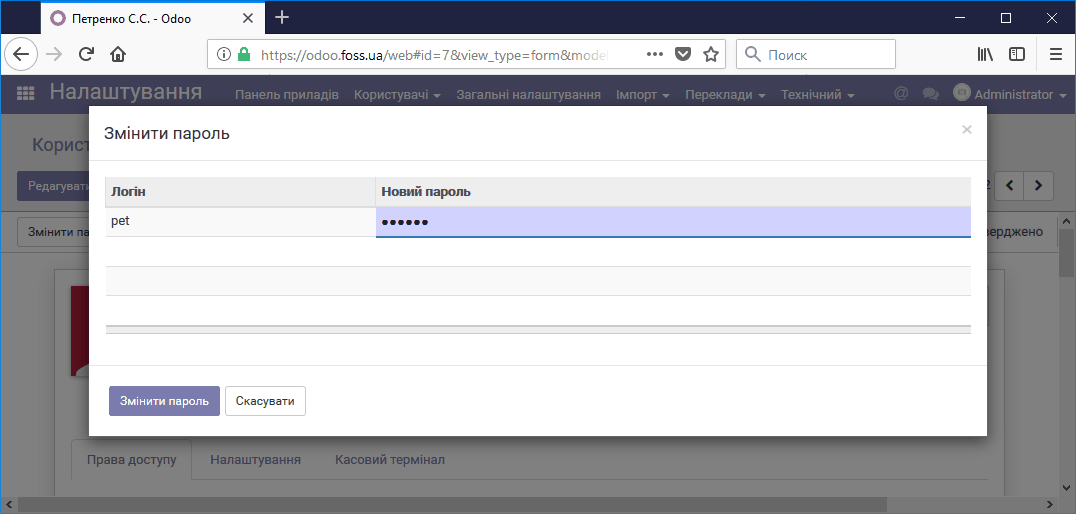
Setting a password for the user
In another browser window, log in to the program as this user and make sure all settings are correct. For example, if you set the user's rights as shown in the figure below,
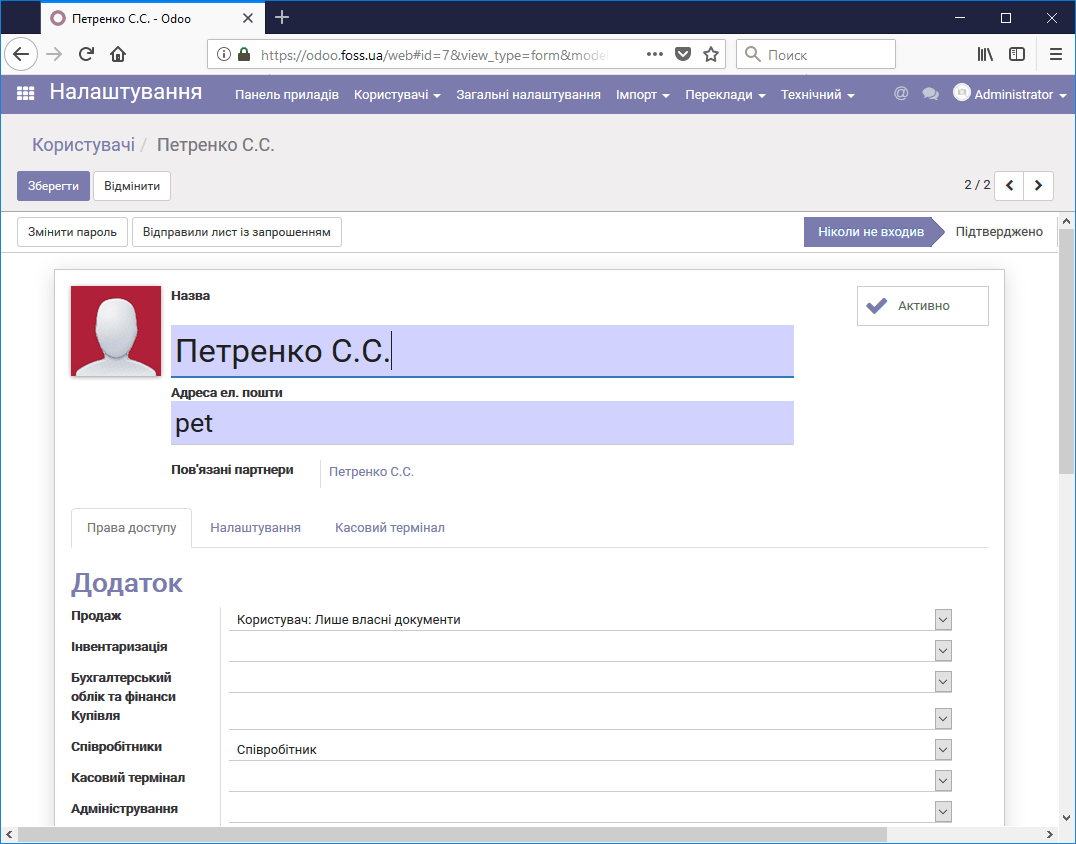
User with salesperson rights
then after logging in as this user you will see only the Sales module available.
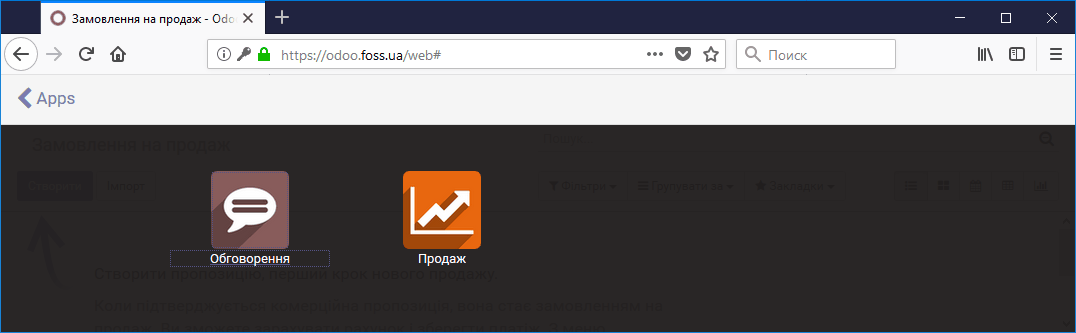
Modules available to the salesperson
Companies
In the Companies menu item, configure your own details. To do this, open the existing company My Company and set it up by entering your details. How to set up the email address for sending messages on behalf of the company is described in the article "Mail system setup".
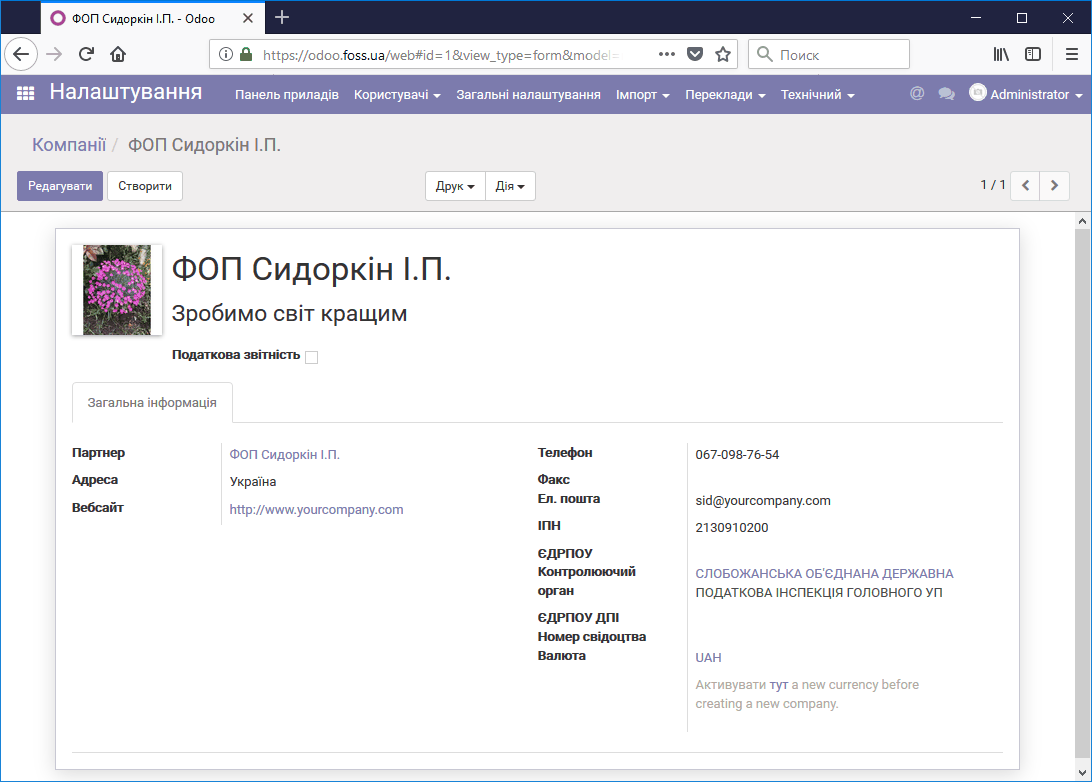
Filling in your company details
If you are going to submit tax reports from the FOP_ErpFoss program, set up the Tax reporting section by selecting the corresponding checkbox on the company card. The data for the Email field of the State Fiscal Service section can be found on the website http://sfs.gov.ua/elektronna-zvitnist/platnikam-podatkiv-pro/edina-adresa/. This is the mailing address to which tax reports are sent. It is zvit@sta.gov.ua. In the Subsite address field, enter the value https://cabinet.sfs.gov.ua/contact. Then set up the email address, from which you will send reports to the State Tax Service.
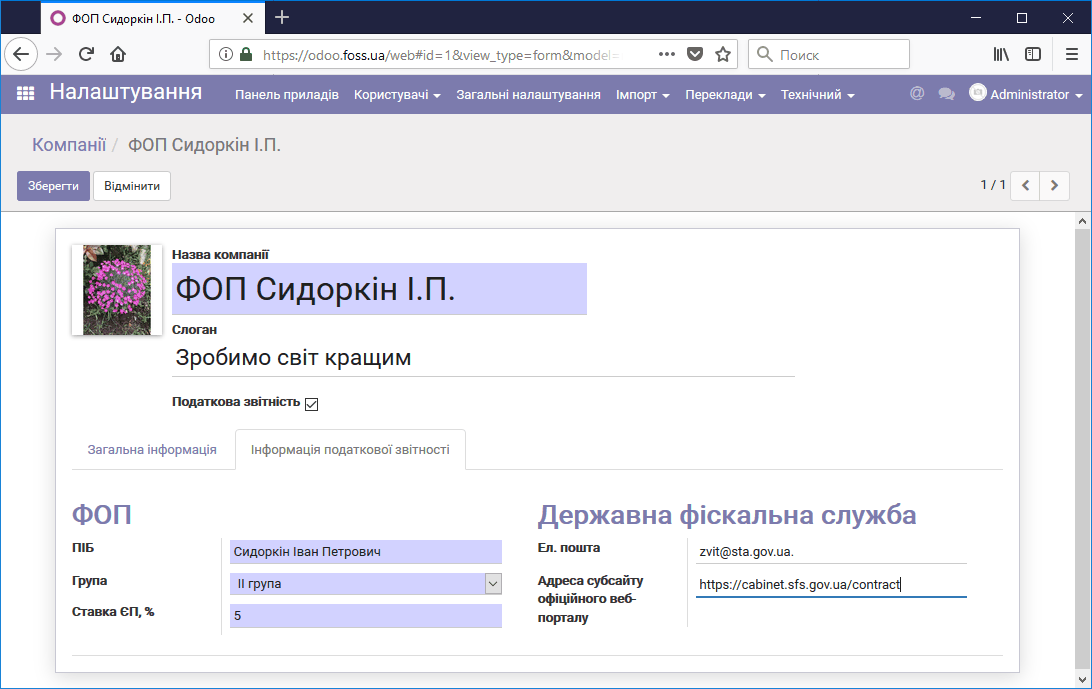
Filling in the data for submitting tax reports
In addition, to print bank details on the invoices you give to your customers, go to the module Accounting/Settings/Bank accounts. Select a bank, fill in its details and select the Default checkbox.
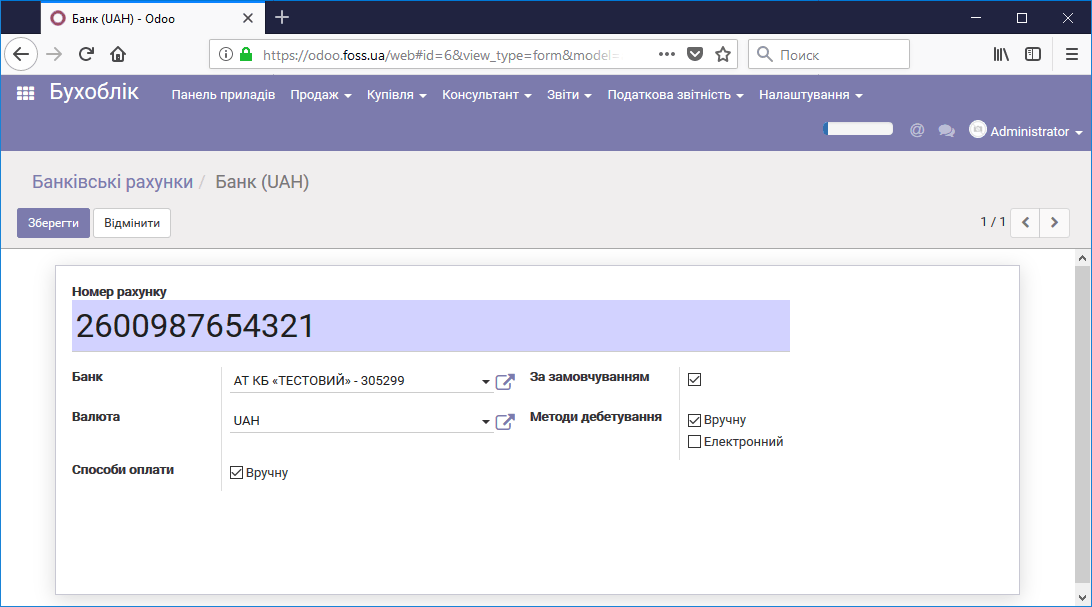
Setting the default bank account
Now, when you print invoices and other documents, all the necessary fields in the form are filled in.
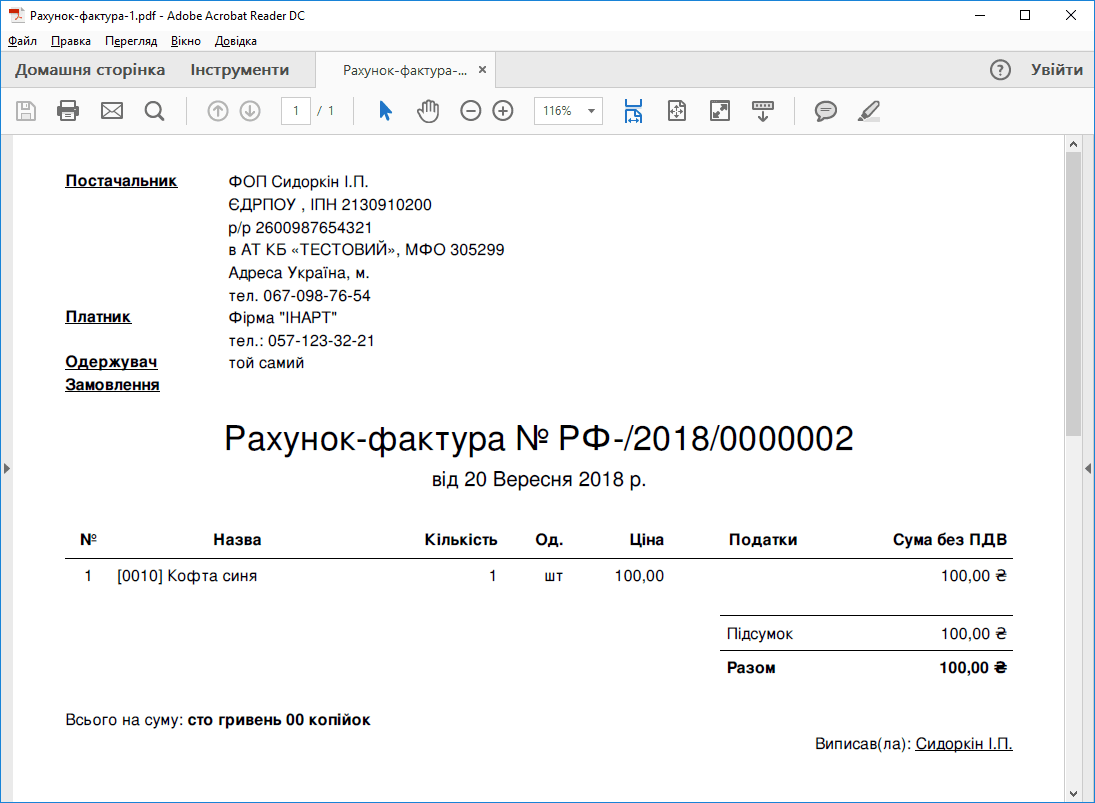
Printed document form
Subsidiary companies
If your business is a conglomerate of several companies or sole proprietors (FOPs) united by one business entity, you can define a parent company and its subsidiary companies in ERP FOSS. This lets you separate the accounting of sales, purchases and warehouse operations for each subsidiary company.
To enable the subsidiary company features, go to the Sales module, select the Settings menu and then the Settings item:
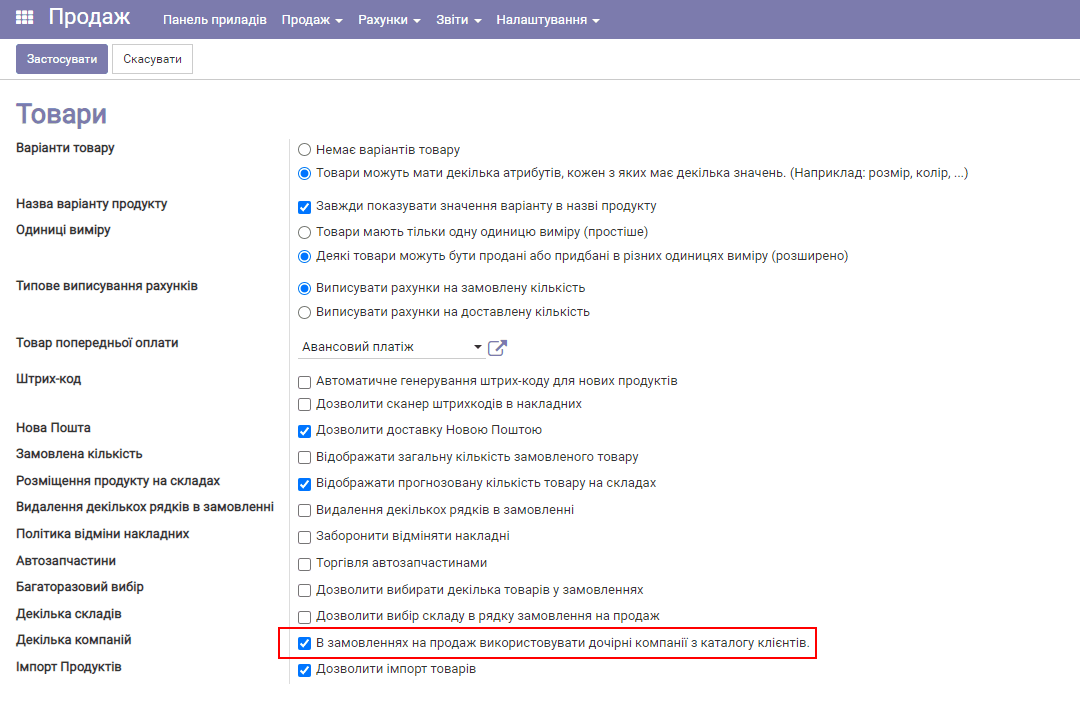
Select the checkbox Use subsidiary companies from the customer catalog in sales orders. Save the changes.
Next, you need to mark your subsidiary companies.
First, set up the main (parent) company as described in the section above.
Then go to the Sales module and select Sales/Customers:
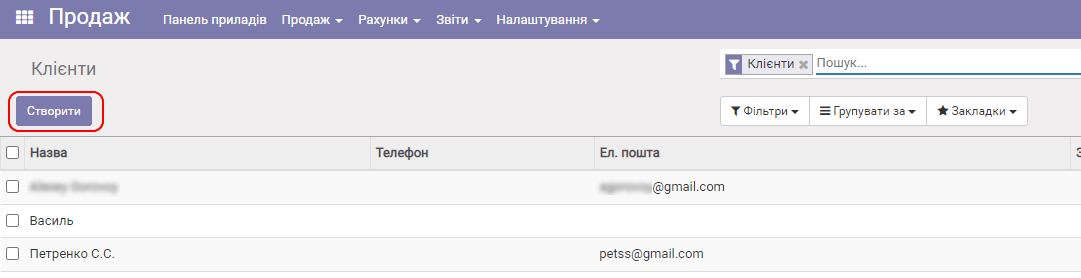
Click Create. A form for creating/editing customers appears:
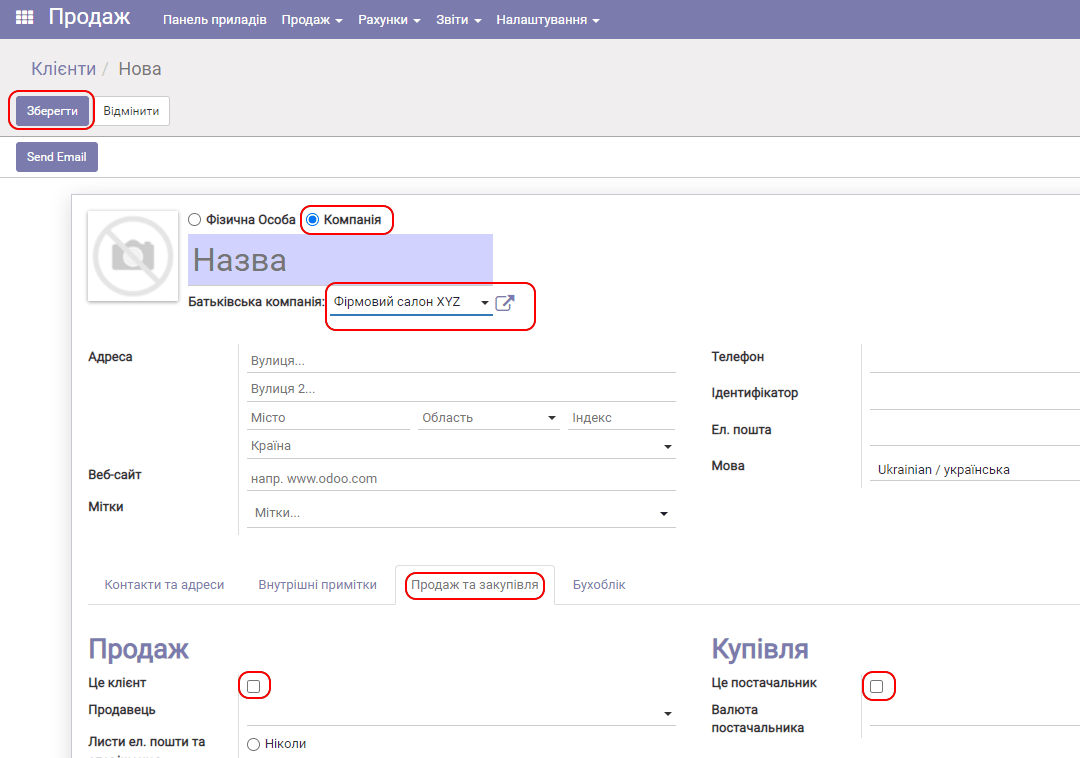
In this form:
- select the "Company" option;
- enter the name of your subsidiary company, for example, by the name of the sole proprietor "Petrenko Petro Serhiyovych";
- select the parent (main) company from the list;
- on the "Sales and purchases" tab, leave the "Is a customer" and "Is a supplier" fields empty;
- save the changes.
Now sales and purchases on behalf of the selected subsidiary company are available to you.
Importing products and partners
You can import data on your products/services and suppliers/customers from Excel files. This is done with the menu items "Import products" and "Import partners", respectively.
For details on running the import, see the article Importing products and partners.