Quick start
Introduction
This article is for those who want to start working quickly with the trade automation program using its main functions. Separate links lead to articles with detailed descriptions.
Registering in the system
To get started, you need to register in the system. Click the Try button on our website:
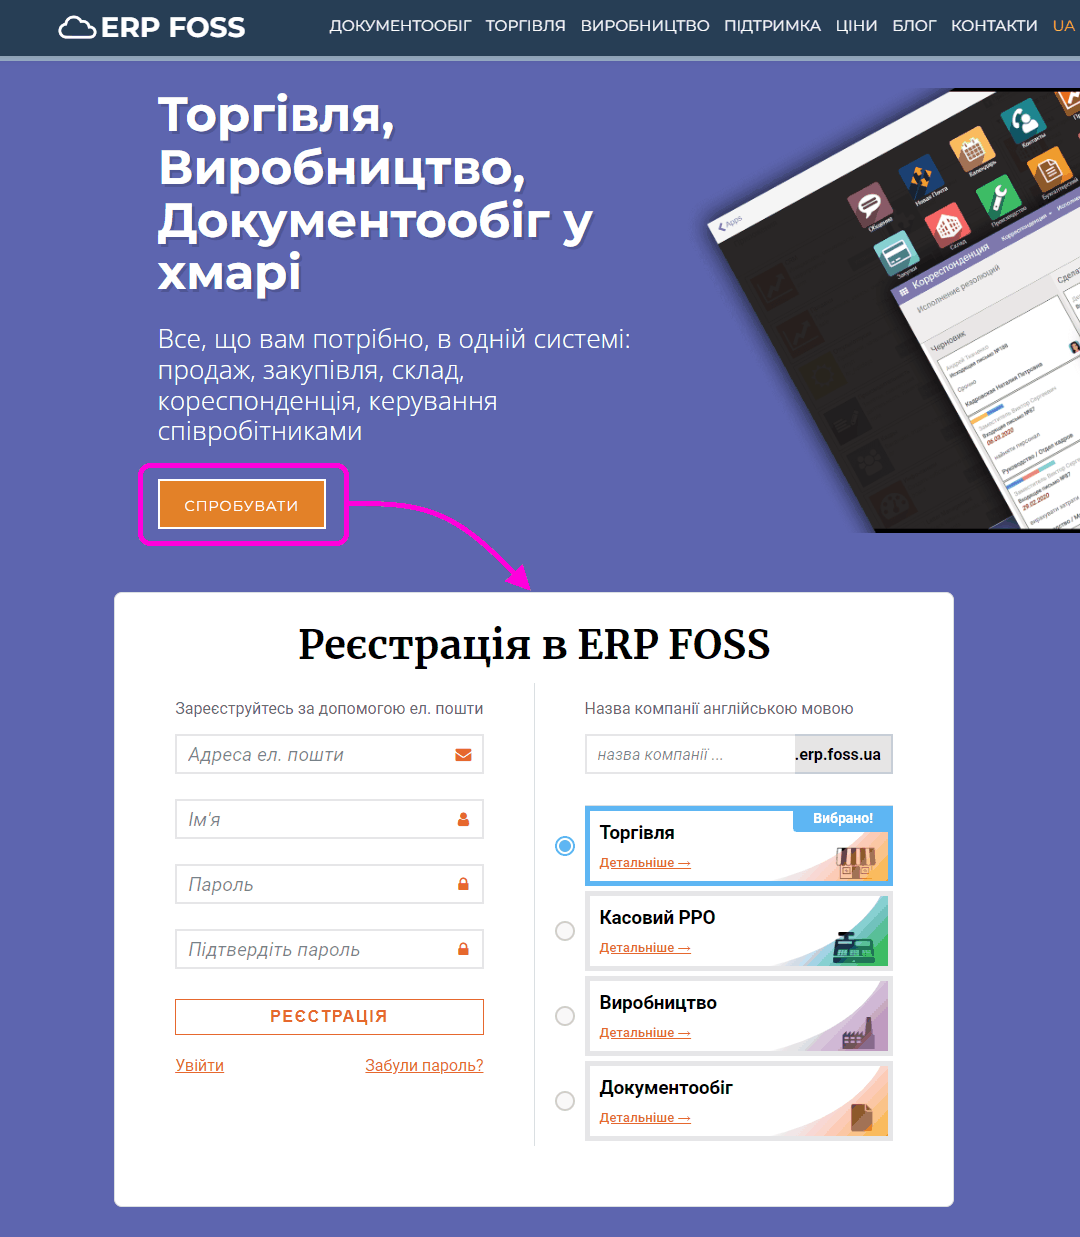
You can read more about the registration process in the article. After registration, you get 1 month of free use, during which you can enter your products/services, configure the program to your needs and, if necessary, set up collaboration for your employees.
Working with the program: ERP FOSS modules
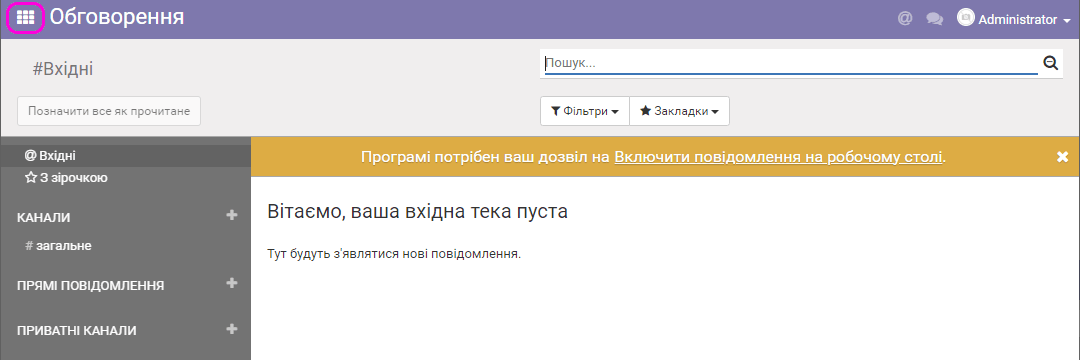
All ERP FOSS functions are implemented by its modules: Sales, Purchases, Warehouse, Accounting and others. To open the modules menu, click the tile button in the upper left corner of your workspace:
The module buttons appear:
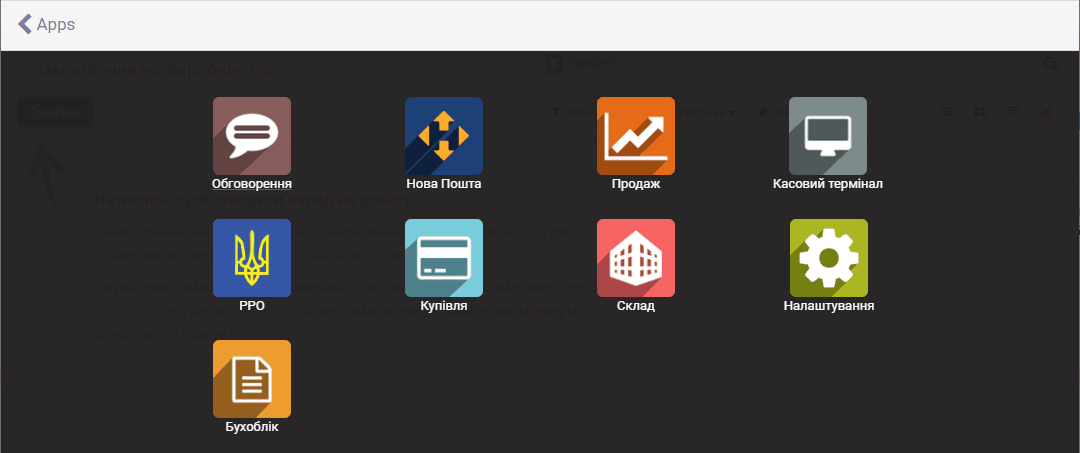
Click the button of the module you need at the moment.
If something goes wrong
During the free period you can always return to the initial state with the Start over function in the user profile, and also choose a suitable solution:
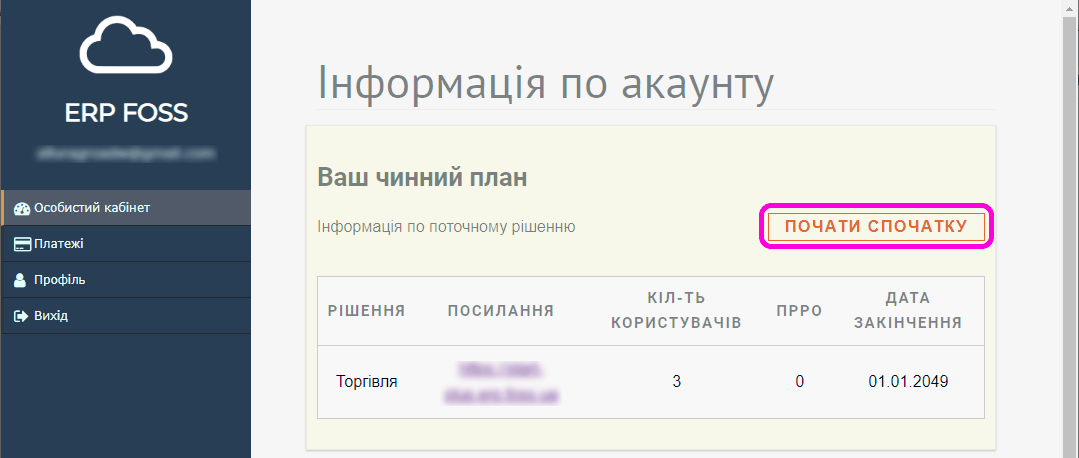
You can read more about returning the system to its initial state in the article. When you start the procedure, we recommend choosing the Empty database option so that you do not work with test products.
Choosing the currency. Company details. Multi-currency setup
From the very beginning, you need to decide on the main currency used for settlements in your company. After the first operation related to product movement is performed in the system, the currency choice cannot be reverted; you can only use the Start over function to get an empty database and start from scratch.
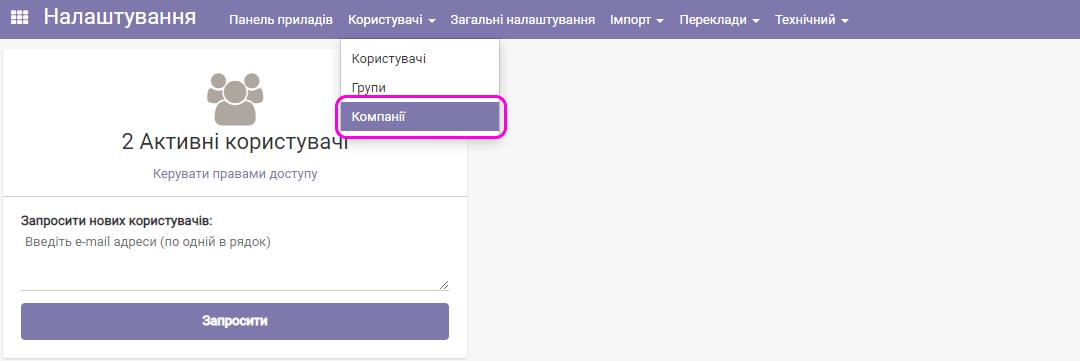
The currency is usually the Ukrainian hryvnia. To change the main currency, go to the Settings module and select the menu item Users/Companies:
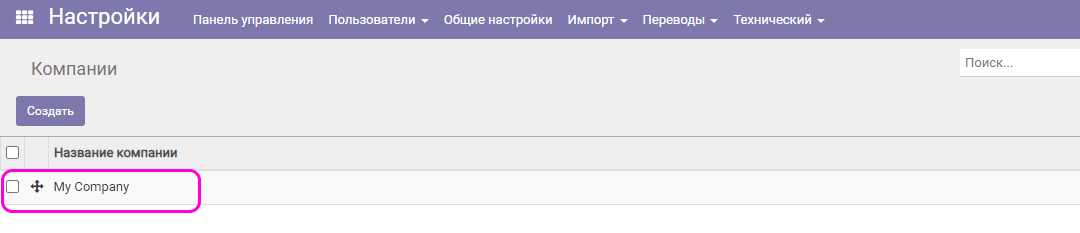
Then double-click the My Company record:
And click the Edit button:
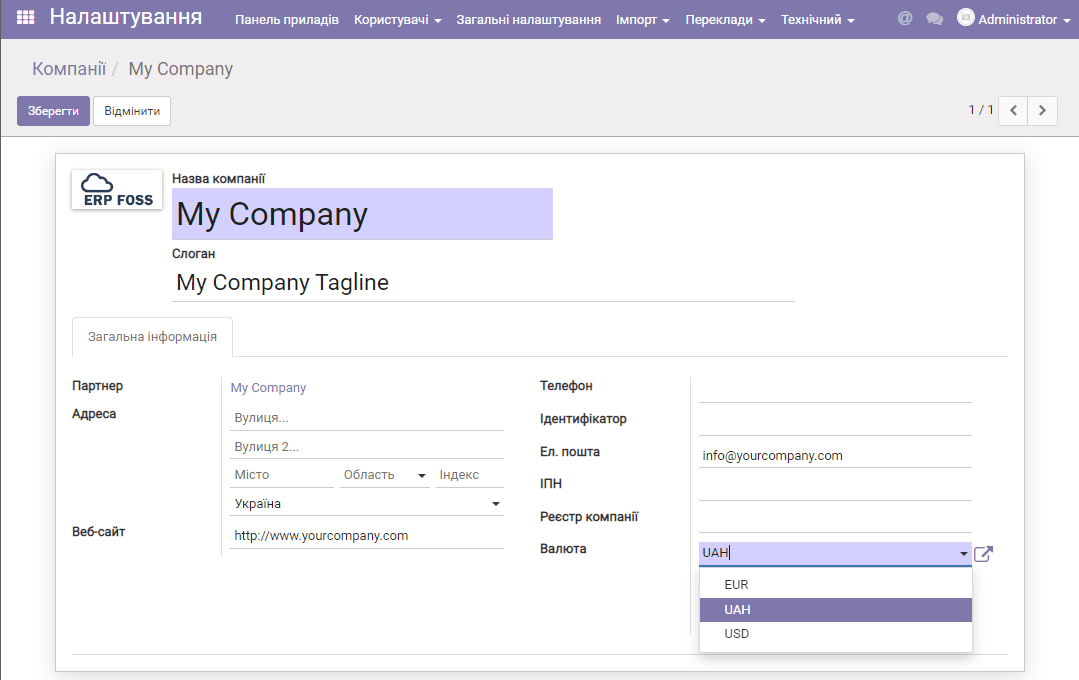
Instead of My Company, you can enter the name of your company (sole proprietor, FOP), fill in the address and other contact details and, if necessary, select the main currency for your settlements. Save the changes.
If you need to use more than one currency, go to the Accounting module and select the menu Settings/Settings:
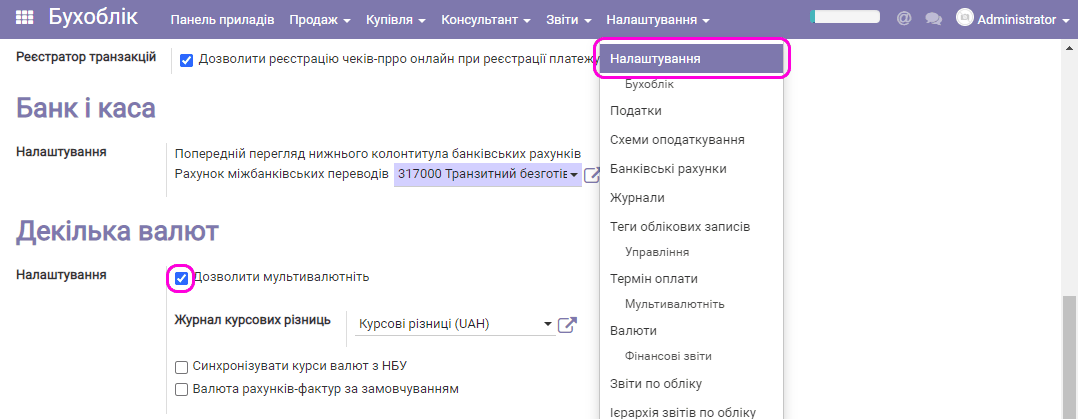
Select the Allow multi-currency checkbox and apply the changes. You can read more about working with several currencies in the article.
Filling the product database
For your convenience, the product database is available from the main modules of the system:
- Sales – menu Sales/Products;
- Purchases – Purchases/Products;
- Cash terminal – Orders/Products;
- Warehouse – Inventory control/Products;
- Accounting – Sales/Products.
Creating products manually
Go, for example, to the Sales module, select the menu item Sales/Products and click Create. A new product card opens:
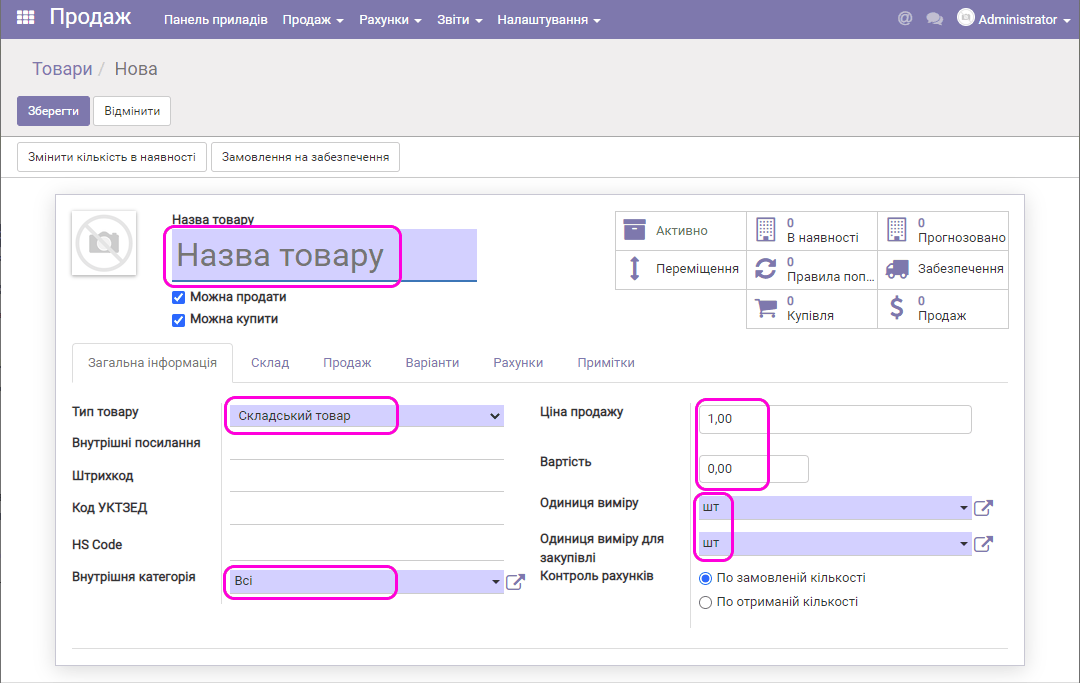
Here you can create a product manually.
Pay attention to the fields highlighted in the screenshot above. Enter the product name and its type: a stock product or a service. The Internal reference and Barcode fields are optional, but the system can be configured to fill them in automatically.
The Internal category field can be used to split products into groups that you can create. Be sure to fill in the Sales price field: the sale price is usually taken from it when a product is sold. However, you can change the sale price using the Price lists function.
The Cost field holds the product cost price. This value is used (usually) when products are purchased.
Also check the Unit of measure and Purchase unit of measure fields. Pieces are usually used, but weighed products need other units. You can also create your own units of measure for purchases and for sales.
This way we can create a product reference list (product catalog). For the products to appear in the quantity you need, they must be received into the warehouse. Products can be received by an inventory count or by a purchase.
Automated product entry
To automate entering products into the database, the system has the Import products function that works with Excel files you prepare. Importing products and services is described in detail in the article.
Warehouse setup
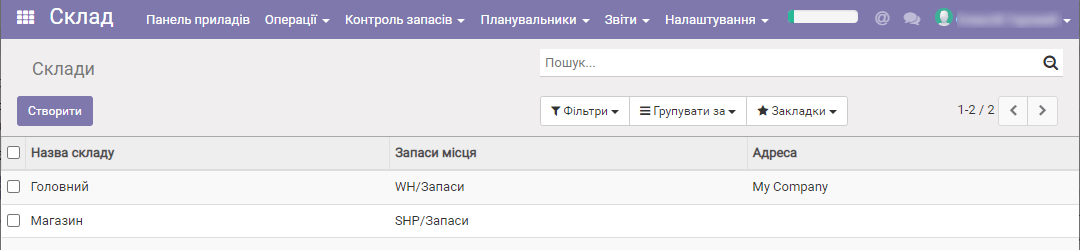
In ERP FOSS you can create several warehouses and receive (purchase) products into these warehouses and/or sell from them. To work with warehouses, go to the Warehouse module and select the menu item Settings/Warehouses:
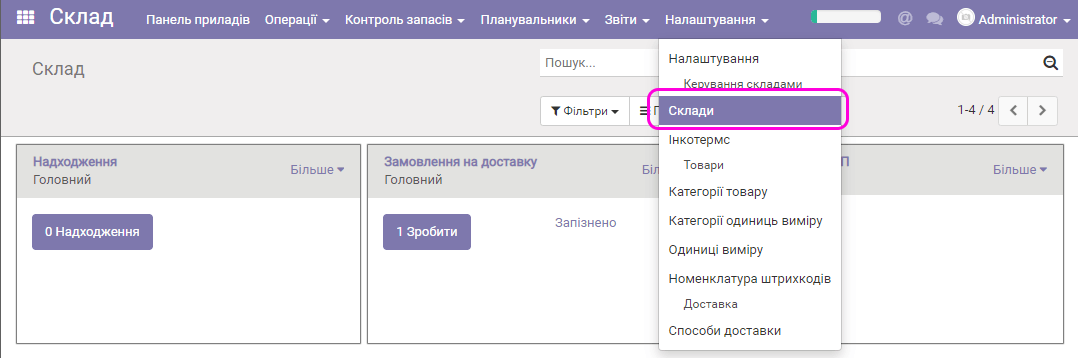
Usually you already have a warehouse called My Company:
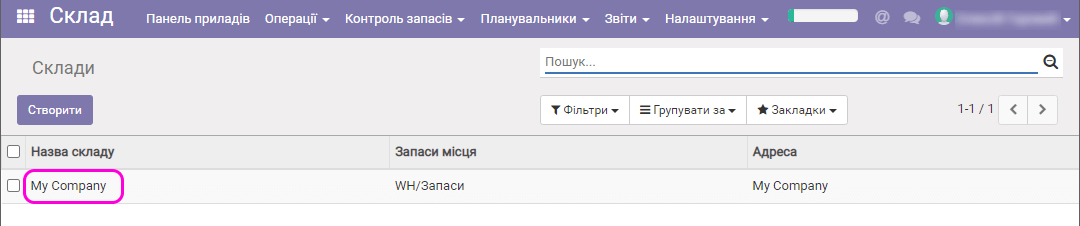
Double-click the row with this warehouse and open it for editing:
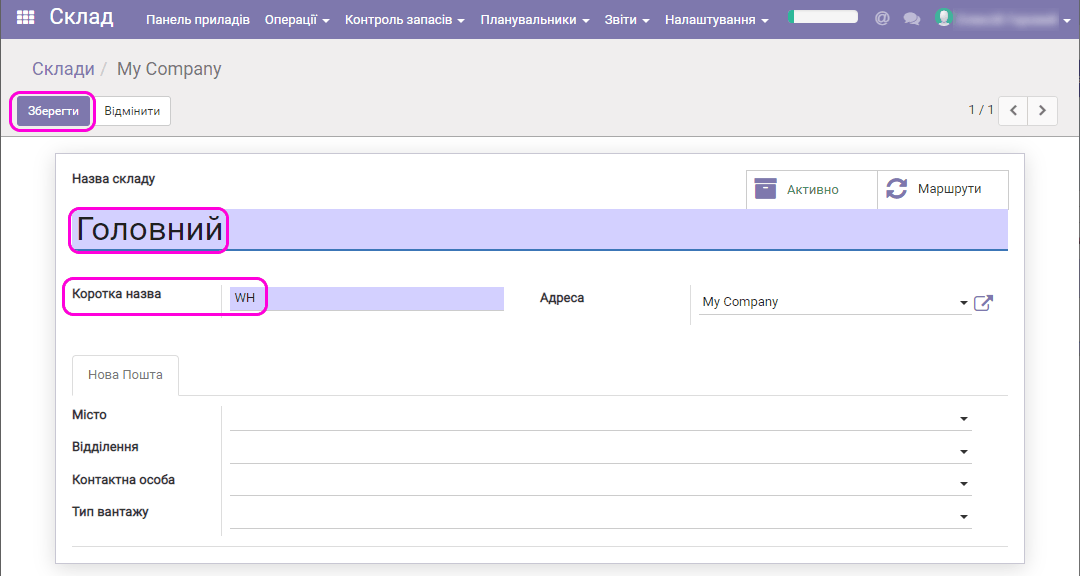
Enter a new warehouse name, for example, Main. You can also change the short name; it is usually best to use an abbreviation in Latin letters, for example, WH (short for warehouse).
Save the changes. With the Create button you can create another warehouse and name it, for example, Shop:
Receiving products
After the products are created, you can receive them into the warehouse(s). There are two ways to do this:
- Product purchase;
- Inventory count.
Product purchase
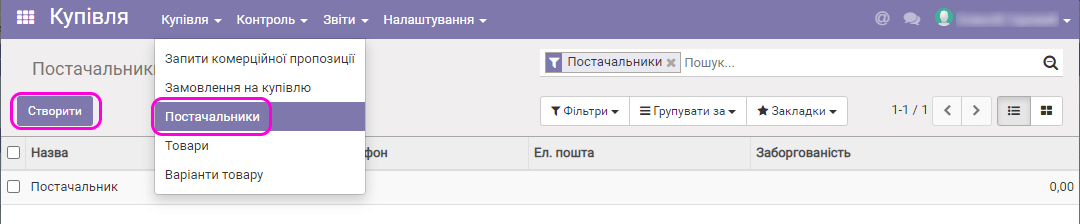
Create the catalog of your products. To make a purchase, go to the module of the same name. Then you can create suppliers. Select the menu item Purchases/Suppliers, then click the Create button:
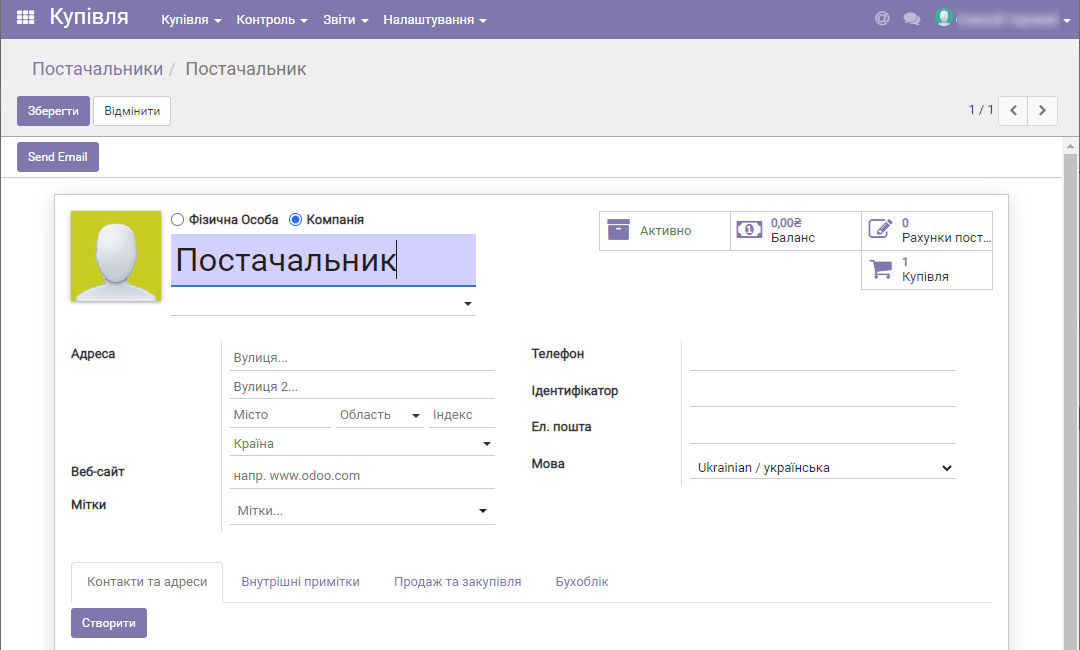
In the form that opens, enter your supplier's name and contact details (if necessary).
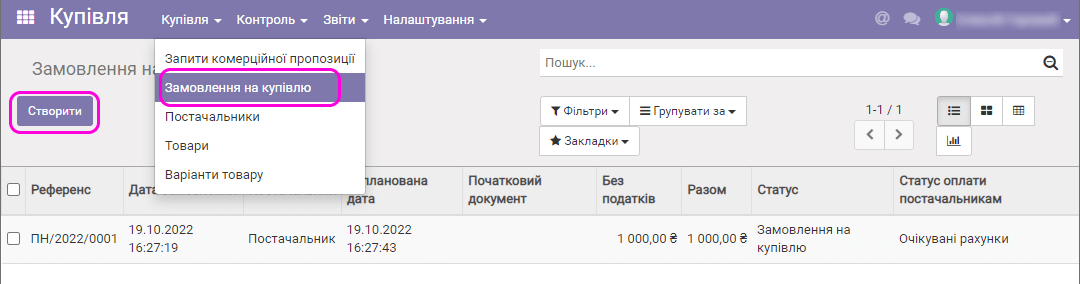
Select the menu item Purchases/Purchase orders, then Create:
A form for a new order (Receipt note) appears:
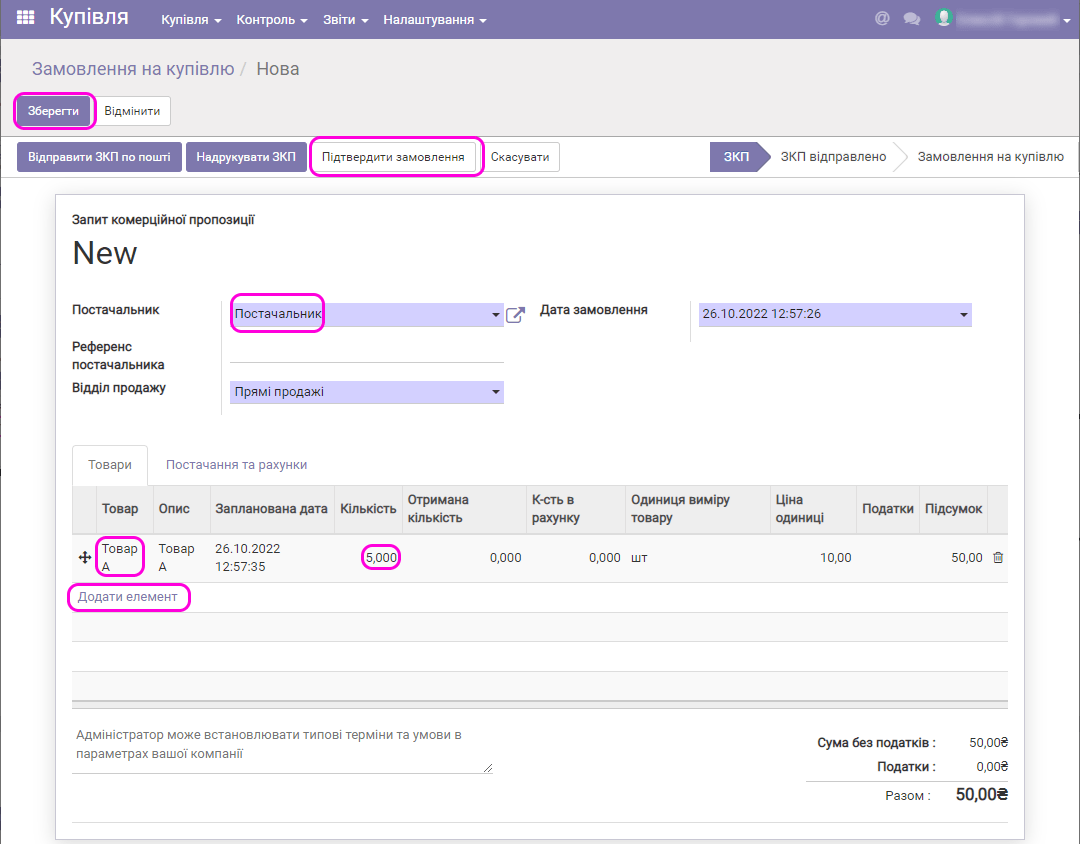
Select the supplier you created earlier. You can also create one directly from this form: just enter a new name in the Supplier field and click Save.
Use the Add link to add the product you created earlier. Its quantity is usually one; you can change this value in the Quantity column.
You can also add products to the note with a barcode scanner.
On the Delivery and invoices tab, you can change the warehouse where the products will arrive:
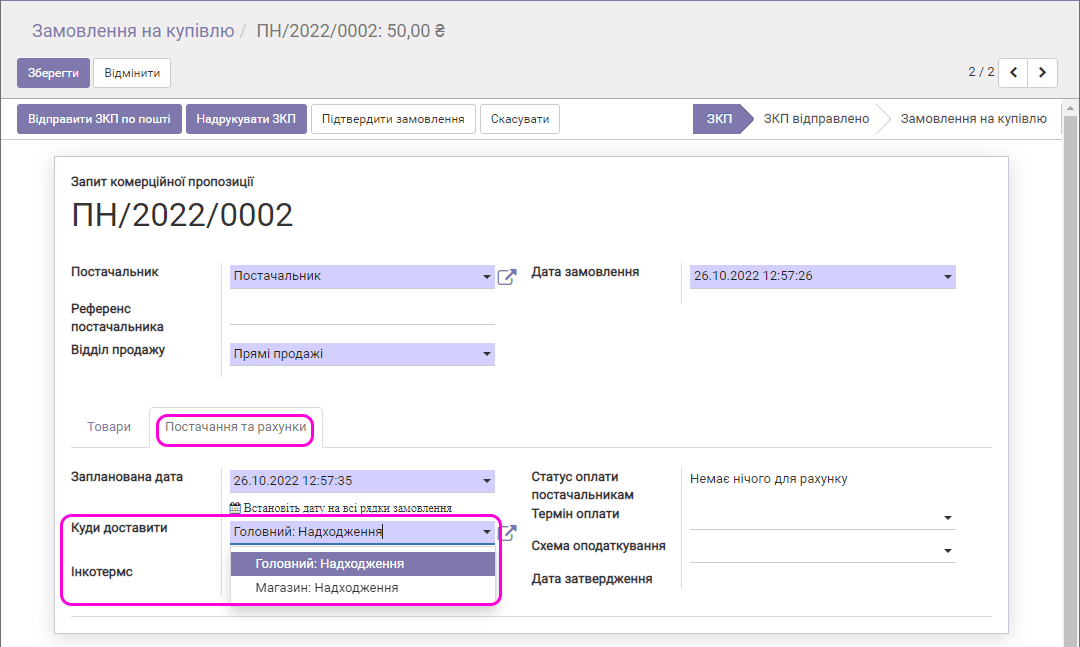
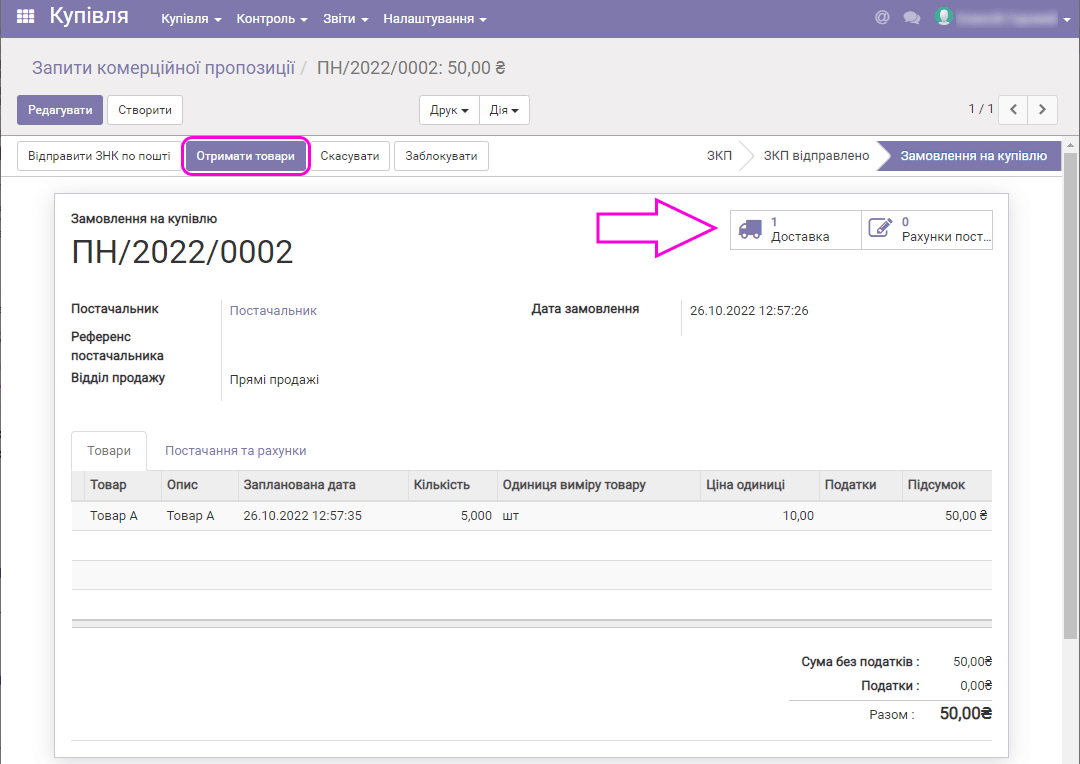
After you click the Save button, the order becomes a draft (a request for quotation). When you click the Confirm button, it moves to the status Purchase order. The Delivery and Supplier invoices buttons appear on the order form. The numbers on the buttons show the number of deliveries and invoices created, respectively.
To process the delivery of products from the supplier, click the Receive products button or the button with the truck icon:
The Delivery document opens:
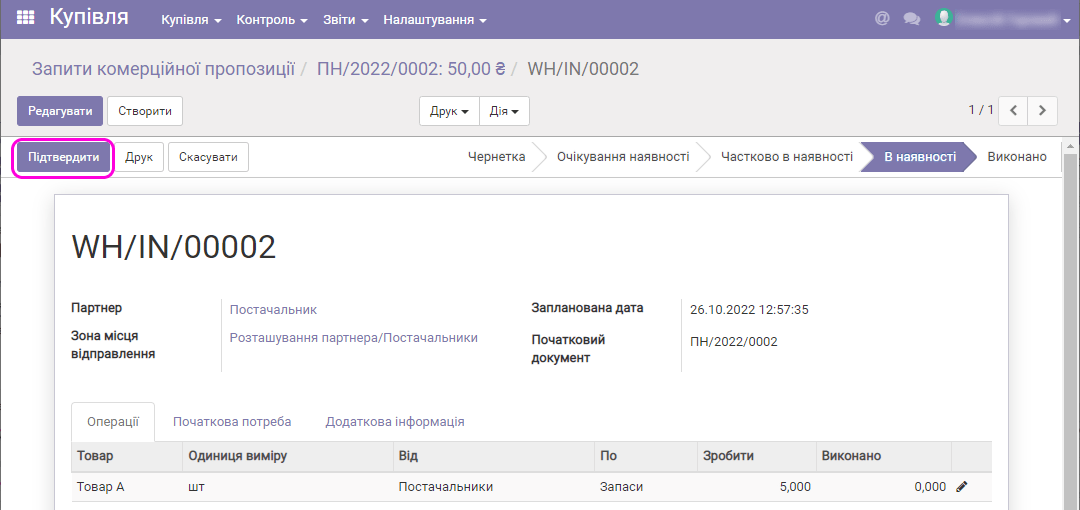
Click the Confirm button if you received the required quantity of products from the supplier. If the actual quantity differs from the ordered quantity, click Edit and enter the actual quantity of received products in the Done column. Then click Confirm.
The quantity of the products listed in this receipt note is updated in the warehouse.
Products could also be received in the Warehouse module. This is useful for companies that have a separate storekeeper employee who receives/issues products.
When you click the Supplier invoices button in the receipt note, you go to the list of invoices for this purchase:
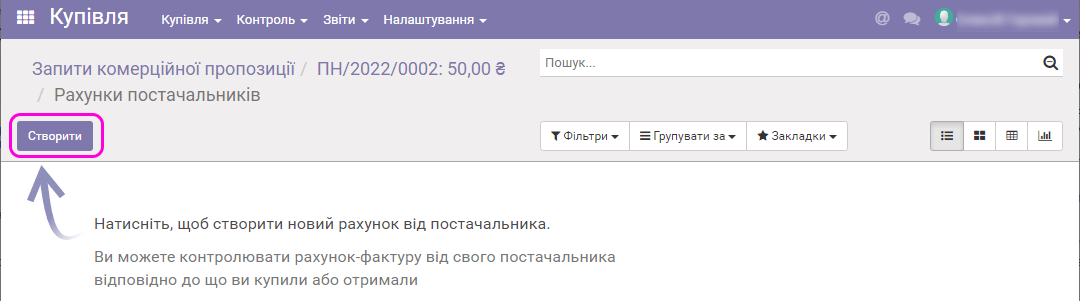
Click Create, and a supplier invoice is created automatically:
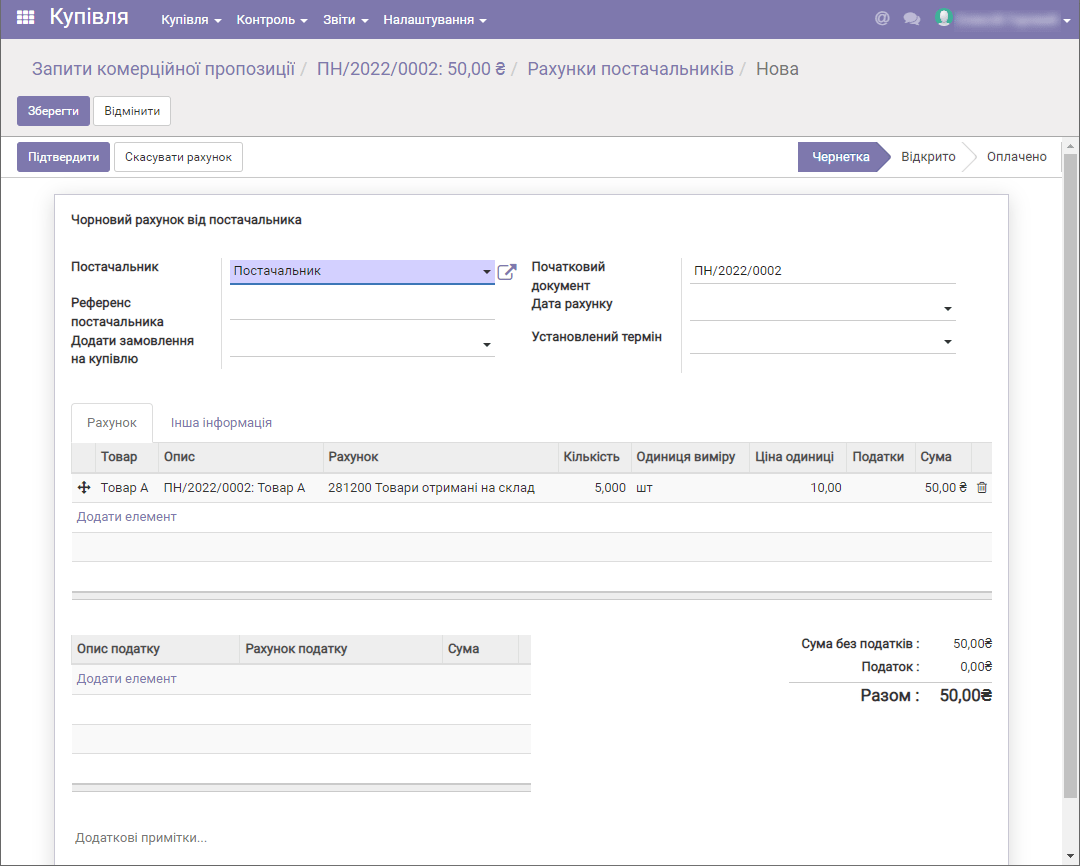
Click Confirm to save this invoice. Then you can go on to pay the invoice by clicking the Register payment button.
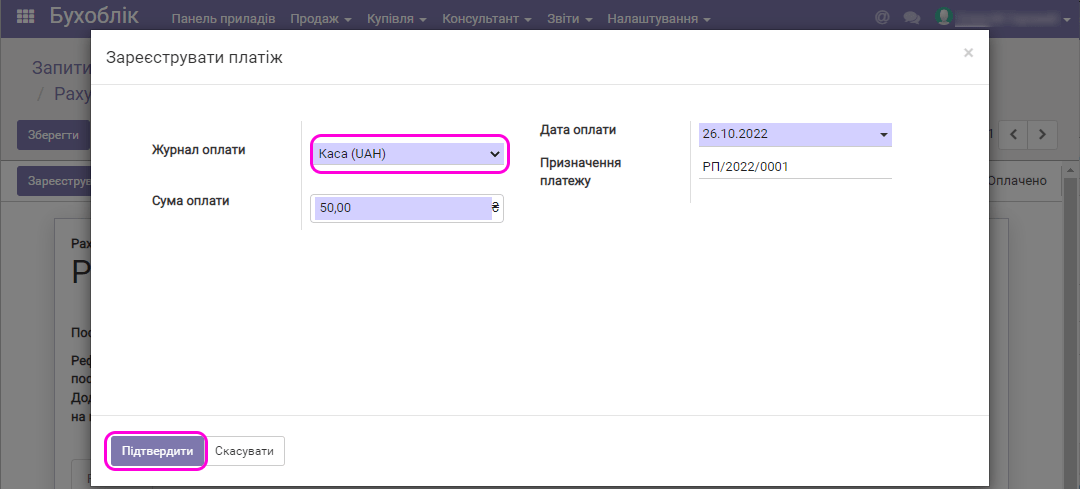
Select the payment journal that the funds will be written off from (usually the system has two journals, Cash and Bank) and click Confirm. Your purchase is now paid.
Note the interface feature called the context (navigation) menu. You can move between documents that are linked to each other by clicking the links:

Inventory count
Another way to receive products into the warehouse is an inventory count. Unlike a purchase, an inventory count does not write off funds from your journals (accounts), which you must take into account later when building profitability reports for your business.
You can count a single product very easily. Open the product card:
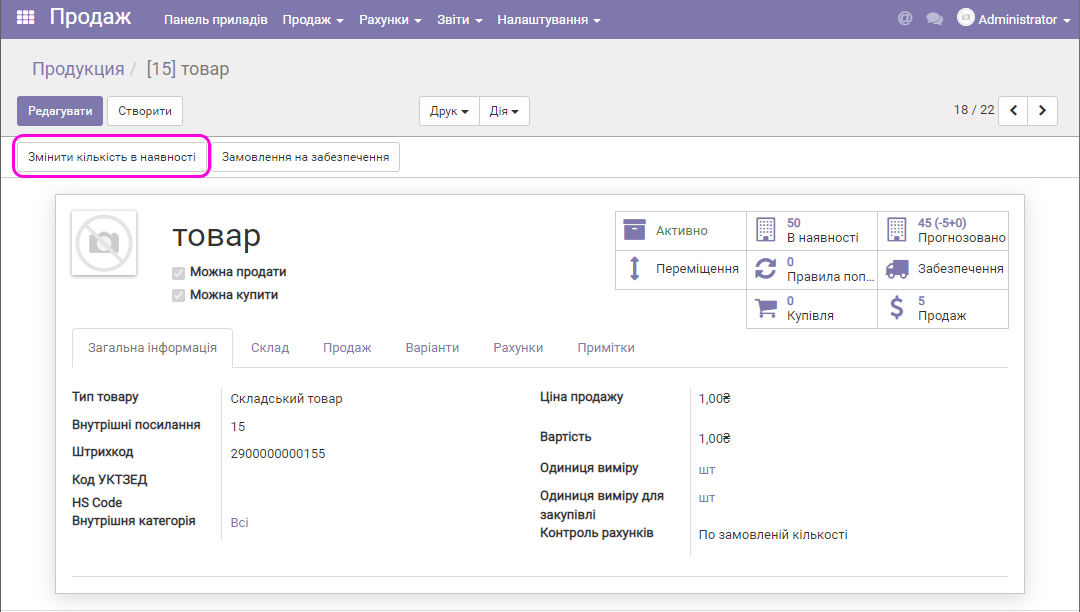
Click the Change quantity on hand button, and a form appears:
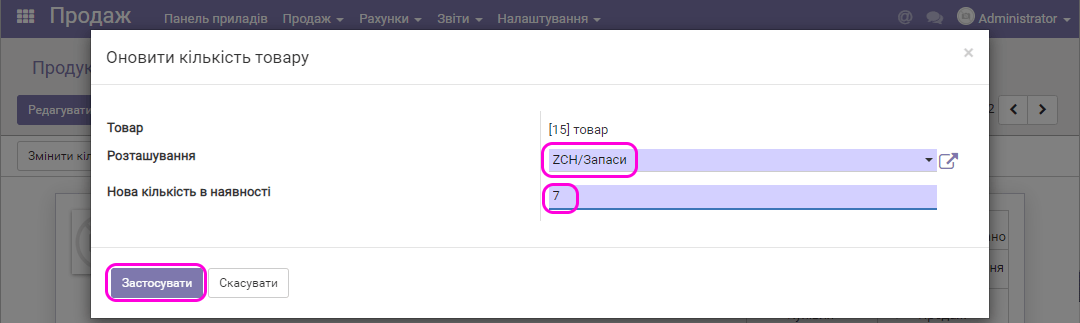
Select the warehouse, enter the new (actual) quantity of the product and click Apply.
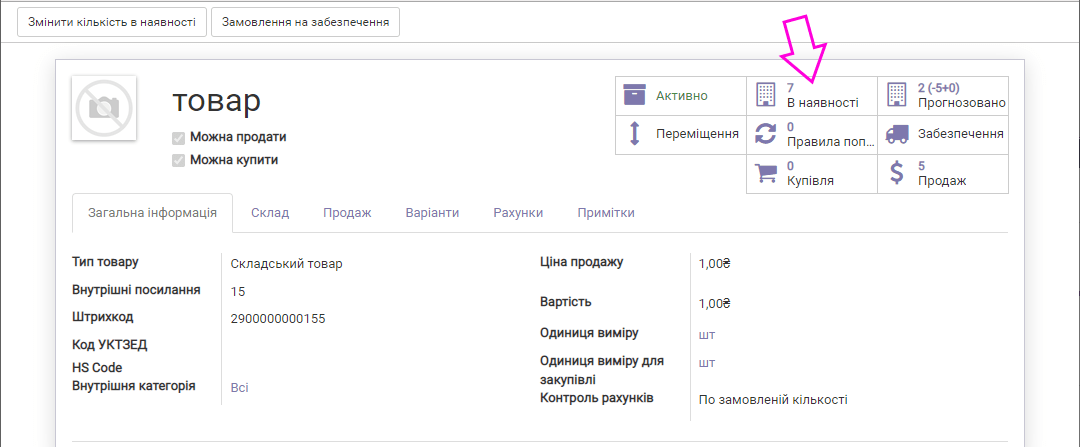
The new quantity (the total across all warehouses, if there are several) is shown in the product card:
If you need to count several products or even all of them at once, go to the Warehouse module, menu Inventory control/Inventory count:
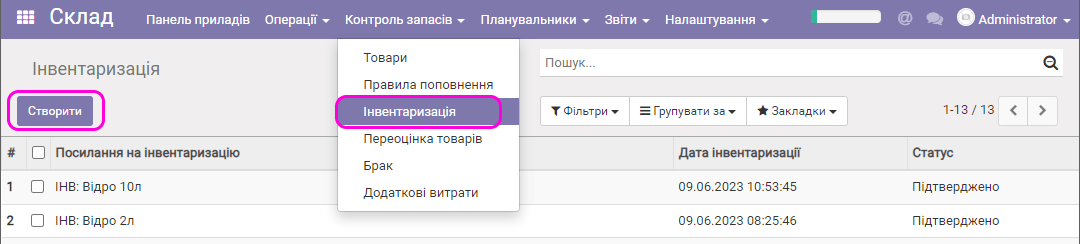
Click the Create button, and the inventory count form opens. See the article for more details.
Selling products
ERP FOSS has two modules for selling products:
- Sales
- Cash terminal
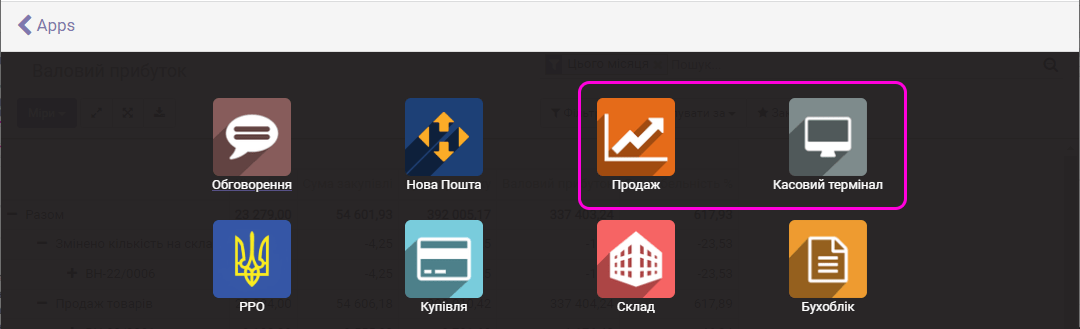
The first one (Sales) is for selling with issue notes. Here you can fully manage the sale and delivery process: split deliveries into parts, connect Nova Poshta, work with partial payments for products and more. The module gives you full control, including cancellation of all actions (delivery, payment, note).
The second module (Cash terminal) is a virtual equivalent of a cash register. The cashier sells a product, it is written off from the warehouse automatically and the payment is registered. Such a sale cannot be cancelled. You can only make a product return.
The software cash register module (PRRO) can be connected to both the first and the second module, which supports sales with payment fiscalization, that is, the customer gets a receipt with a fiscal number. To trade with PRRO, it must be set up.
Let us look at selling with these modules.
Sales module
Go to the Sales module, select the menu Sales/Issue notes and click Create:
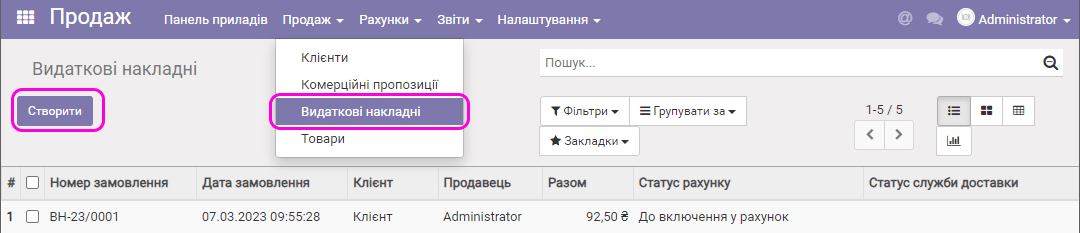
The issue note form appears:
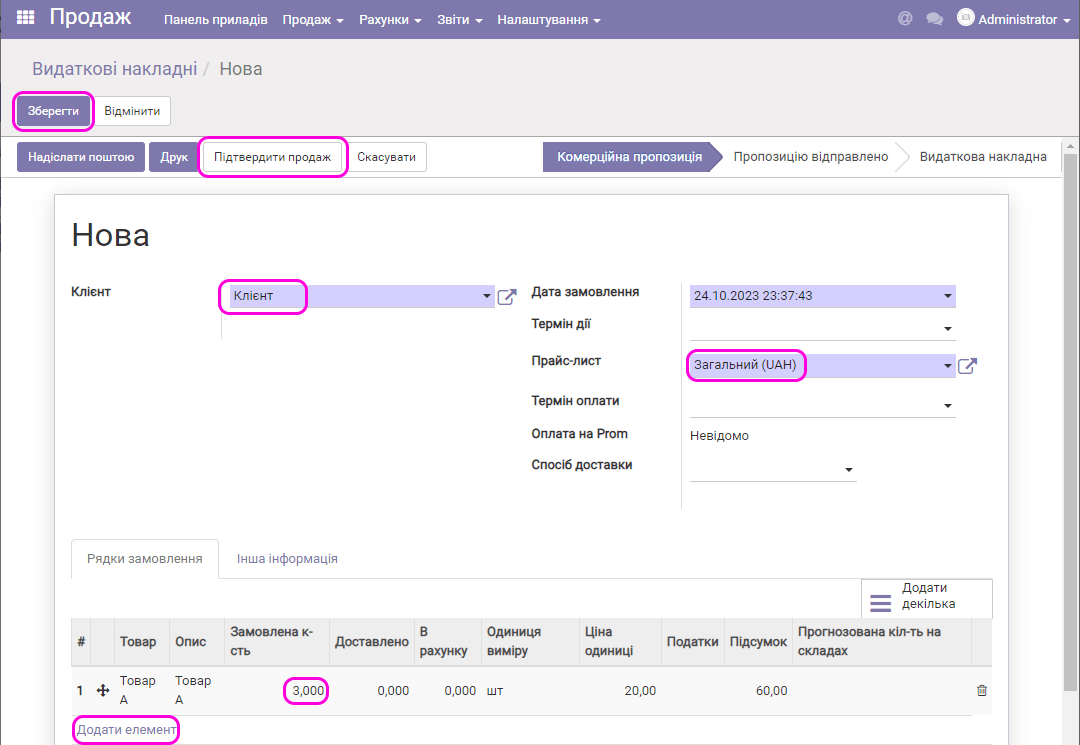
Select the customer and, if necessary, change the price list.
Then, in the order lines, use the Add an item link to select the products you want to sell. If necessary, you can edit their quantity, unit price and unit of measure. The unit price is usually taken from the product card, taking into account the price list settings.
Save the note. Its status becomes Quotation, and it is in the list available through the menu Sales/Quotations. You can edit the quotation: add/delete lines, change quantities, prices and so on.
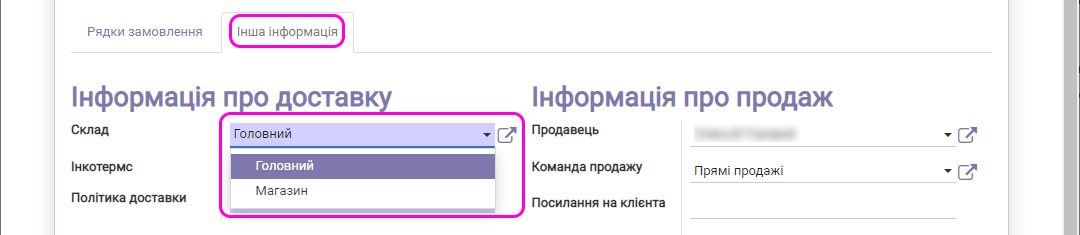
On the Other information tab, you can select the warehouse from which the products will be delivered to the customer. The first warehouse that existed in the system is set automatically:
Then click Confirm sale. Your order moves to the status Issue note (no longer a draft), and it gets a Delivery (shown as a button with a truck on the order form):
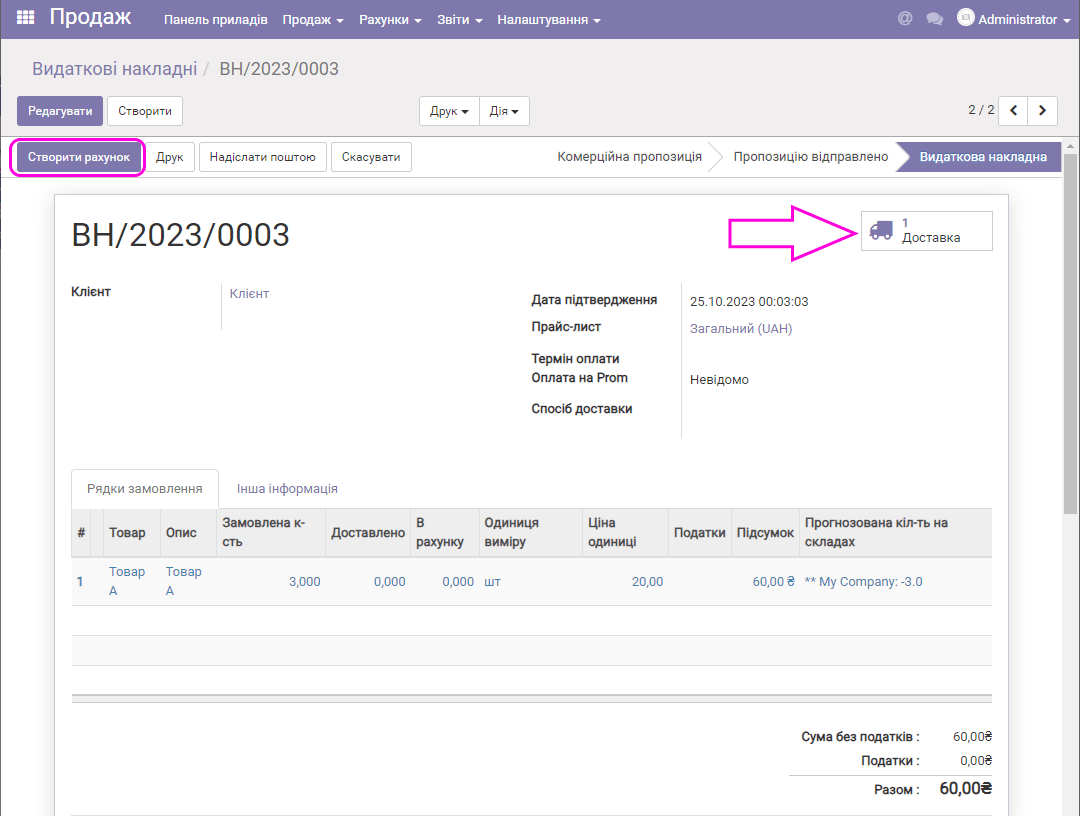
Then, depending on how your business processes work, you can go on to deliver the products or first create an invoice for the customer (with the Create invoice button):
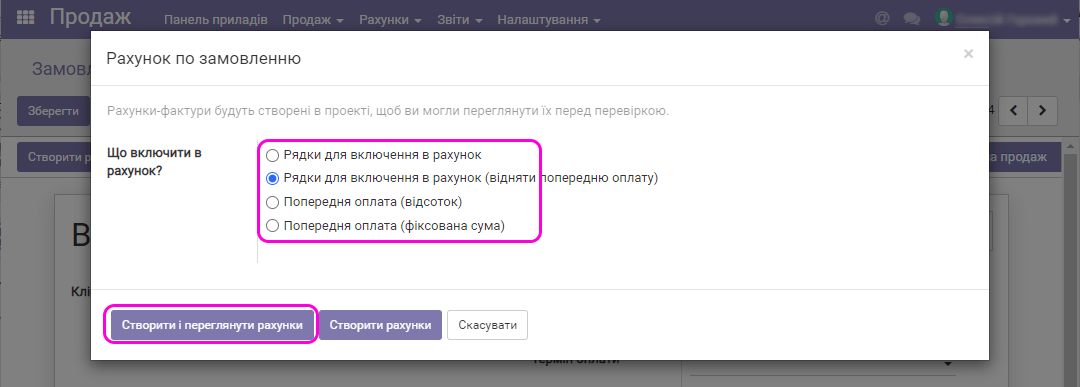
This form lets you choose the amount of the invoice: for all order lines, for all lines taking the prepayment into account, or a prepayment invoice (as a percentage of the order amount or a fixed amount). Leave, for example, an invoice for the full amount and click Create and view invoices:
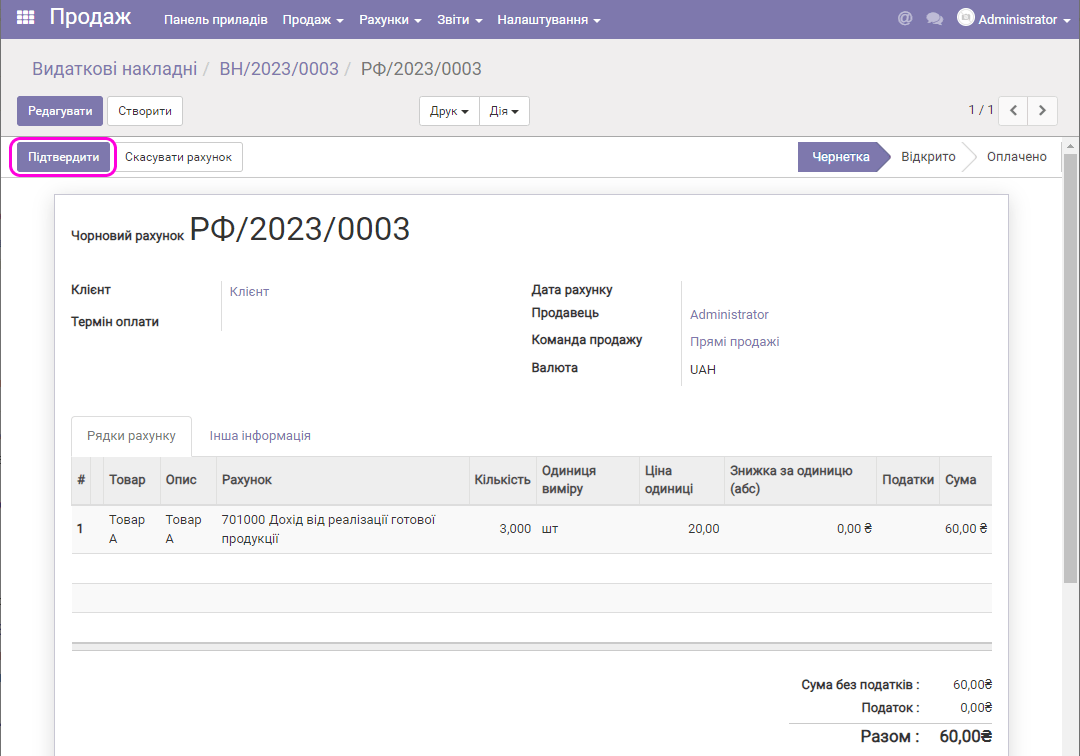
A draft invoice appears; you can edit or delete it if necessary (the Action menu).
After you click Confirm, the invoice becomes open for payment and the Register payment button appears:
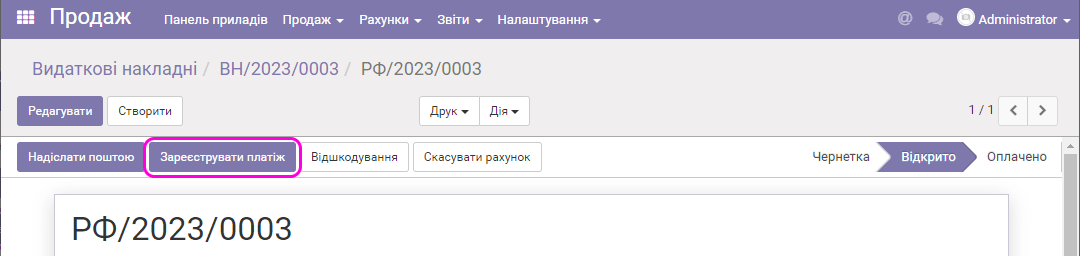
When you receive a payment from the customer, click this button:
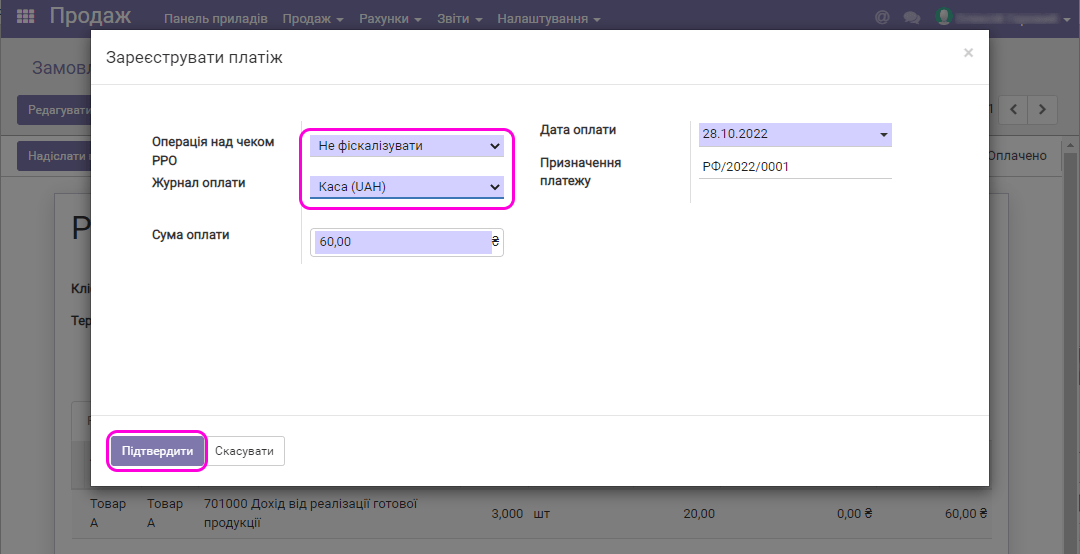
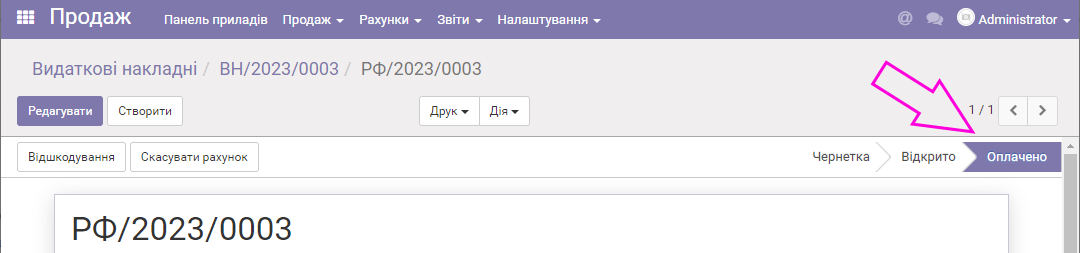
Select the RRO receipt operation (use do not fiscalize until you have set up the cash register), and the Payment journal the customer's payment will be posted to, and click Confirm. The customer's payment is registered. The invoice moves to the status Paid:
As with a purchase, you can deliver the products (the button with the truck), only now to the customer. You can make the delivery using the integration service with Nova Poshta; see the articles for more details: setup and sale with Nova Poshta delivery.
Cash terminal
Before you start selling with the cash terminal (cash register), create the necessary products and make sure the necessary journals are available for payment at the register. To do this, go to the Accounting module and select the menu Settings/Journals:
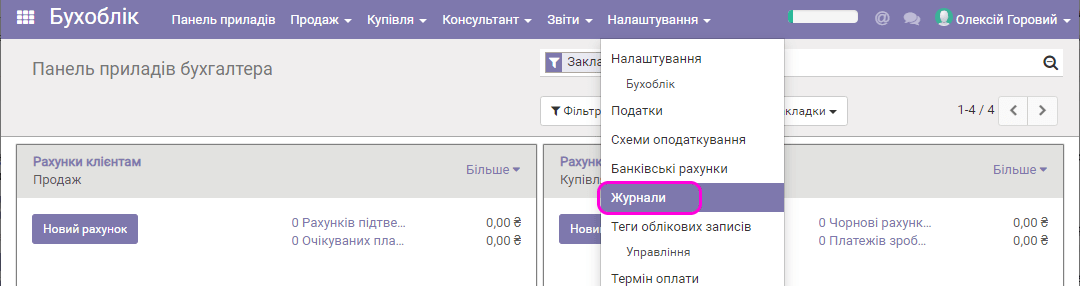
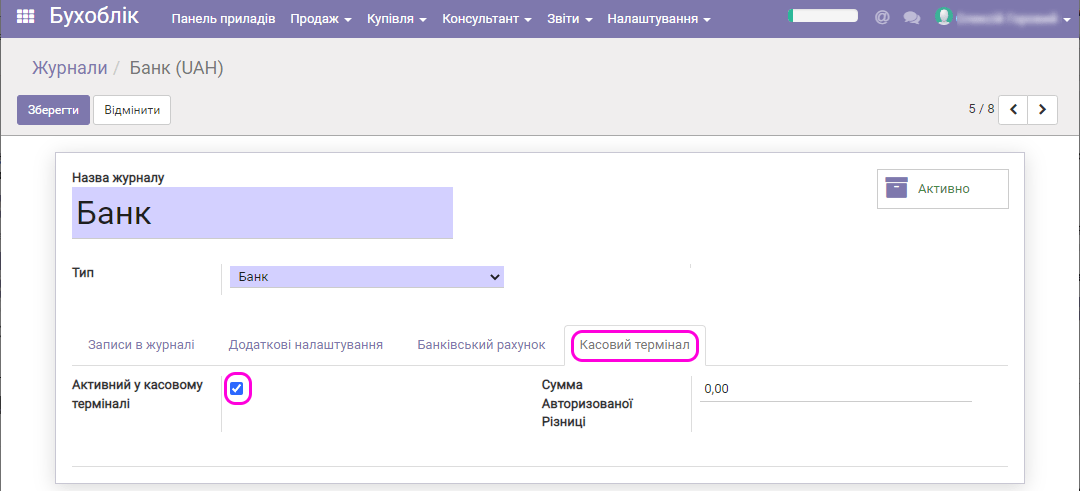
Usually the system has two journals for registering payments: Bank and Cash. The first is for non-cash payments, the second for cash payments. You can rename them as you see fit, for example, Card and Cash. But for them to be available for registering a payment at the register, you need to turn on the flag in the journal settings. Usually the Cash journal is available at the register; to make Bank available, open it for editing and select the checkbox as in the screenshot:
In addition, this journal must be selected in the settings of the register itself. Go to the Cash terminal module:
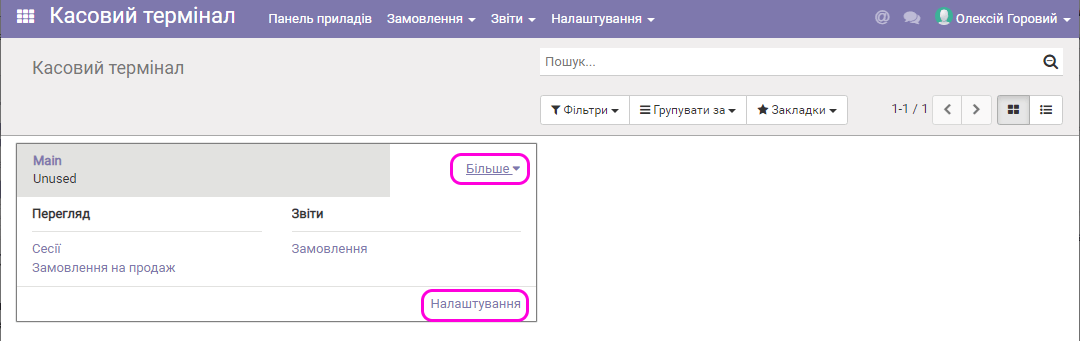
One register named Main is already set up. Click the More link and then Settings, and the register settings form appears:
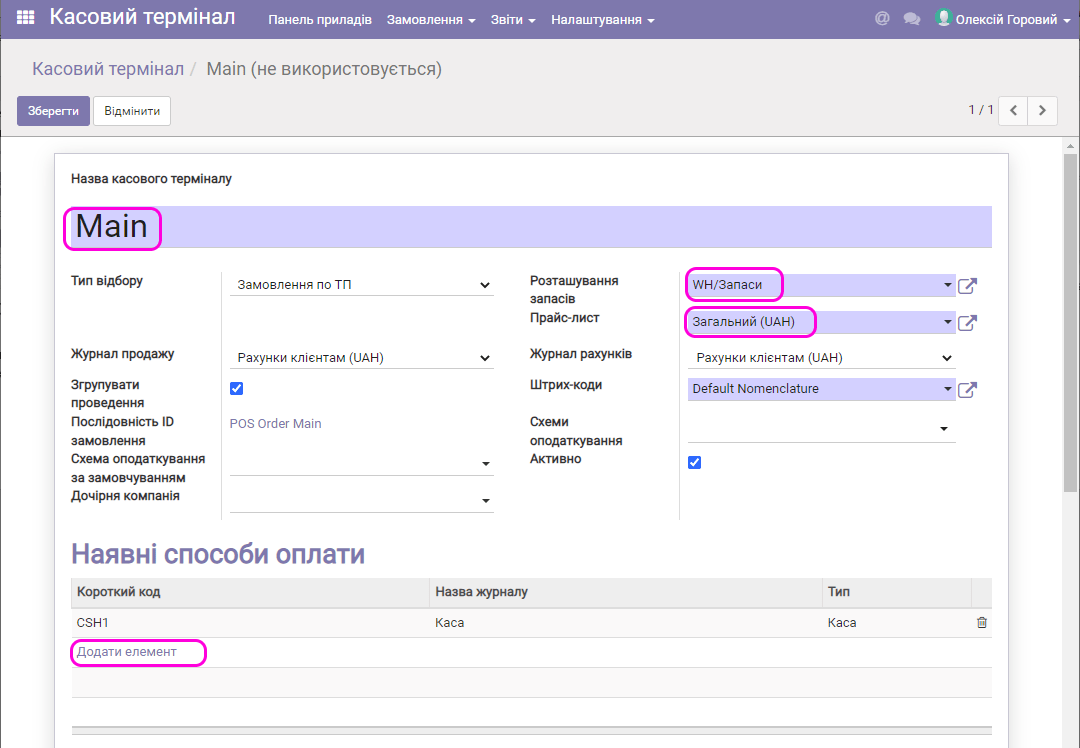
You can change the register name, for example, 1st floor register, select the warehouse the register's products are written off from (usually the first warehouse, WH), the price list used for sales at the register (you can configure the register so that the price list is selected at the register itself; contact us and we will set it up), and also add payment methods (journals). Click the Add link, and a form opens:
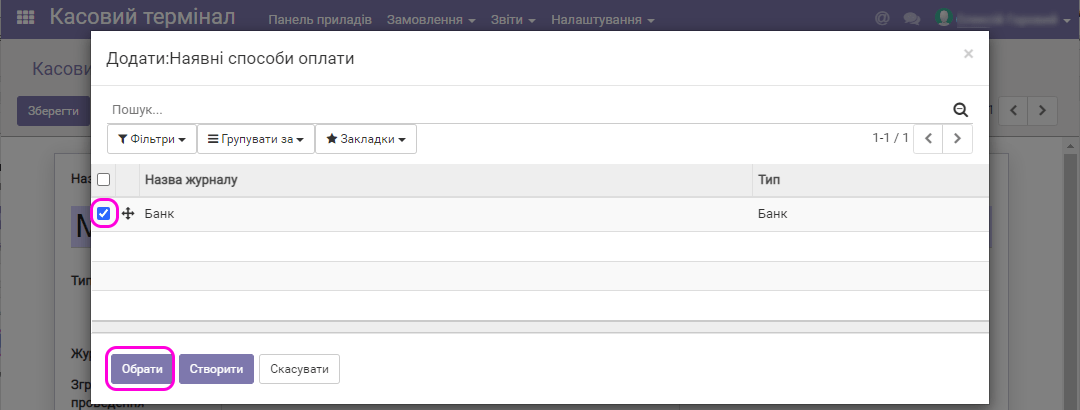
Select the checkbox of the available journal and click Select.
Click Save to save the entered settings.
You can change the order of the payment methods at the register. To do this, open the Cash terminal module again and select the menu Settings/Payment methods:
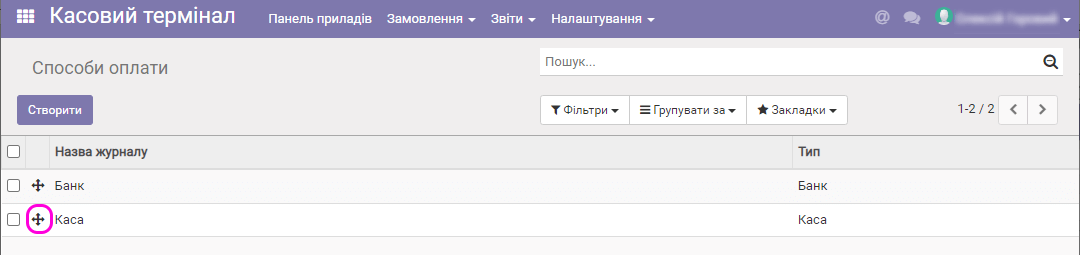
Click the icon shown in the figure above and drag the selected payment method up or down to arrange them in the order you need. You can create several registers in the program and work with them.
Now start trading. Go back to the dashboard of the Cash terminal module, select the register and click Open session:
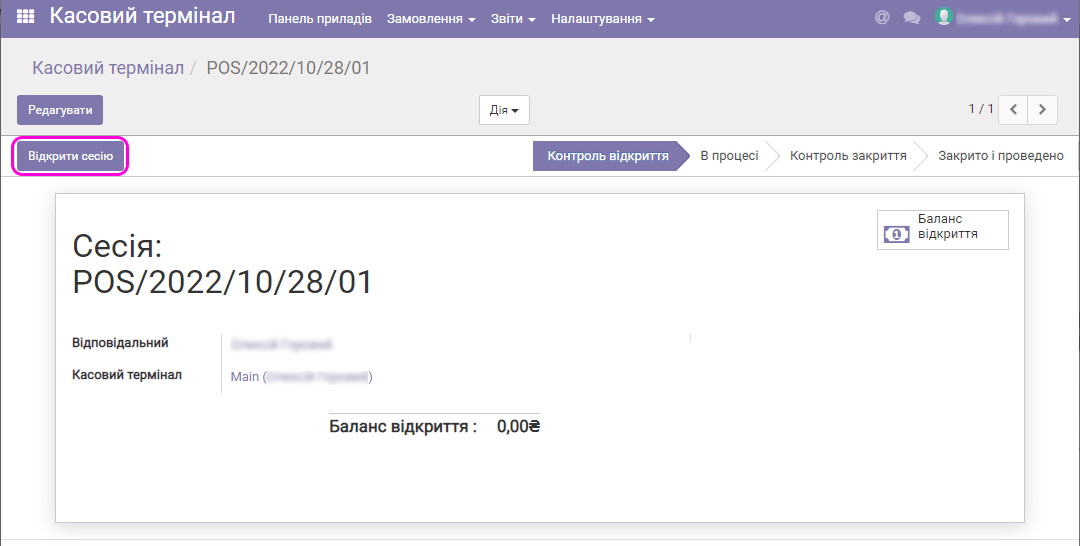
In this form you can set the opening cash balance of the register. Click Open session once more and then Continue selling:
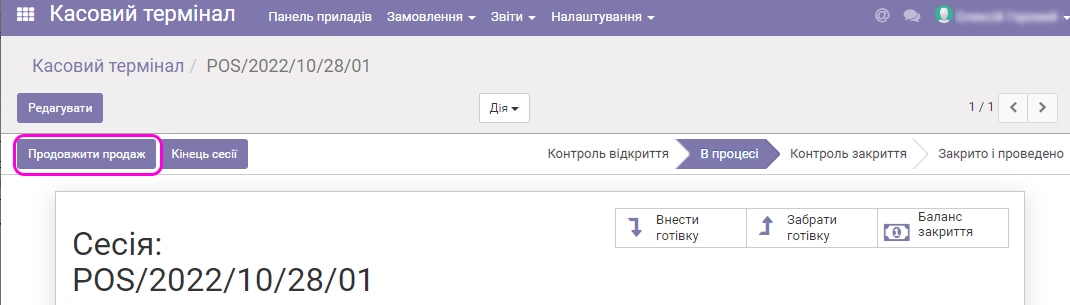
Wait for your products to load into the register:
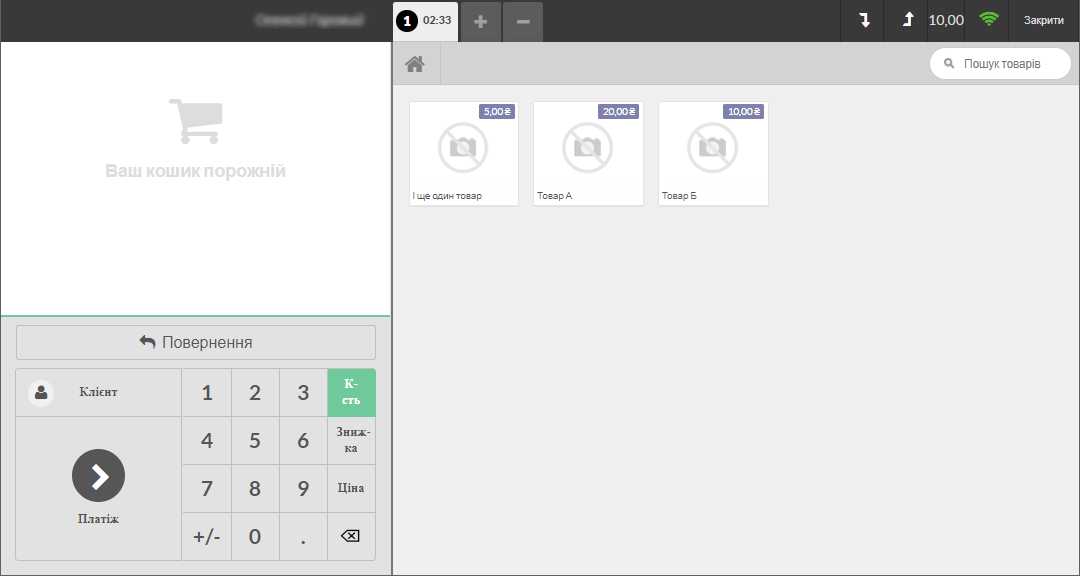
This is the virtual register window. With the mouse or a barcode scanner (if the product has this code entered), you can select products into the basket (build a receipt):
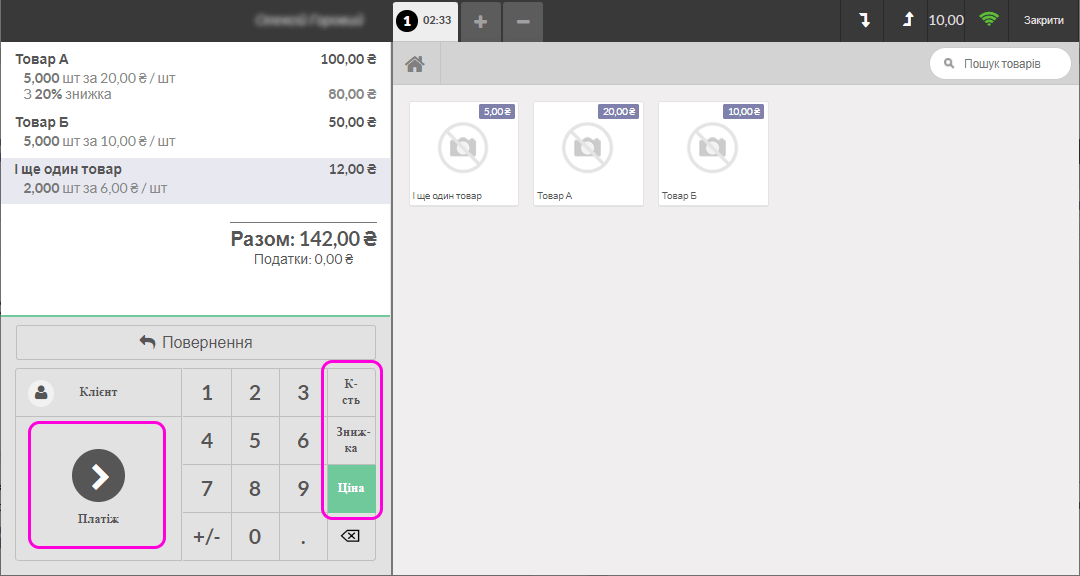
After selecting a receipt line with the mouse, you can change the product quantity on the receipt with the Qty button and the digit keys, specify the discount % for the selected item with Discount, and change the product price on the receipt with the Price button (set a new one instead of the one at the register).
Click the Payment button to go to payment:
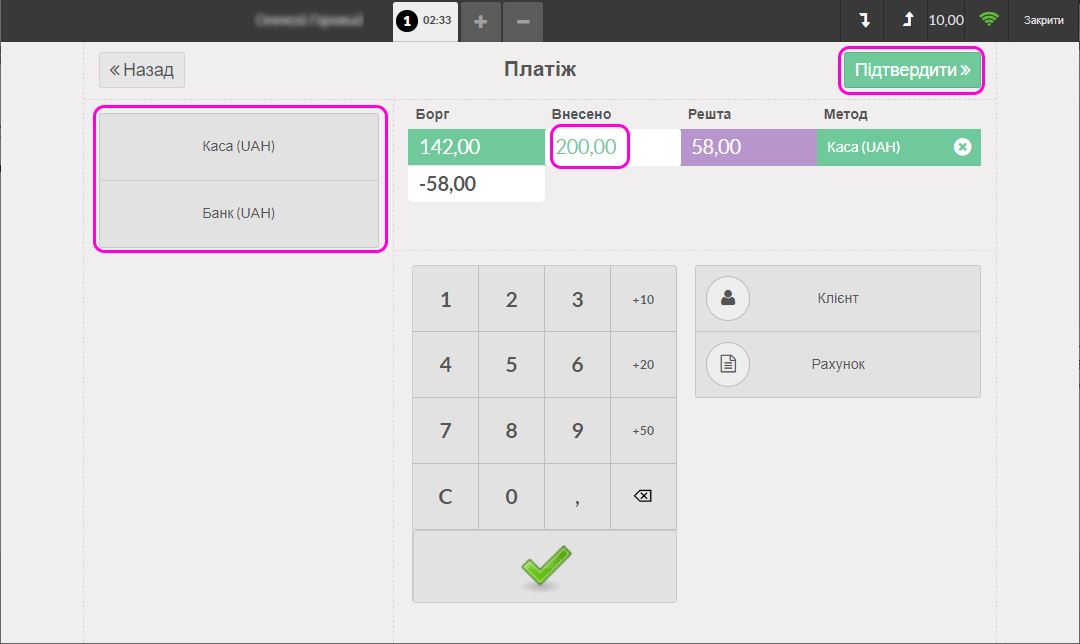
Select the payment journal, for example, Cash (the cash journal), enter the amount paid by the customer, the program shows the change, and click Confirm.
If a journal for non-cash payments is selected, for example, Bank, the paid amount is filled in automatically.
After the payment is confirmed, a window with the receipt opens, which you can send to print:
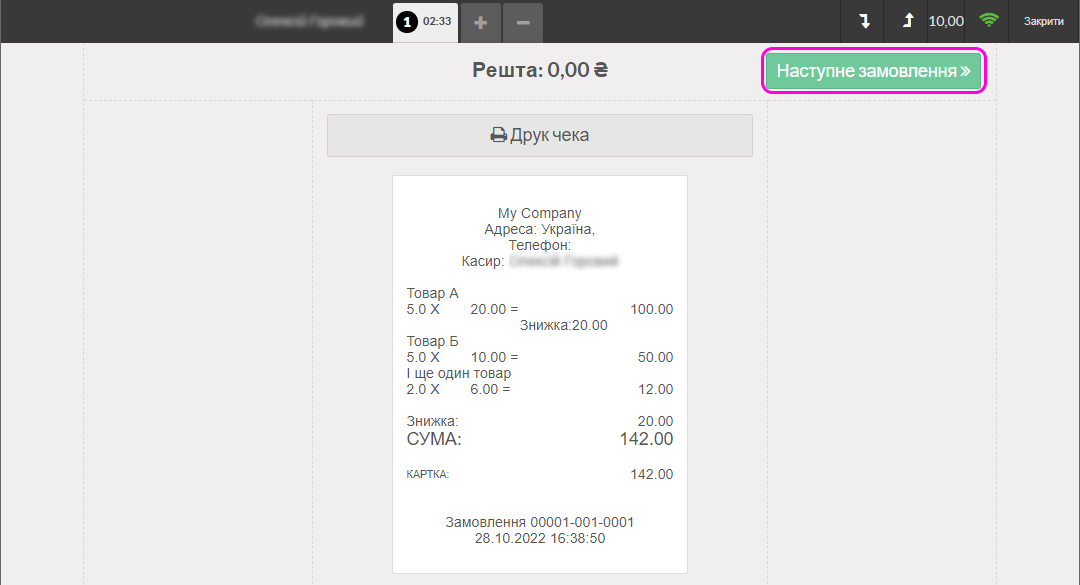
The receipt header contains the details of your company entered earlier. Once the PRRO (software cash register) is set up, this is where the fiscal number and other data required by the tax regulations appear.
Click Next order to return to the register.
To stop working with the register, click Close and immediately Confirm; you return to the module dashboard:
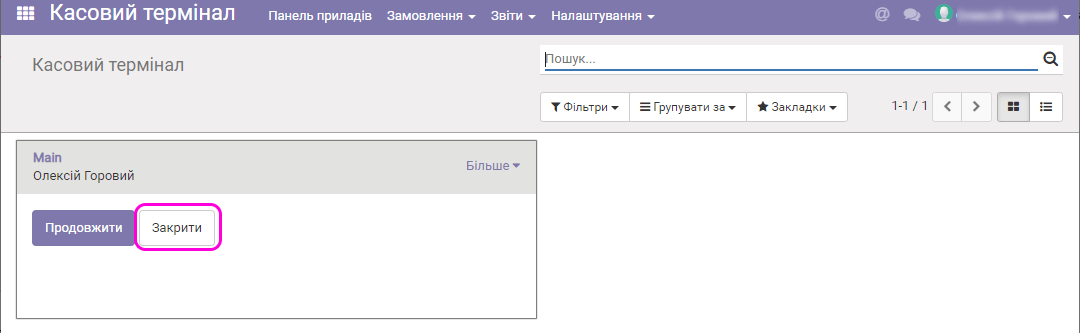
If you had a break in work, you can click Continue and the session continues; the cash terminal window appears again.
To end the session, click the Close button, and the window with the closing balance of the trading session appears:
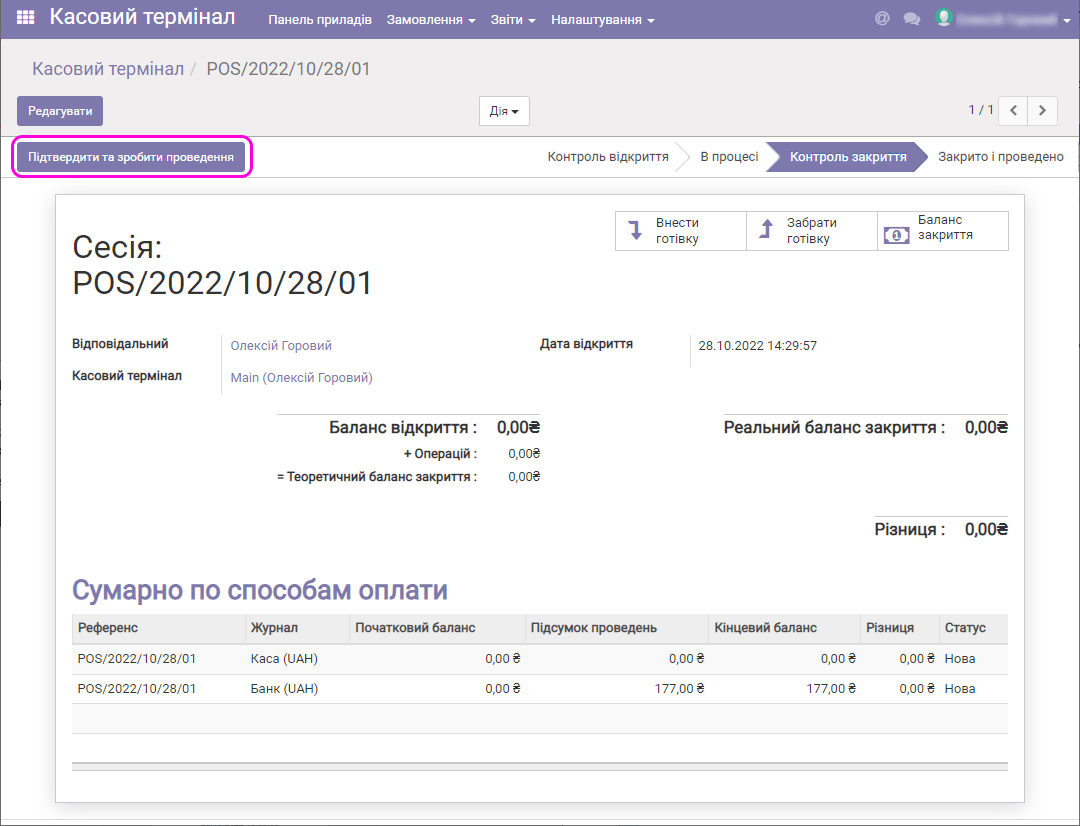
Click Confirm and post entries, the session is closed and all accounting entries are posted. The register is ready to open a new session.