Working with incoming correspondence
This section describes all the options for working with incoming items (letters, parcels, small packages) that have arrived at your organization.
Access rights
Users can work with incoming items if the Correspondence function in their access rights settings has the role Employee or Manager. A user with the Employee role can create and edit only their own letters; a user with the Manager role can edit letters created by other users.
Therefore, we recommend giving the Manager role to system users who are office staff (clerks) in your organization.
Typical processing of incoming items
A typical workflow for incoming items includes the following stages:
creating and filling in the incoming letter card;
creating a resolution for the letter and having it approved by the manager;
executing the resolution.
Let us look at all stages of this process.
Working with the letter card
Creating and filling in the card
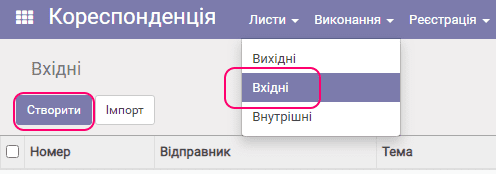
Go to the Incoming folder and click Create.
The letter card appears (RCC - registration and control card of the incoming letter):
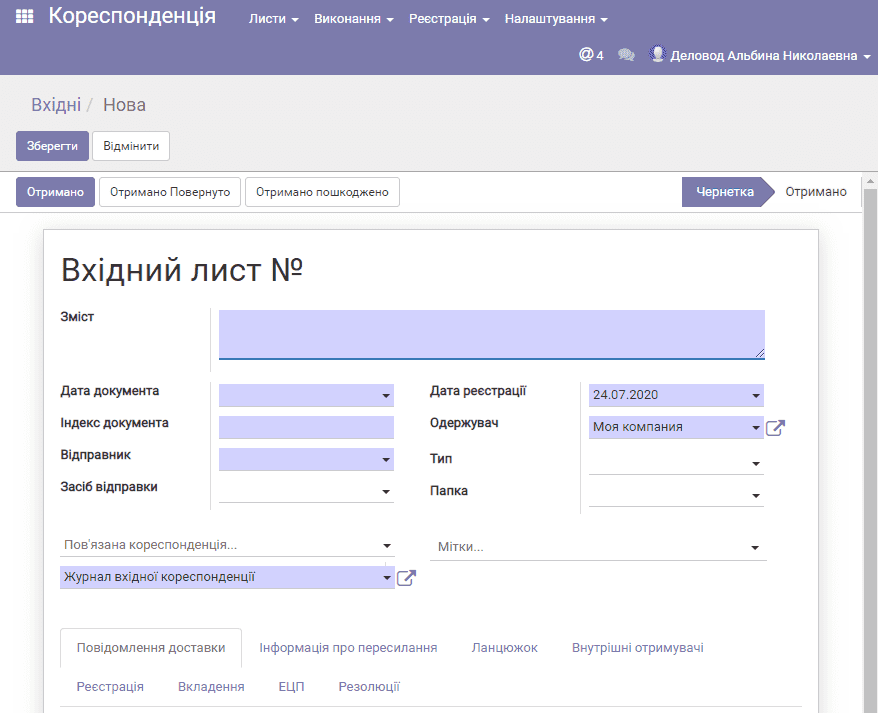
Let us look in detail at the purpose of each field of the document card.
| Field name | Description |
|---|---|
| Subject* | Brief summary of the letter |
| Document date* | Date the document was registered in the organization that sent the letter |
| Document index* | Registration number of the document in the organization that sent the letter |
| Sender* | The organization that sent the letter. Selected from a reference list; a record can be created while filling in the card |
| Delivery method | How the letter was delivered to the recipient (DHL, USPS, Nova Poshta) - selected from a reference list |
| Registration date* | Date the document was registered in your organization |
| Recipient* | The organization that receives the letter |
| Type | Type of correspondence (for example, letter or small package), a reference field |
| Folder | The folder the document will be filed to, a reference field |
| Related correspondence | Link to another letter related to this one |
| Tags | Classification of correspondence (for example, "urgent", "restricted", etc.), a reference field |
Fields marked with * are required. Some of them are filled in automatically.
In addition, the card contains a number of tabs for additional information about the incoming letter. Let us look at the purpose of these tabs:
| Tab name | Purpose |
|---|---|
| Delivery message | For entering additional information |
| Forwarding information | For entering data about small packages |
| Chain | Information about documents related to this letter |
| Internal recipients | For notifying other employees about this letter |
| Registration | Registration records |
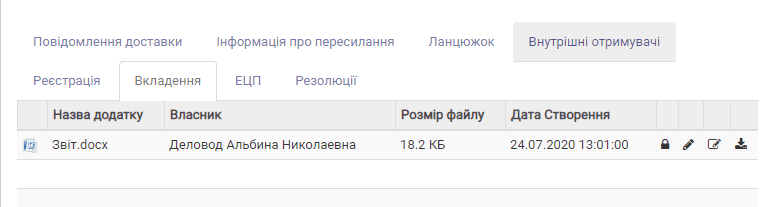
| Attachments | Information about files attached to the letter |
| EDS | For signing files attached to the letter with an EDS and/or verifying the EDS |
| Resolutions | Records of resolutions placed on the letter |
Attachments
You can add any number of files to a saved document card. To do this, use the Attach menu on the letter card:
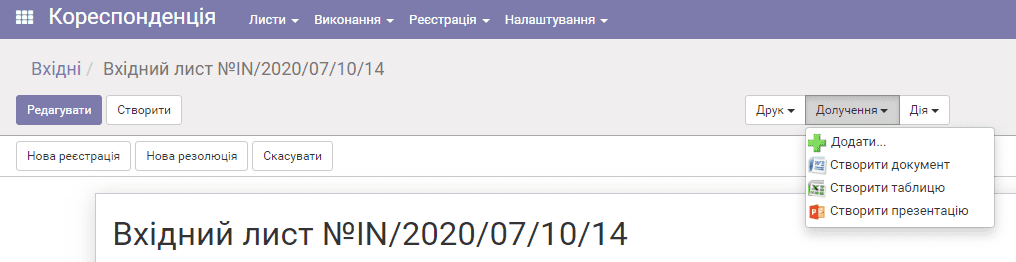
You can either add any file from your disk or create an OpenOffice document (a text document, spreadsheet or presentation) and attach it to the letter card.
Working with OpenOffice documents
To create an OpenOffice document, select Create document (or spreadsheet or presentation) in the Attach menu; a dialog for entering the document name appears:
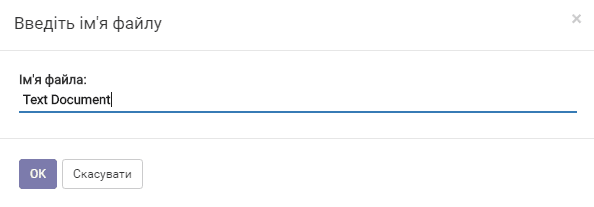
Enter the name and click OK; the window of the built-in OpenOffice editor opens:
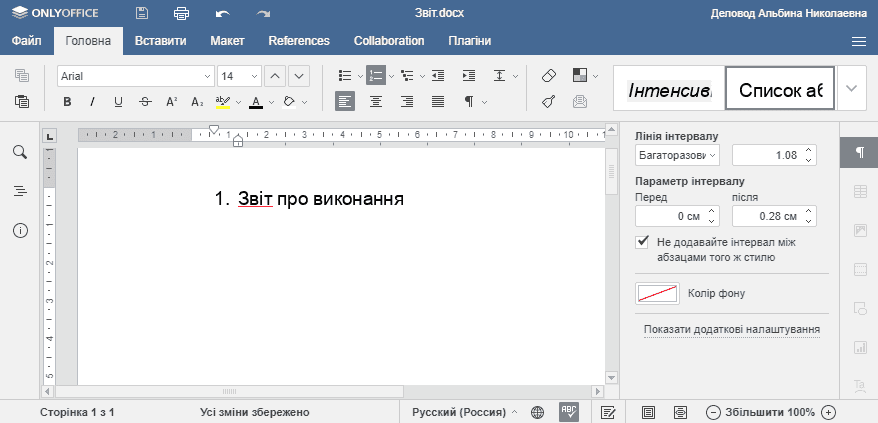
Edit the file. It is added automatically to the attachments, which you can see on the card tab:
The "Forwarding information" tab
On this tab you can specify data about the parcel/small package.
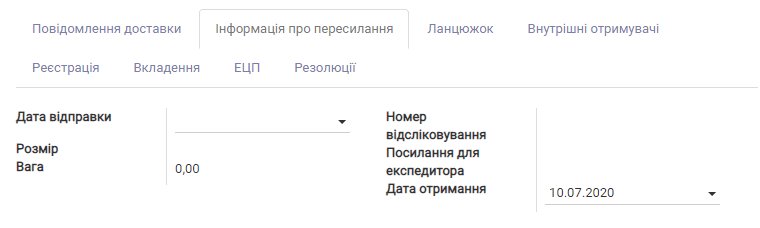
| Field name | Description |
|---|---|
| Dispatch date | Date of dispatch from the sending organization |
| Size | Package size |
| Weight | Package weight |
| Tracking number | Number used to track the status of the parcel |
| Courier reference | Parcel number for the courier |
| Receipt date | Date the document was received in your organization |
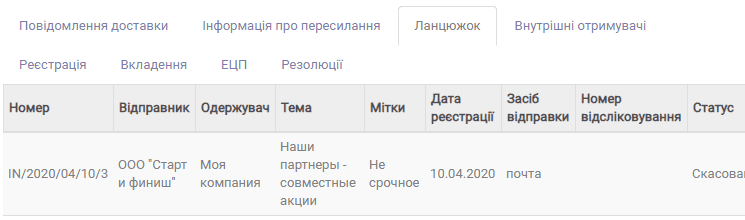
The "Chain" tab
The Chain tab shows all letters in which this letter is specified as related.
The "Internal recipients" tab
If you want to notify employees of your organization about received letters, select them on this tab.
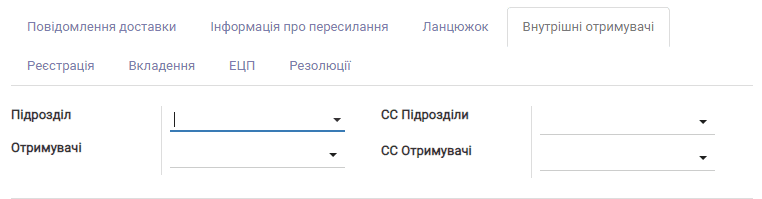
| Field name | Description |
|---|---|
| Department | If you want to notify the whole department, select it in this field |
| Employees | List of employees to be notified |
| Copy to departments | List of departments to which a copy of the notification will be sent |
| Copy to employees | List of recipients to whom a copy of the notification will be sent |
Printing the card
To print the card, select the corresponding menu item:
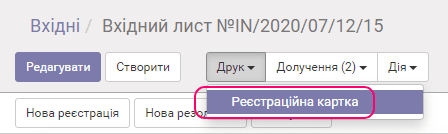
The card will be printed to a PDF file.
Deleting a document and other actions
To delete a document, use the Action menu.
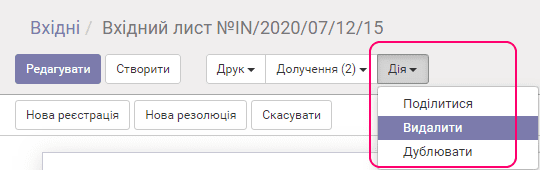
This menu can also be used to share the letter with other users and to create a copy of the current document.
The "EDS" tab
Actions on this tab are described in a separate article.
Working with resolutions. Executing the incoming item
After the letter card is created and saved, it is in draft status. Next, it must be moved to the Received status by clicking the button of the same name on the letter card. You can choose "Received Returned" and "Received Damaged" for cases when the letter (or parcel) was rejected for any reason.
As a result, a letter in the "Received" status gets a registration number (numbering and working with registration numbers are described in more detail in a separate section).
Next, the letter can be sent for execution using the resolution mechanism.
Creating a resolution
To create a resolution for a document, click the button:
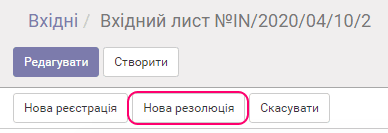
The resolution creation/editing form then appears:
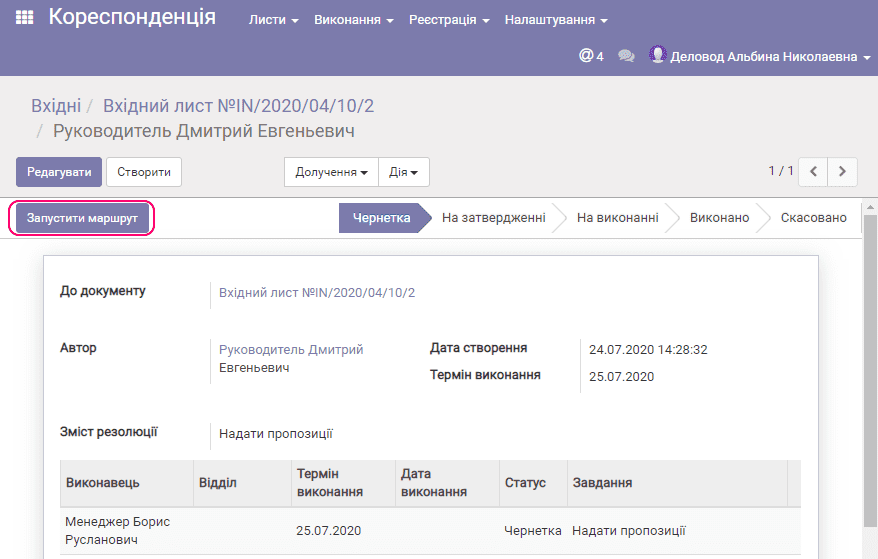
In the Author field, specify the author of the resolution if the resolution must first be sent to this employee for approval. For example, you are a records clerk, you created a resolution and specified your manager as the author. In this case, after the resolution is launched for execution, it first goes to the manager for approval. Otherwise, the tasks under the resolution are sent straight to the assignees.
In the Resolution content field, enter a brief description of what needs to be done for this document as a whole.
Next, in the assignees table, specify the employees who will execute the resolution, with a specific task and due date. A task can be assigned to a specific employee or to a department. In the latter case it is sent to all employees of the department.
Save the resolution and click Start route; the resolution is sent to the assignees or to the author for approval.
Approving a resolution
The employee who approves the resolution receives a notification about a new resolution submitted for their review:
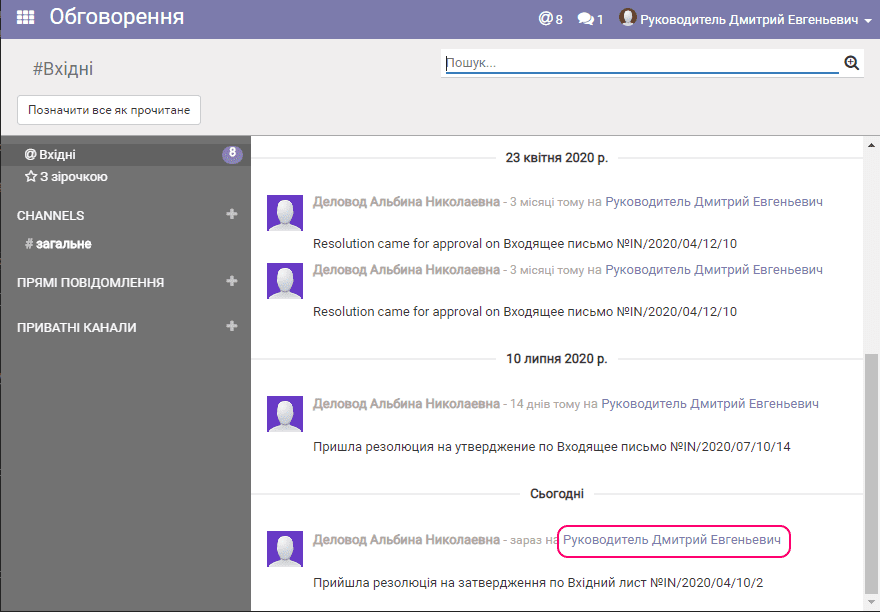
After you click the link, the resolution card opens:
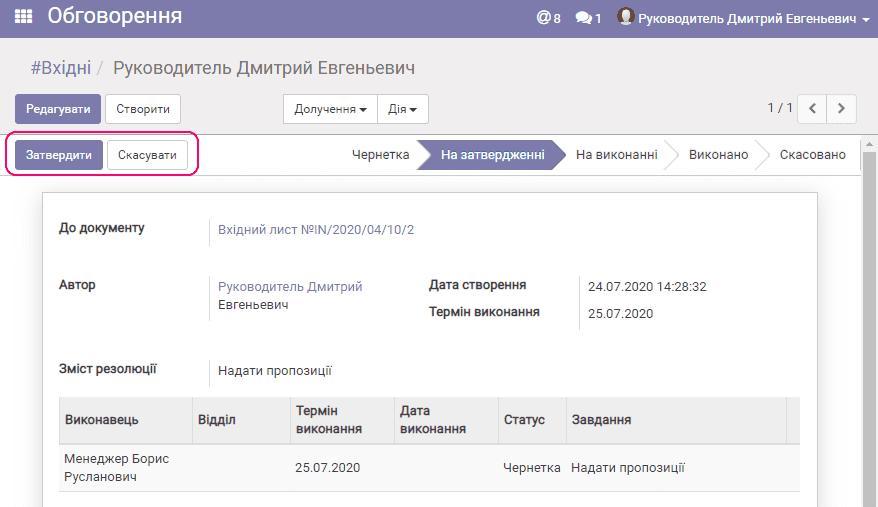
You can make changes to the resolution with the Edit button. You can add new assignees and change tasks and due dates. After saving the changes, click Approve. If you do not agree with the resolution, click Cancel.
After the resolution is approved, it gets the In progress status and all its tasks are passed to the assignees.

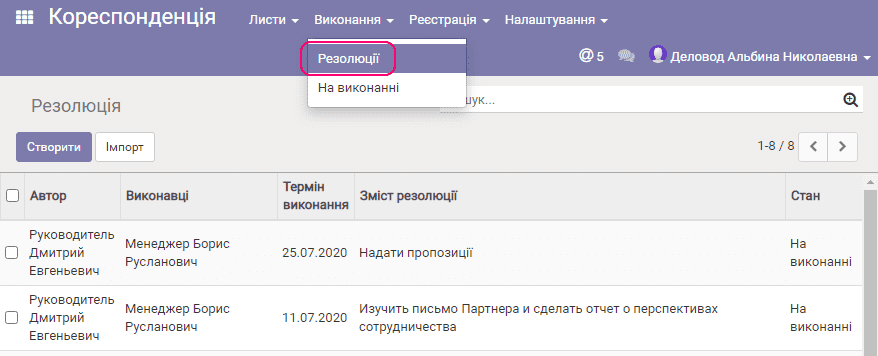
The list of resolutions available to you can be seen in the menu Execution/Resolutions.
Executing tasks under a resolution
When the assignee receives a notification about a new task, click the corresponding link:
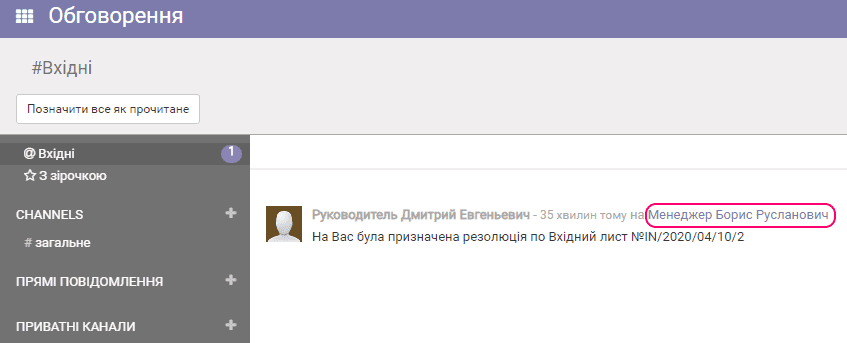
the task card opens:
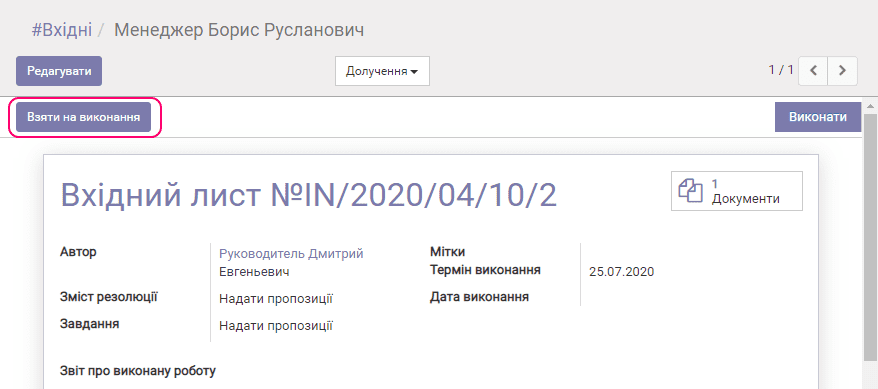
Click Take for execution to start working on the incoming item. If the task was sent to a department, by clicking this button you become its direct assignee.
After you have completed the work related to the task, you must report on its completion. To do this, click Edit on the task card and enter your report.
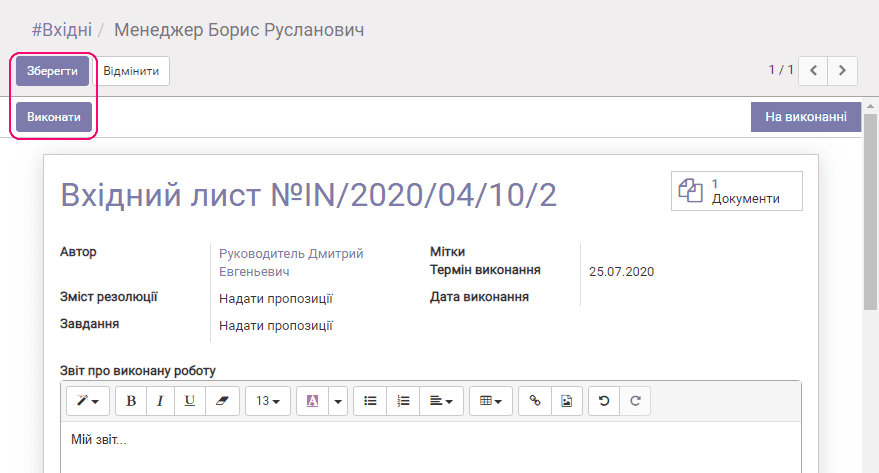
If necessary, you can attach files to the task card. Then click Save and Complete. The task then moves to the Completed status.
You can see the status of all documents you are involved in using the menu Execution/In progress. For convenience, select the kanban view:
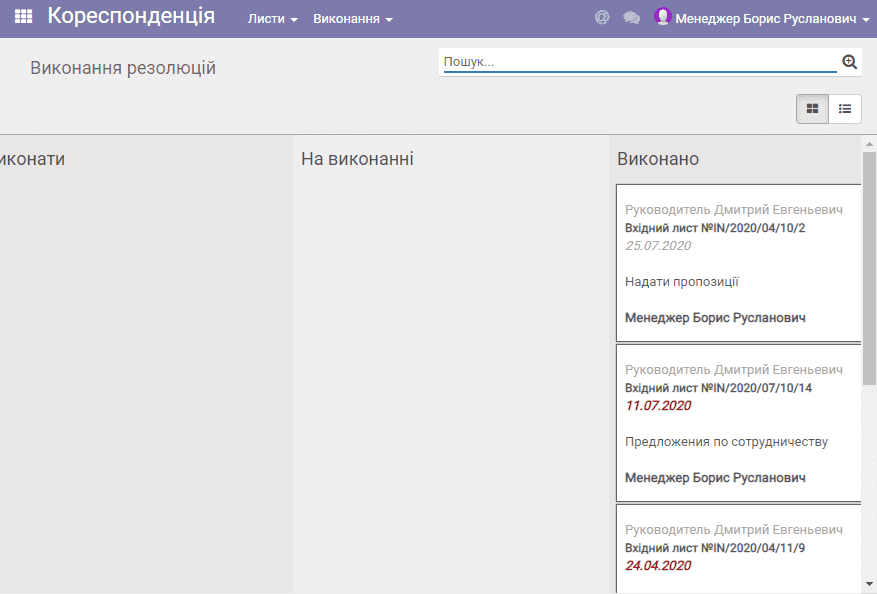
You can select a task to view/execute directly from this kanban.