Simplified production management
Introduction
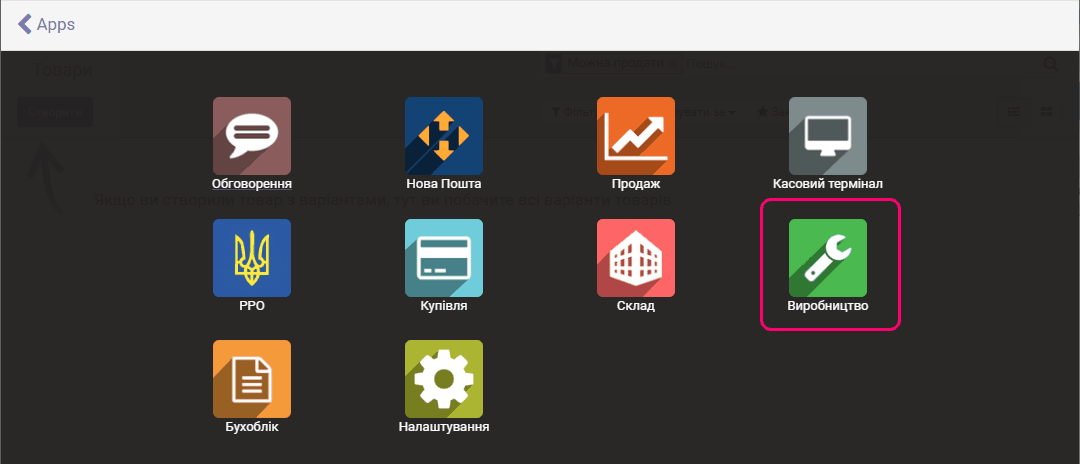
The Production module lets you organize production management at your enterprise: create bills of materials (specifications) and orders for producing products that can later be sold, and track the execution of production processes. The program also allows you to use routings, create work centers for manufacturing products, keep track of working time, monitor equipment load, and so on. To start, go to the "Production" module:
We recommend first reading the article "Quick start".
Production management options
The program offers two ways to manage production:
- Simplified - using orders. There are only bills of materials for manufacturing products.
- Extended - using work orders. Production areas and routings are entered.
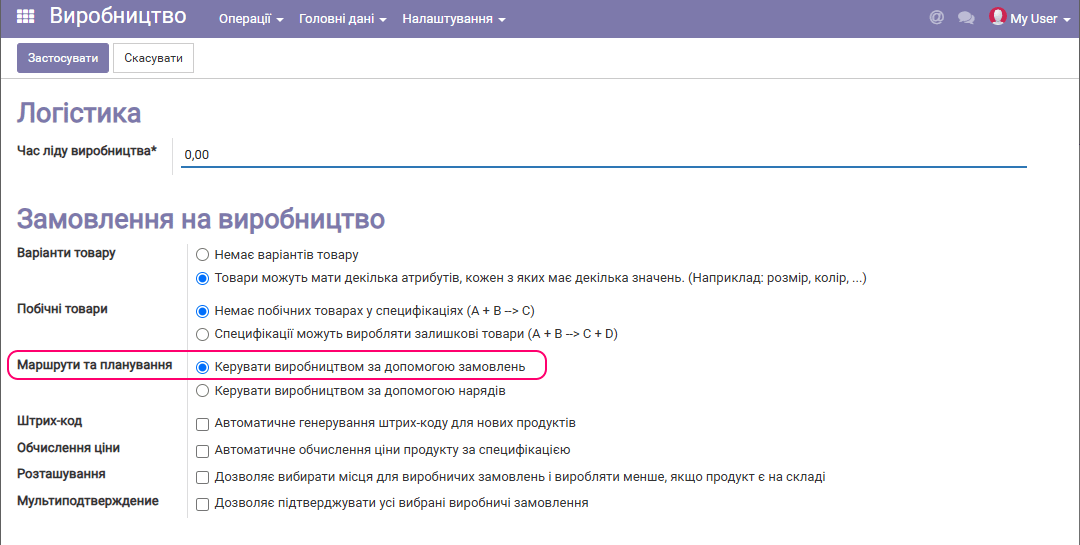
In this article we look at the first option - simplified production management, which is used in most practical cases of working with the system. To enable it, select the option Manage production using orders in the module settings:
Test data
You can use test data to learn the program and its interfaces. To load test data into the program, use the Start over function and select Production - Populated database; see the article Registration in the program. In the same way you can switch from test data to an empty database. Below we work with an empty database, which we fill step by step with products while exploring the program's features.
Creating the list of components and products
First, decide which products will be components for manufacturing other products and which will be manufactured. For example, we have a product "Chair", which is manufactured from the component products "Seat" in a quantity of 1 pc and "Leg" in a quantity of 4 pcs.
We create the product "Chair". On the "Warehouse" tab we specify the following settings:
Production - means that this product will be manufactured and a bill of materials can be created for it.
Make to order - when an Issue note with this product is created and confirmed in the "Sales" module, a production order for this product in the ordered quantity is created automatically.
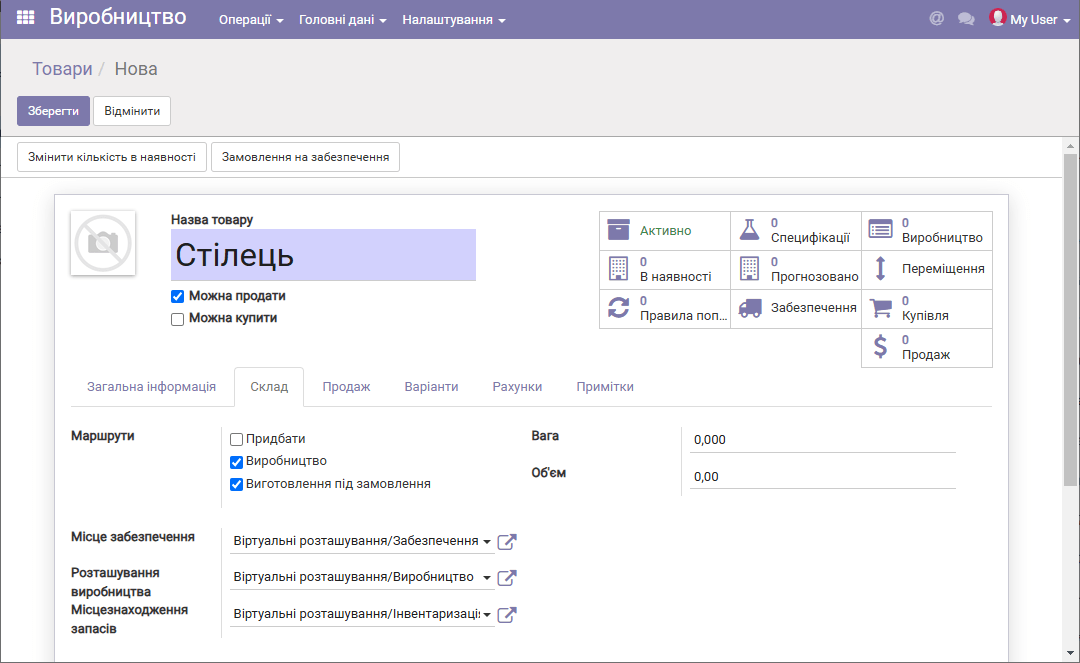
We create the product "Seat", which will be a component of the product "Chair". On the "Warehouse" tab we specify the "Purchase" setting, which means the product will be purchased for production:
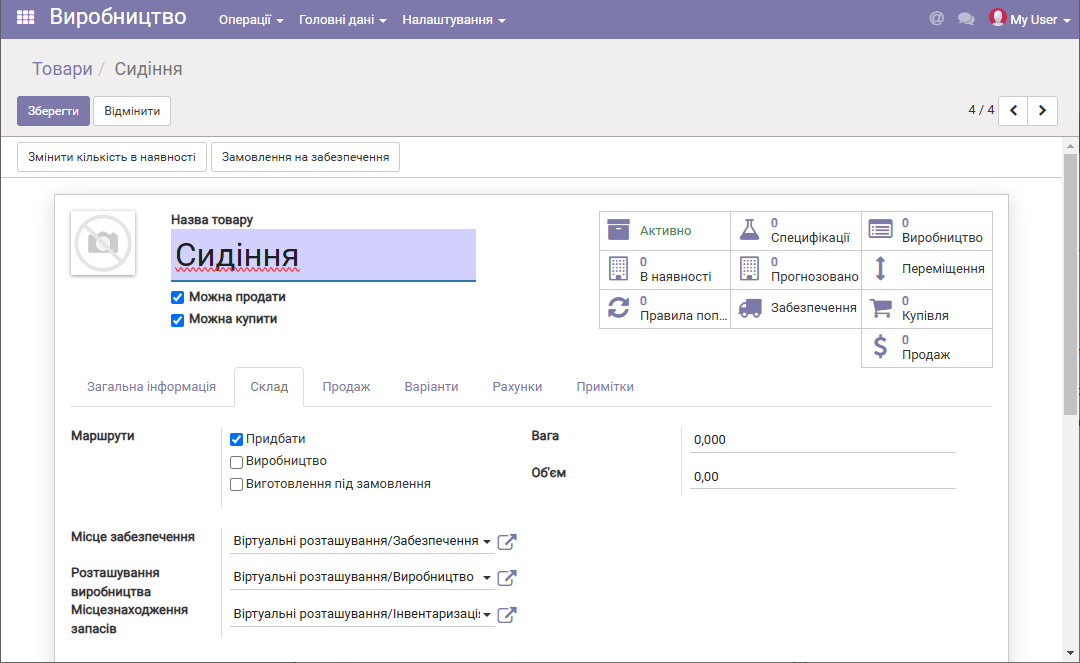
If needed, we can change these settings if we want the "Seat" to also be manufactured from its own components.
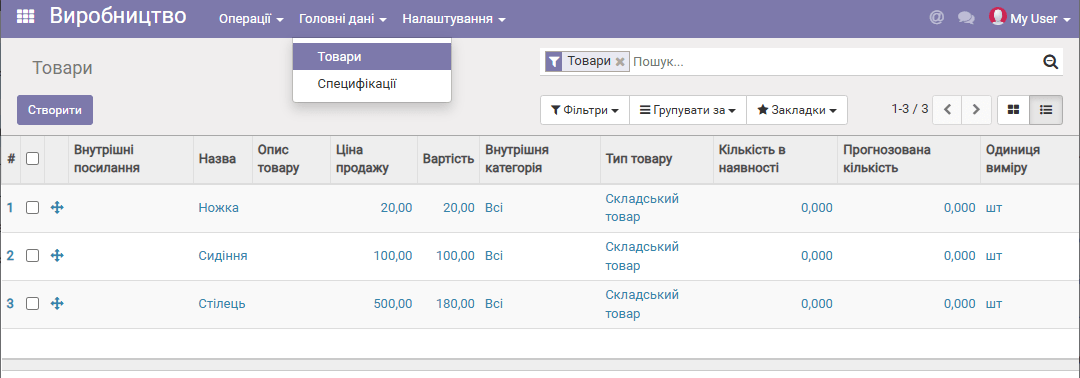
With similar settings, we create the product "Leg", which is a component of the Chair. As a result, we get the following list of products:
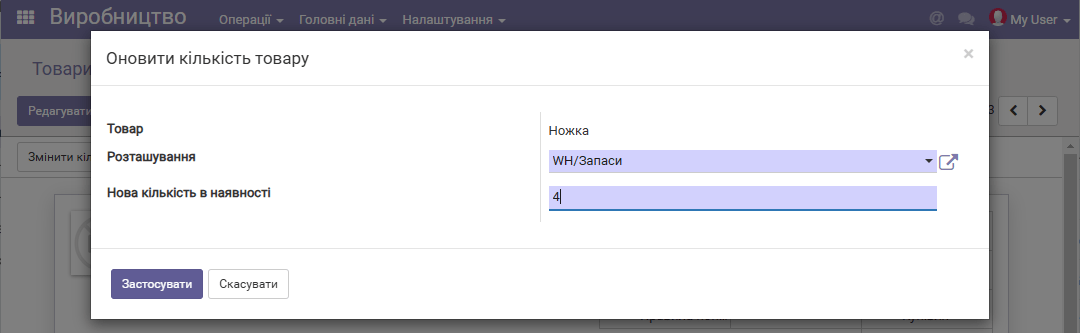
Next, as an example, let us post the component products to the warehouse using an inventory count. To do this, open the product cards "Seat" and "Leg" and click the "Update quantity on hand" button; set the values: seat - 1, legs - 4 pcs.
For more details on receiving products into stock, see the article Quick start.
Bills of materials
Bills of materials (specifications) let you link the manufactured products with the component products. To create a bill of materials for the Chair, go to the "Production" module and select the menu item Master data -> Bills of materials. Click Create:
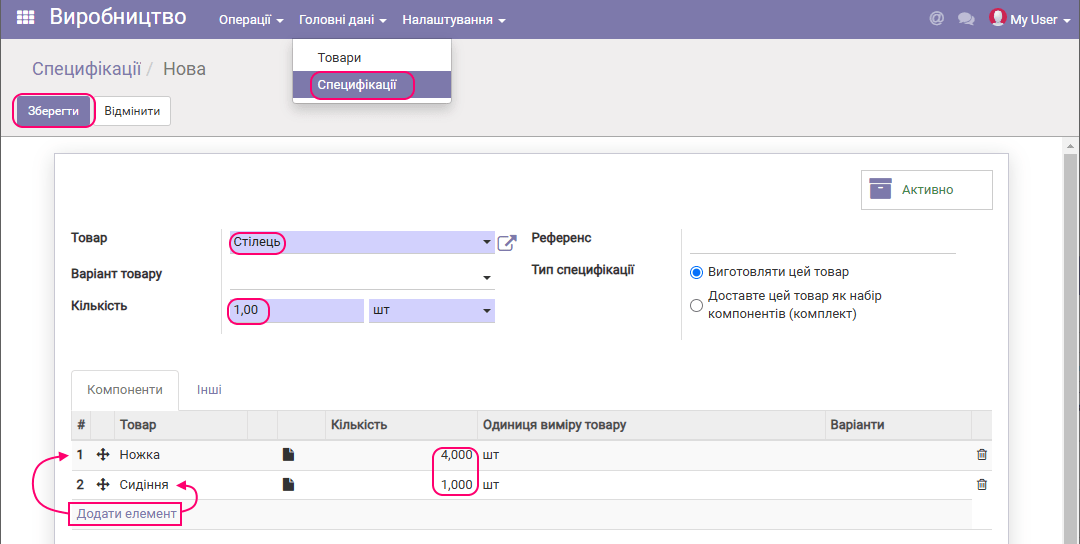
We select the product "Chair" and specify that manufacturing 1 pc of this product requires 1 pc of the component "Seat" and 4 pcs of the component "Leg". We save the bill of materials.
You can create several bills of materials for one product and select the appropriate one when working with production orders. However, in most cases it is better to use product variants to create a separate bill of materials for each product variant.
The program also lets you create bills of materials for products that consist of other products and are thus manufactured according to their own bills of materials. The nesting level of bills of materials is not limited.
Working with production orders
We have created a bill of materials for the product and posted the components. To start the production process, go to the menu Operations -> Production orders and click Create:
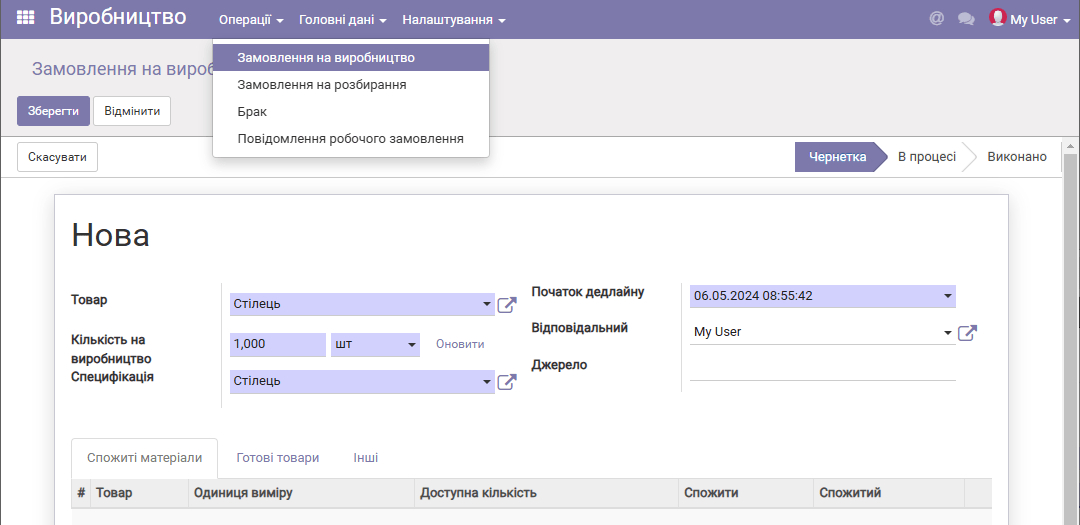
Select the product to produce, "Chair", specify the quantity to be produced, and save the order. The program then lets you check whether the components are available in sufficient quantity to manufacture the product(s). Click Check availability:
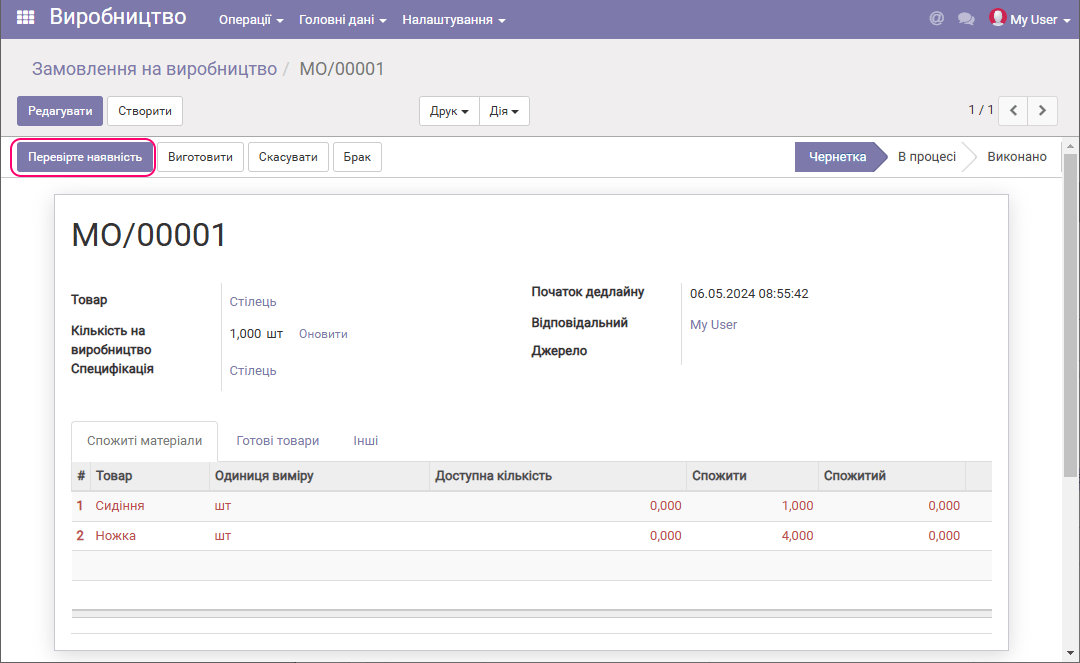
If there are enough components, all lines in the order are highlighted in black; if some products are missing, those lines are highlighted in red. You can change the quantity of products to manufacture by clicking the Update link and entering a new quantity. Then you can start the check of component availability again for the new quantity. If everything is fine, click Produce:
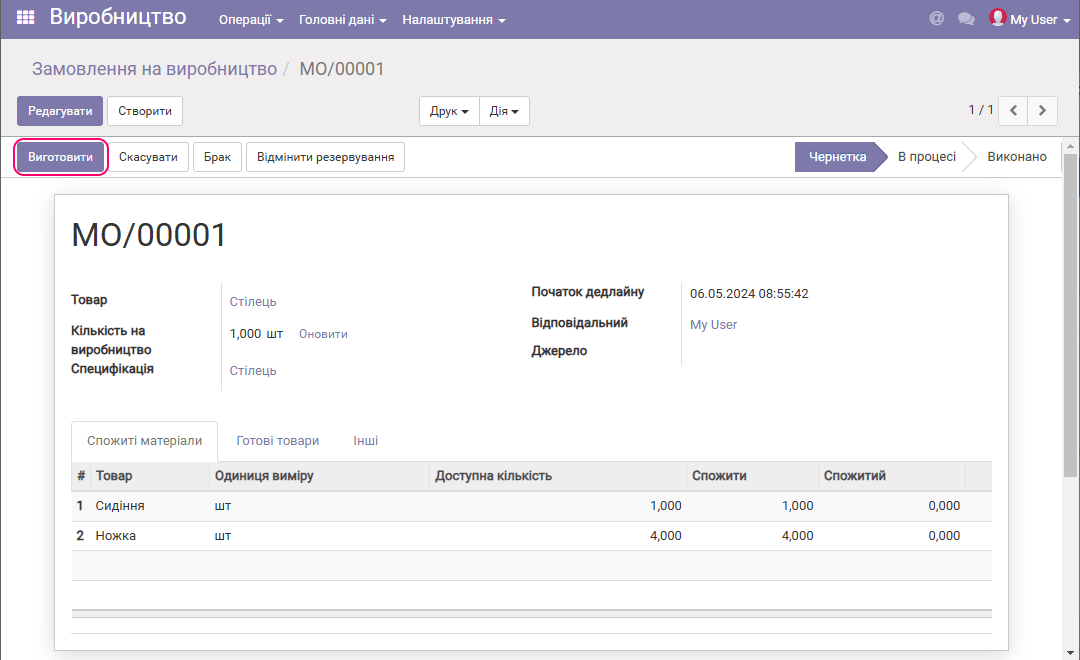
and then Record production:
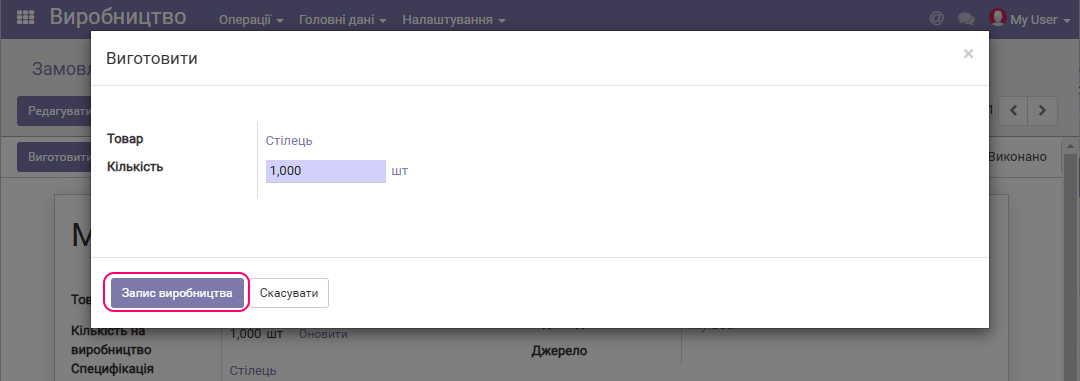
The component products are reserved in the warehouse for manufacturing the product. Next, suppose the production process of the product takes place.
At some point you get the information that the products have been manufactured. Then click the Mark as done button.
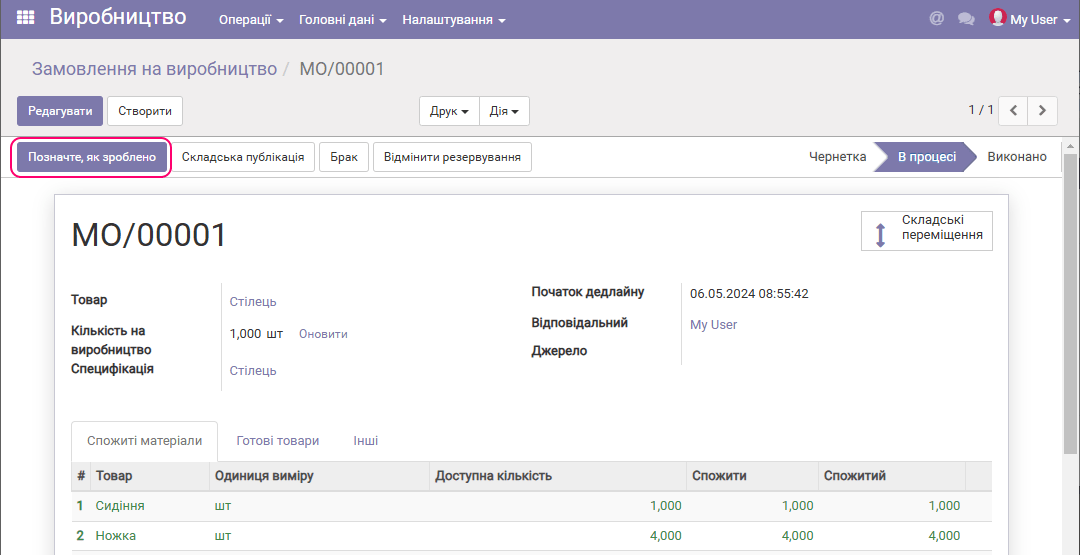
At this moment the new quantity of the manufactured product appears in the warehouse. The component products are consumed. The order moves to the Done state; it cannot be cancelled, so the component products cannot be returned to the warehouse that way.
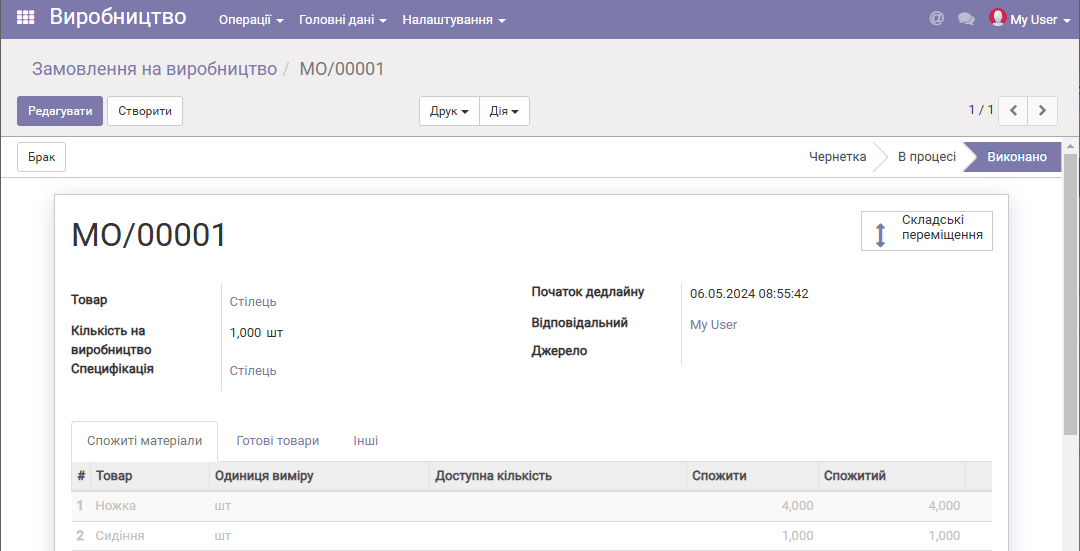
You can return the components by disassembling the product. You can also write off the product as defective. We look at these options below.
Disassembly orders
Disassembly is the process opposite to production. You can create a Disassembly order by specifying the quantity of the product to disassemble, or by selecting the Production order by which this product was manufactured. In the latter case, the quantity of the disassembled product matches the quantity manufactured under the order. All parts are returned to the warehouse. The quantity of products in the warehouse is reduced by the quantity of the disassembled product.
To disassemble, select the menu item Operations -> Disassembly orders and click Create:
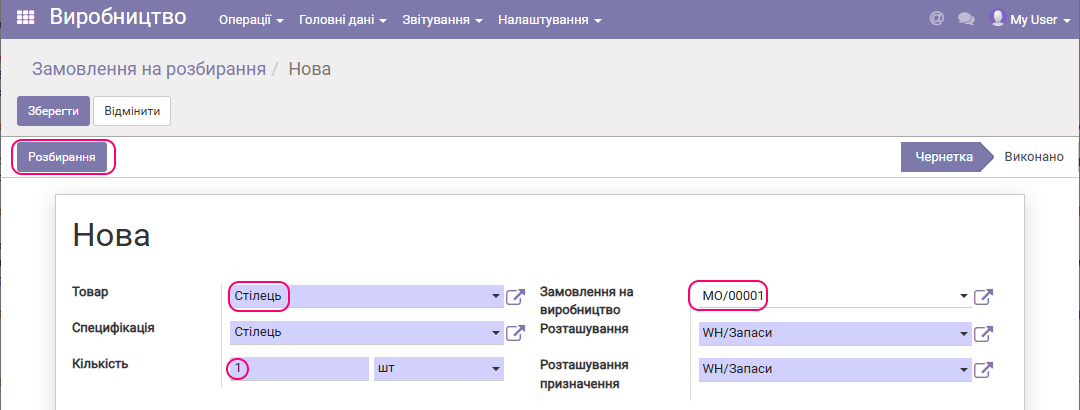
In our case, we can specify that this is the disassembly of a product that was created in a specific production order. In general, however, this is not required, for example, when your production actually disassembles products manufactured elsewhere.
We specify the product and quantity and click Disassemble. As a result, the product is disassembled into components, which appear in your warehouse.
Scrap
Defects may occur during production. You can write off a product or any other item as defective (and thus remove it from the warehouse) using the menu item Operations -> Scrap in the "Production" module. A similar menu item exists in the "Warehouse" module. Click Create; the defect write-off sheet appears:
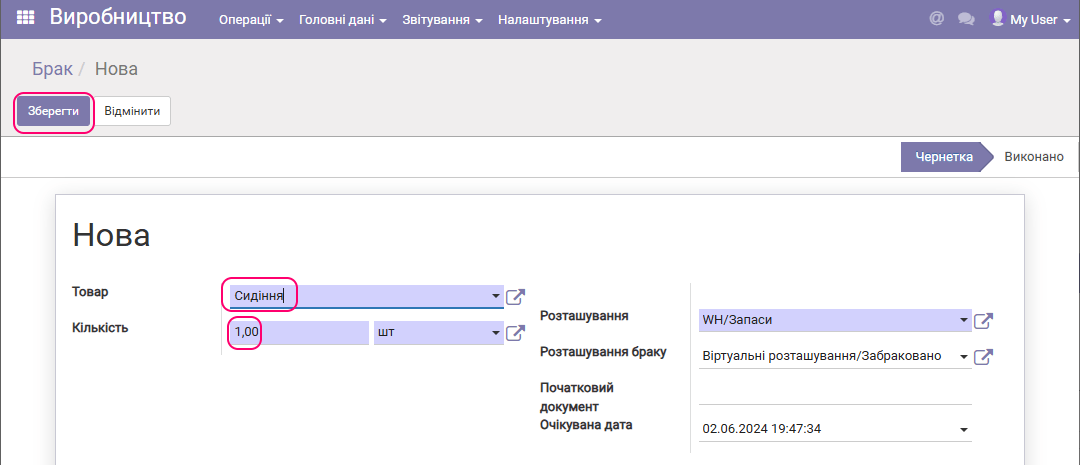
Select the product and the quantity to be written off as defective, and click Save. The product is written off as defective.
You can write off a product as defective directly from a completed production order. The order has a corresponding button for this. Attention! The defect write-off operation is irreversible and cannot be cancelled.
By-products
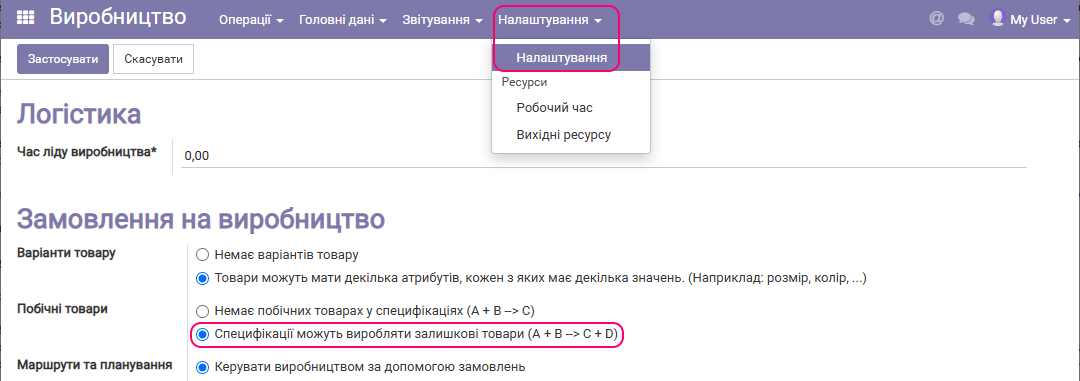
When manufacturing certain products, some quantity of by-products may result. For example, when manufacturing a metal item, a certain amount of metal waste appears, which can later be sold. We can take this into account. To do this, in the Production module settings, set the option "Bills of materials can produce residual products (A + B --> C + D)":
In the bill of materials, on the By-products tab, specify which products will be obtained:
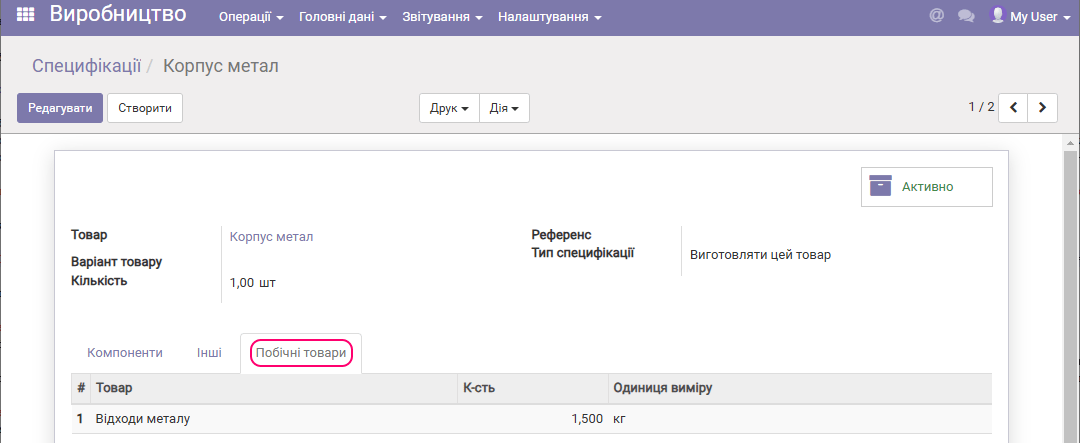
Now, after production of this product is completed, the by-product ("Metal waste") appears in our warehouse in the specified quantity.
Reports and additional features of the solution
The "Production" solution offers several useful reports and features. Let us look at them in detail.
Printing the product structure and cost price by bill of materials
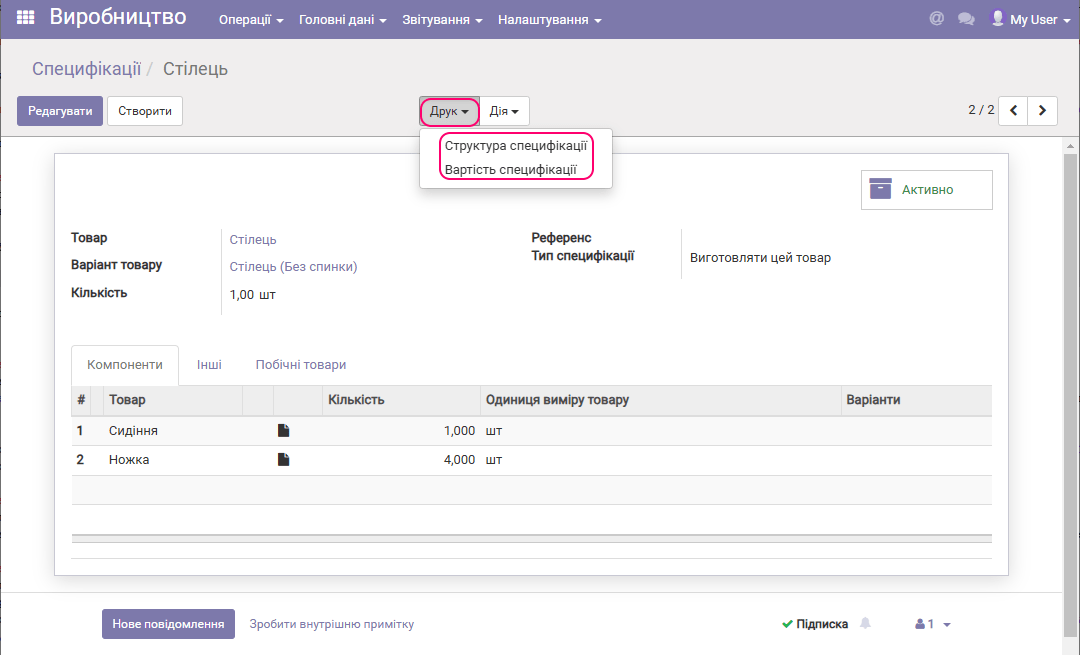
You can print the structure of the bill of materials and the calculation of the product cost price as the sum of the cost prices of its components according to the bill of materials. To do this, open the specific bill of materials, click the Print button and select the corresponding item:
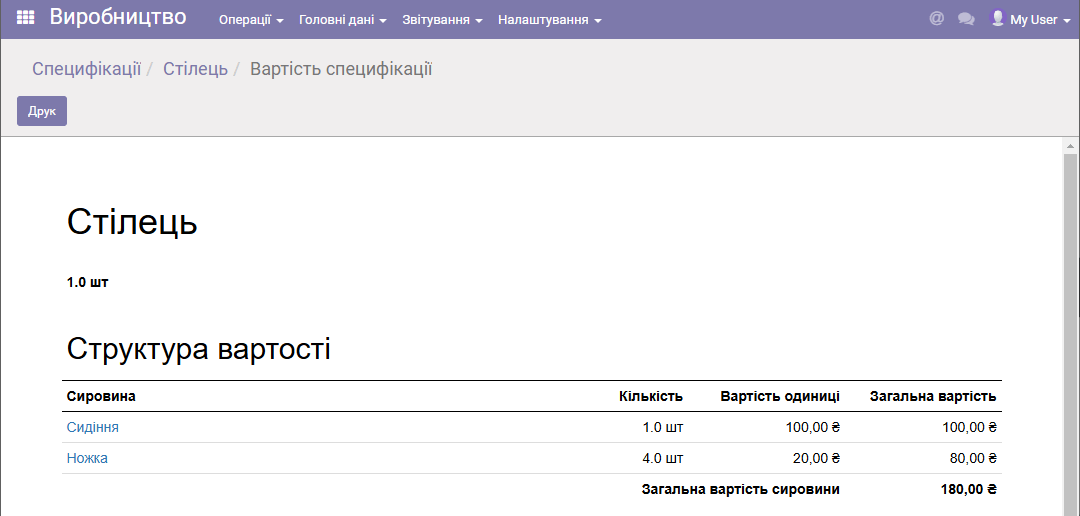
Example of the "Bill of materials cost" report (calculation of the product cost price by bill of materials):
Automatic calculation of product cost prices
You can automatically transfer the cost price calculated by the bill of materials to the Cost field of the product card. To do this, select the option in the Production module settings:
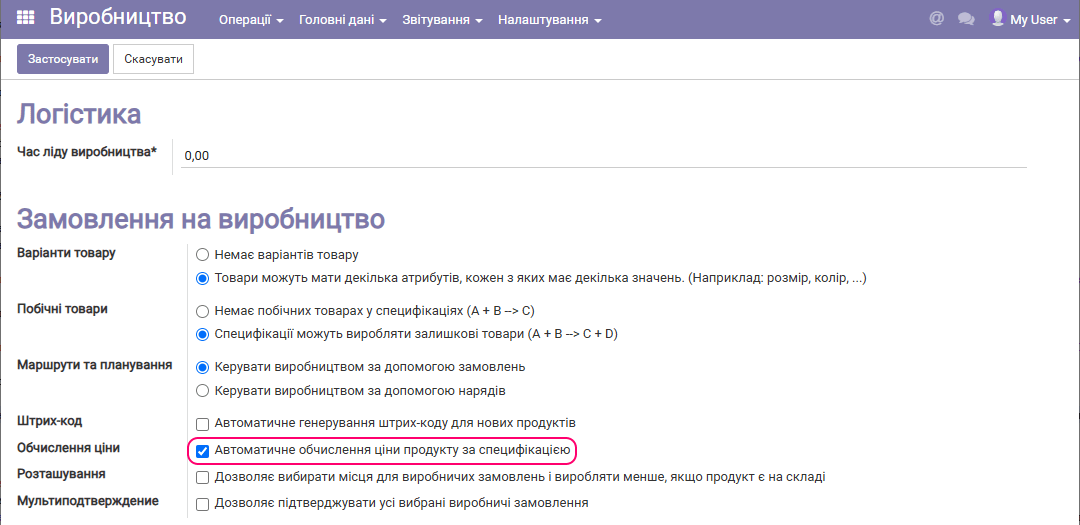
Click Apply. A new item Price recalculation appears in the Master data menu. Use it to automatically recalculate the cost prices of products according to the created bills of materials.
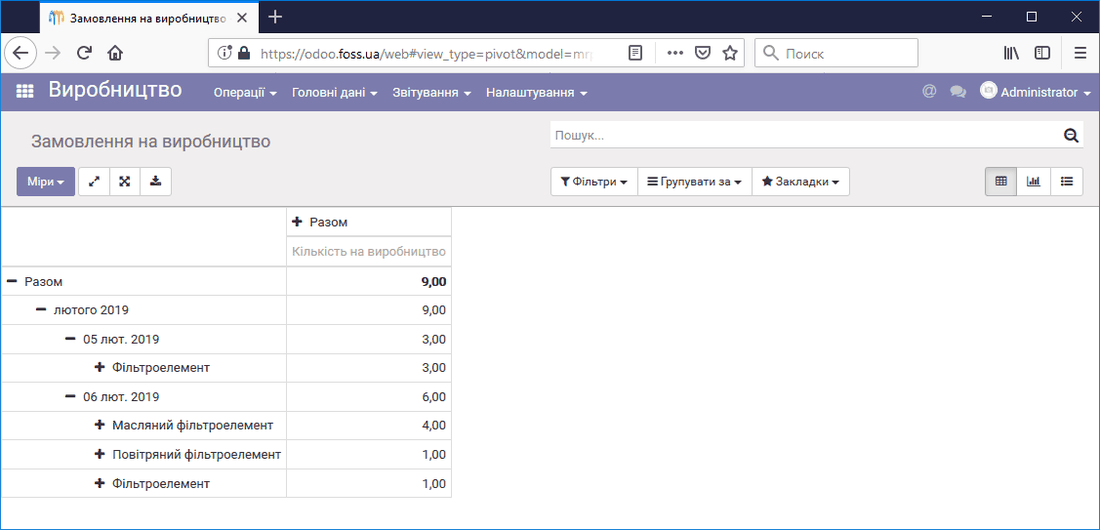
The "Production orders" report
The Production orders report provides information on manufactured products. This report can be configured in the same way as the Sales report.