Software cash register setup: getting started
Introduction
The ERP FOSS service is offered in two packages that differ in price: the basic package and the "Software cash register" package. The basic package provides all functions for comprehensive business automation (warehouse, production, trade, etc.), including the software cash register. The "Software cash register" package provides only the PRRO (software cash register) function.
The full set of ERP FOSS service modules:
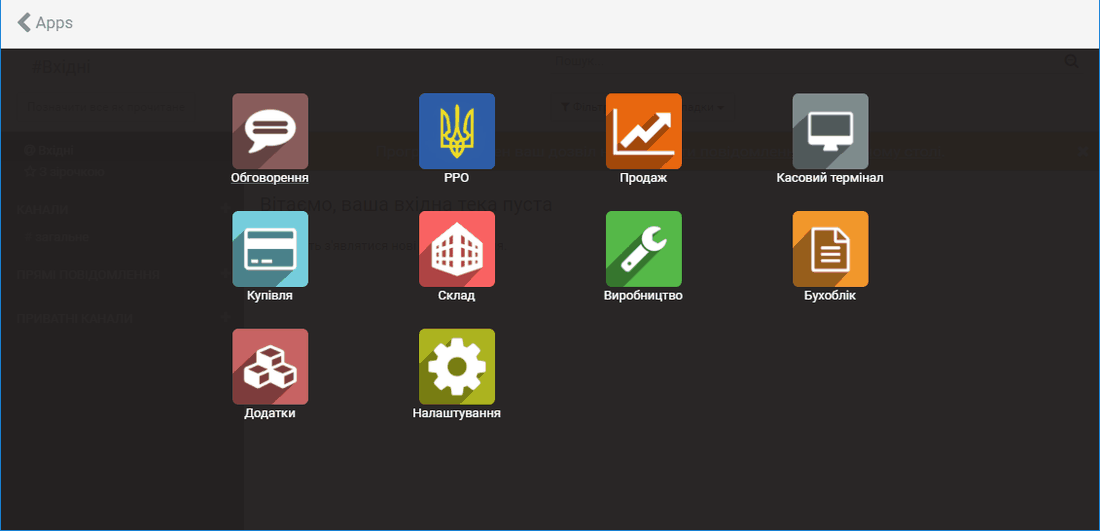
To set up the PRRO, you need the Settings, Accounting and, of course, Cash register modules.
How to start working with the software cash register
To start working with the software cash register you need to:
- Get an electronic key and a qualified public key certificate
- Register your business unit on the tax portal
- Register the PRRO on the tax portal
- Register the public key certificate on the tax portal
- Configure the ERP FOSS service
Let us look at these steps in detail.
Getting an electronic key and a qualified public key certificate
The key (electronic digital signature, EDS) can be obtained at your tax office or at another accredited certification authority, as well as online, for example, in the Privat24 portal.
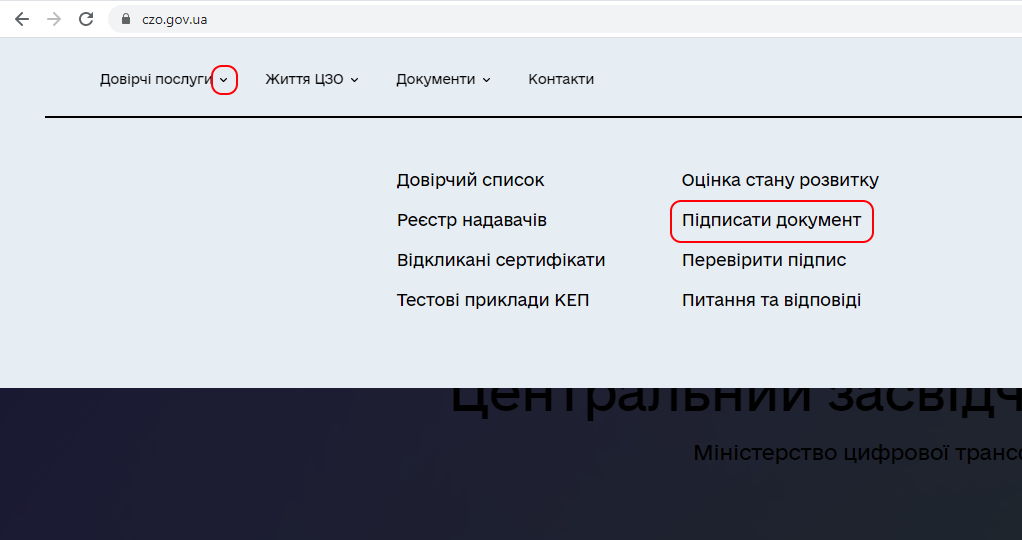
If you have an EDS but no qualified certificate, you can generate it yourself and download it on the CZO website. This certificate is required to register a cashier. On the CZO website, select the menu item Trust services/Sign a document:
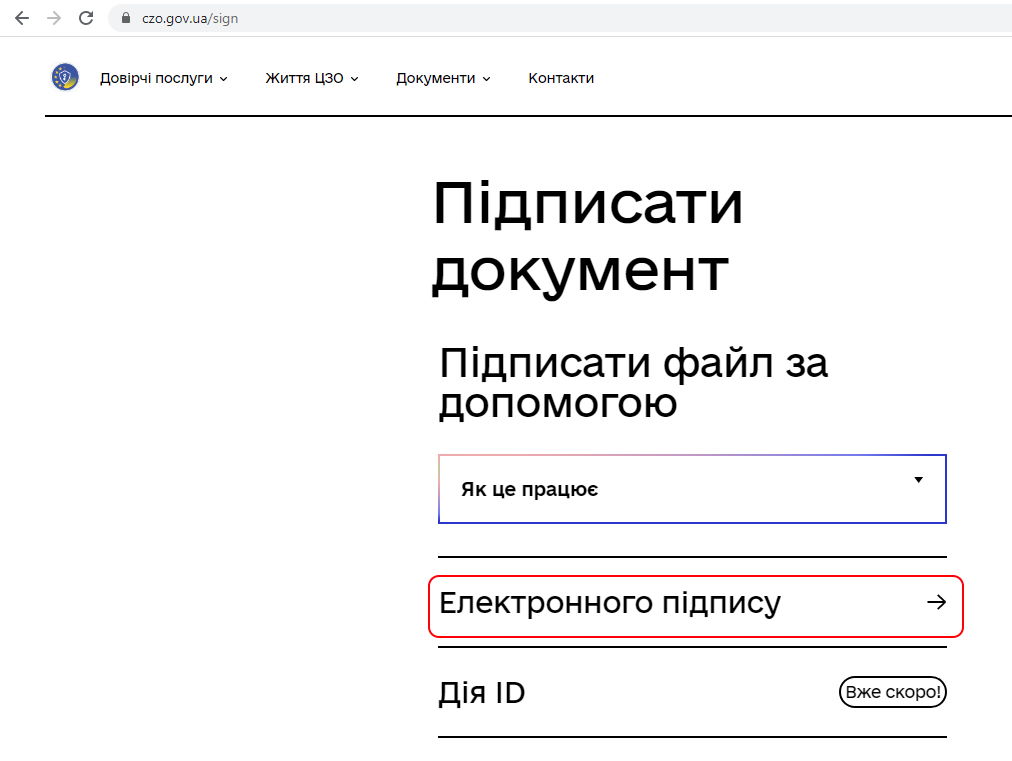
Next, click Electronic signature:
A window for entering the EDS key appears.
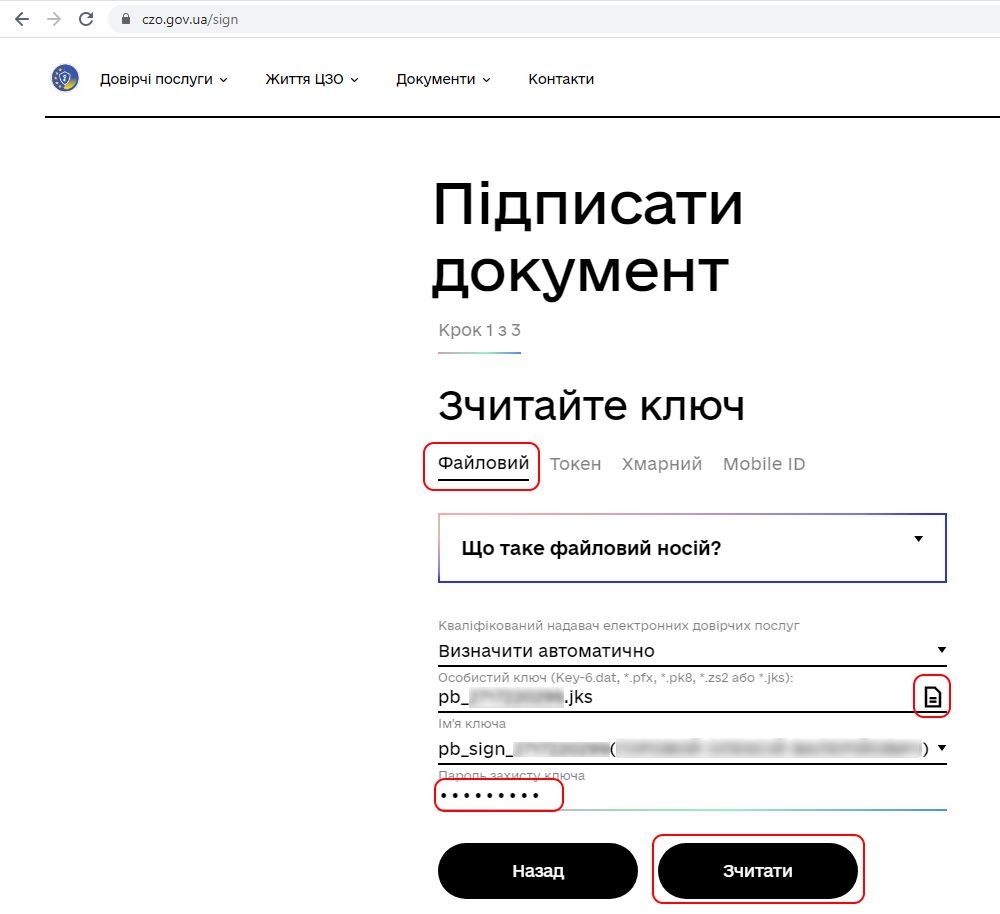
Select the "File" media type, select the file of your EDS key, for example, the *.jks file from Privat. In the "Key protection password" field enter the password for your key and click Read:
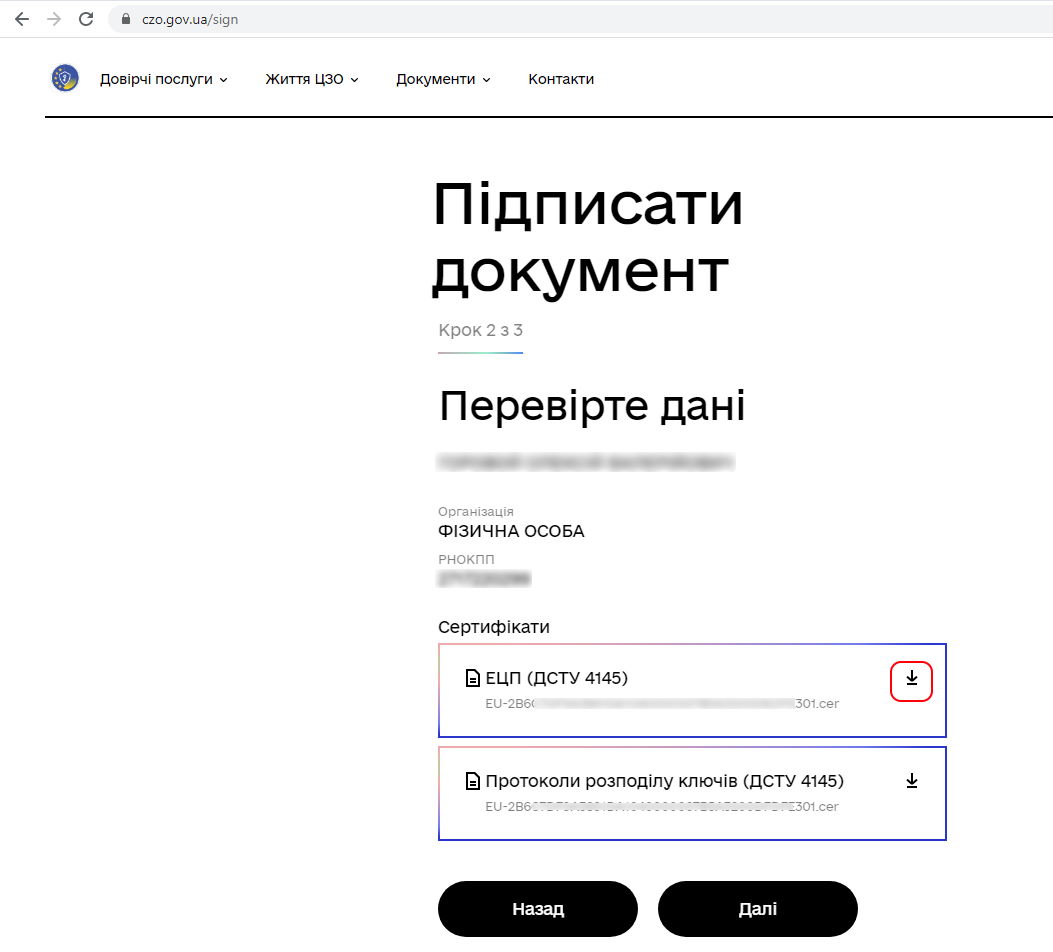
Download your qualified public key certificate using the EDS (DSTU 4145) link and save this file (of the .cer type) on your device. Close the CZO website.
You will need the downloaded certificate later when filling in forms on the tax portal.
Registering a business unit
To register a business unit, log in to the taxpayer's electronic account and submit form No. 20-OPP (F1312003):
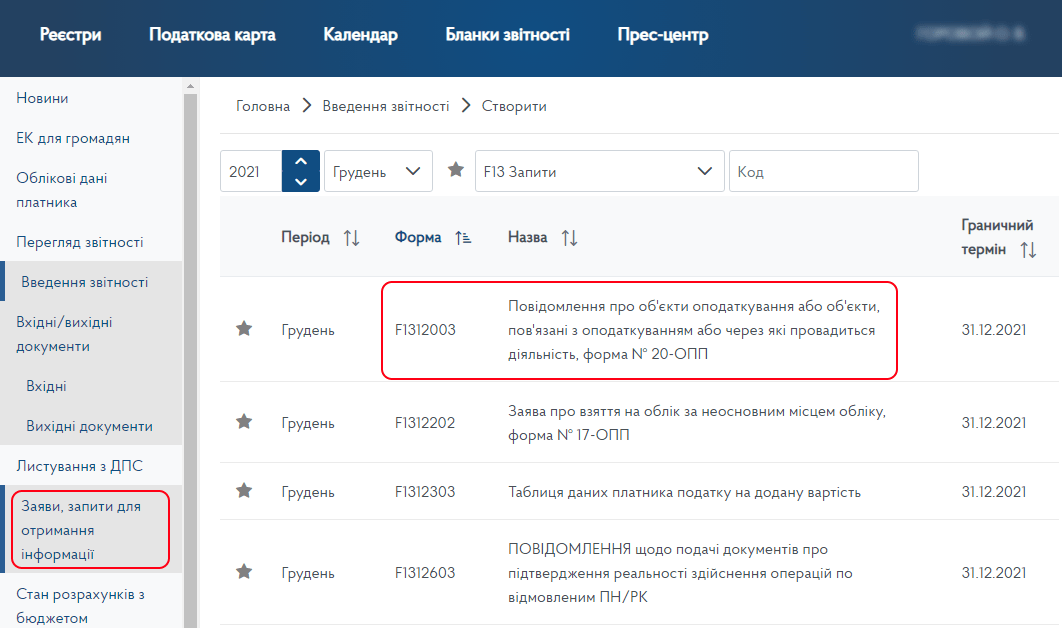
Registering the PRRO
To register the PRRO, submit the "Application for registration of a software point-of-sale register in form No. 1-PRRO" (Form No. 1-PRRO, F1316604):
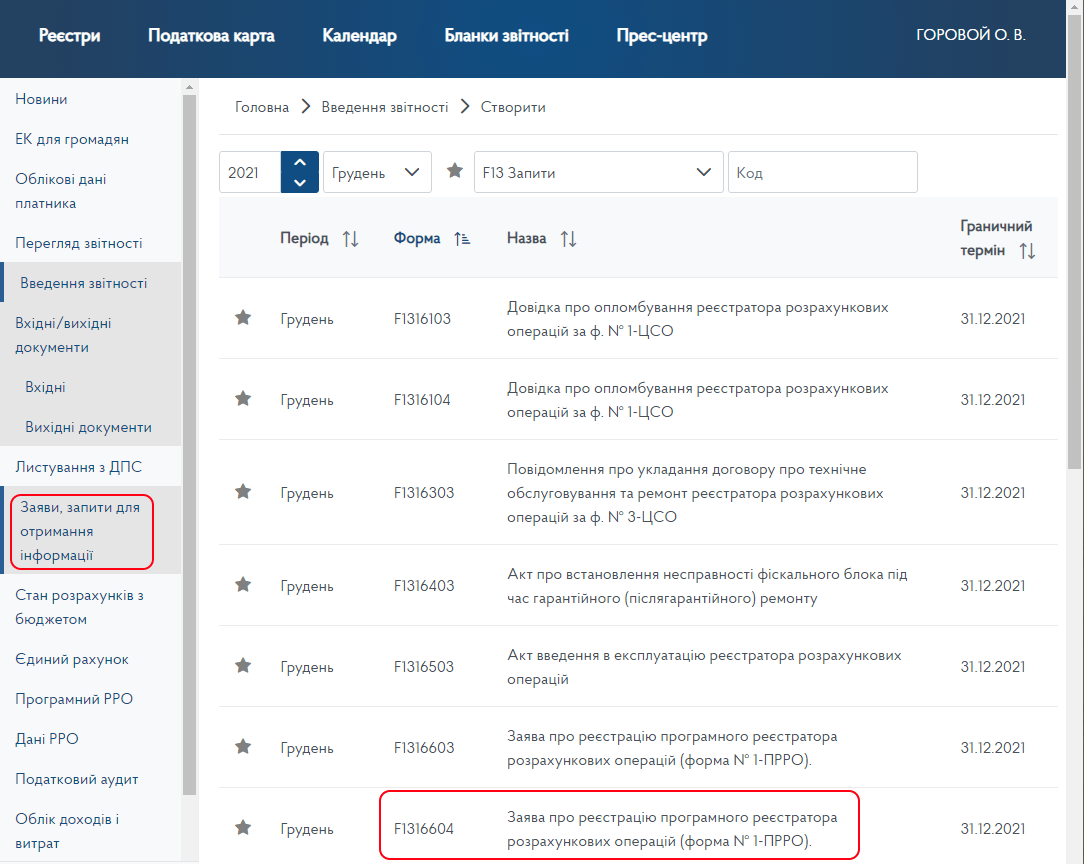
When filling in the form, pay attention to the items in the figure below and select the following options:
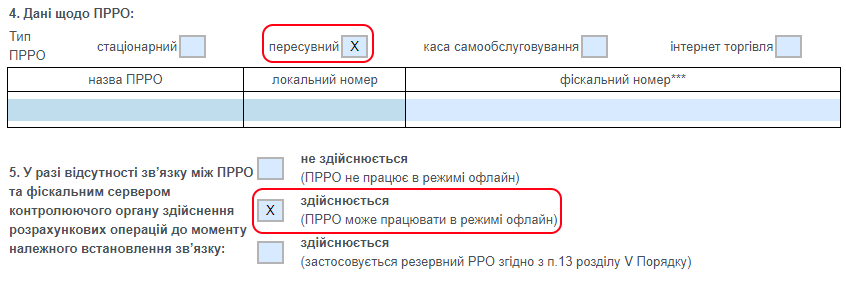
After submitting, check your electronic account for receipts on the processing of the application. If processing is successful, you get: "Document accepted" "Information – PRRO "Cash register name" with local number "Cash register number" has been assigned fiscal number "PRRO fiscal number"".
Registering the public key certificate
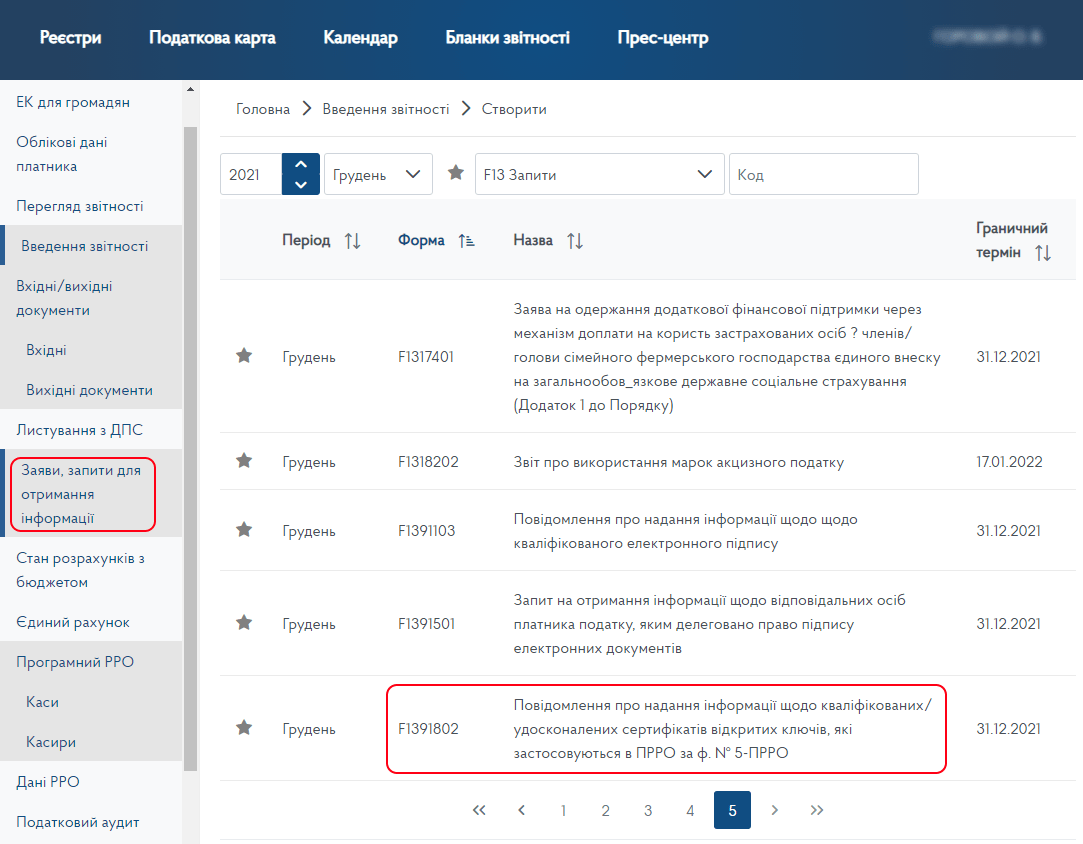
You need to submit the "Notification on providing information on qualified/advanced public key certificates used in the PRRO" (form No. 5-PRRO, F1391802) for the person whose EDS will be used to open shifts, sign z-reports, etc.
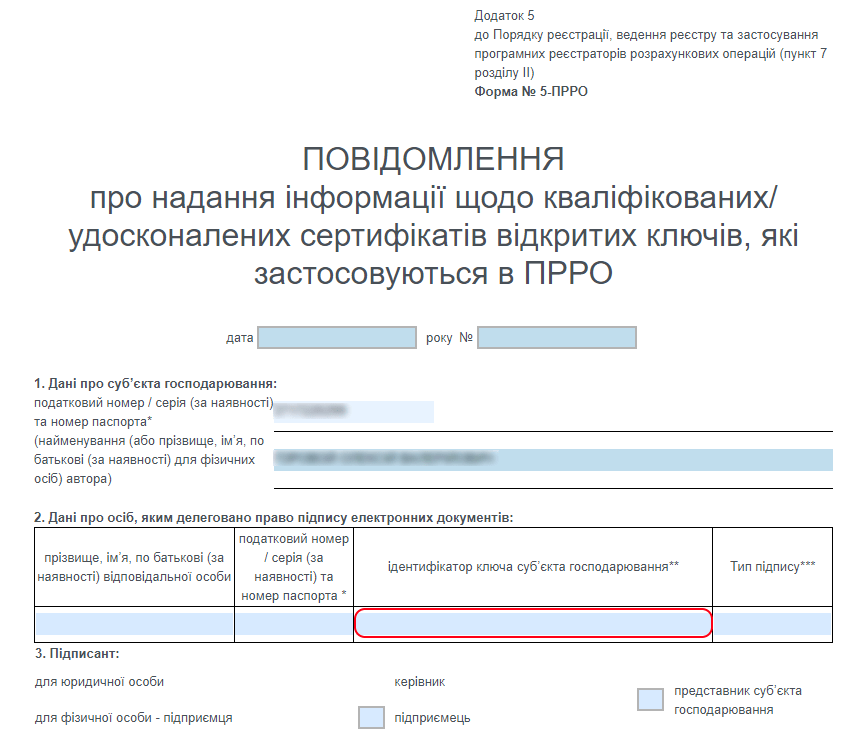
Fill in the form; in the "Subject key identifier" column you must enter the data of your qualified certificate (the procedure for getting it on the CZO website is described above).
Open the certificate file, go to the "Details" tab and select the "Subject key identifier" field:
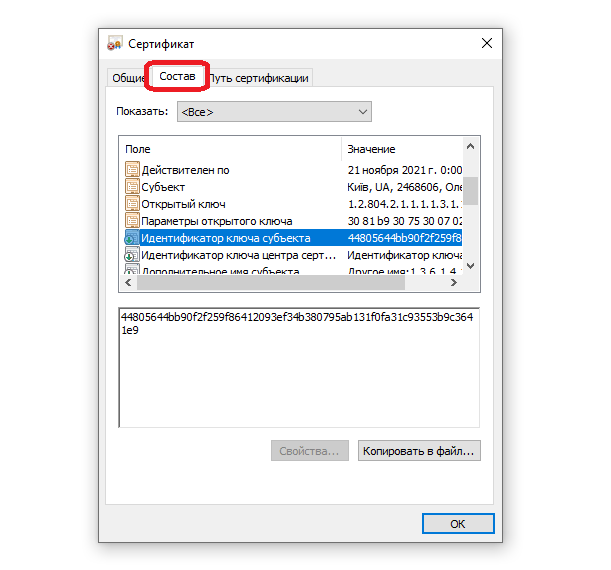
Copy this string and paste it into the form above. In the "Signature type" field of this form enter Cashier or Senior cashier.
Setting up the software cash register in ERP FOSS
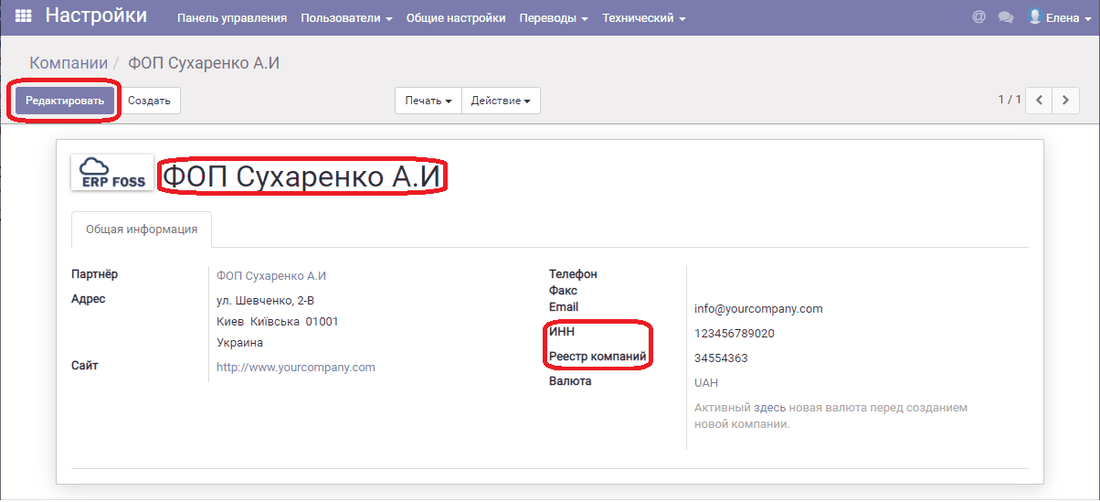
The first step is to specify your company. To do this, go to the Settings module. Select the menu item Users/Companies. The program usually already has a company named My Company. It must be renamed: click Edit, enter the name, address, TIN, EDRPOU code ("Company registry" field) and click Save.
The next step is to set up payment journals. To do this, go to the Accounting module. Select the menu item Settings/Journals:
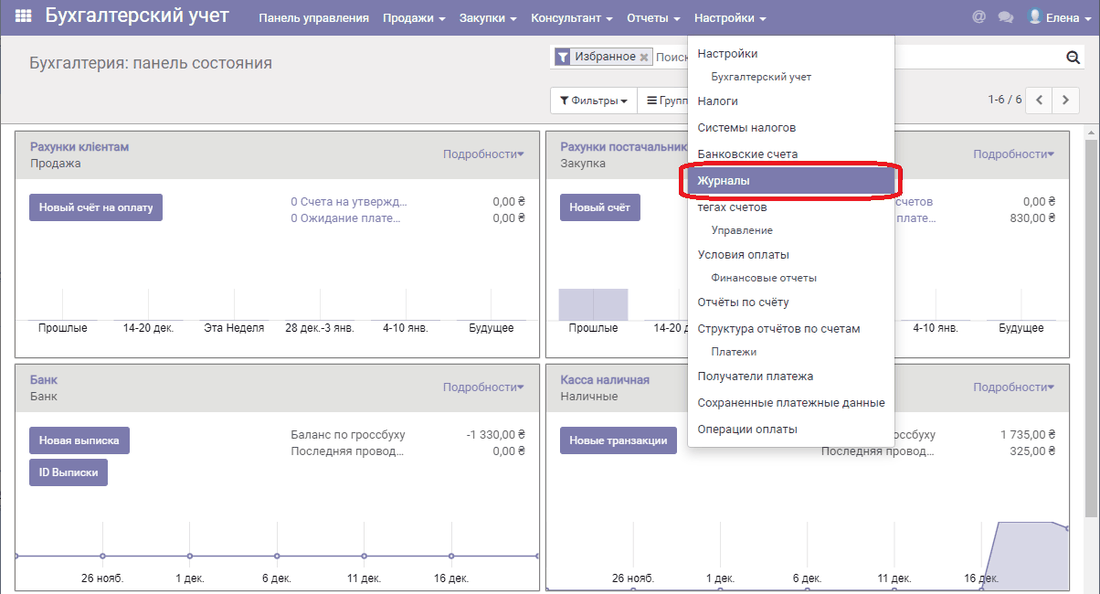
The system usually already has payment journals - Bank and Cash. You need to decide which payment journal will be subject to fiscalization. To do this, open the payment journal card, click Edit, go to the "Advanced settings" tab and select the "Subject to fiscalization" flag:
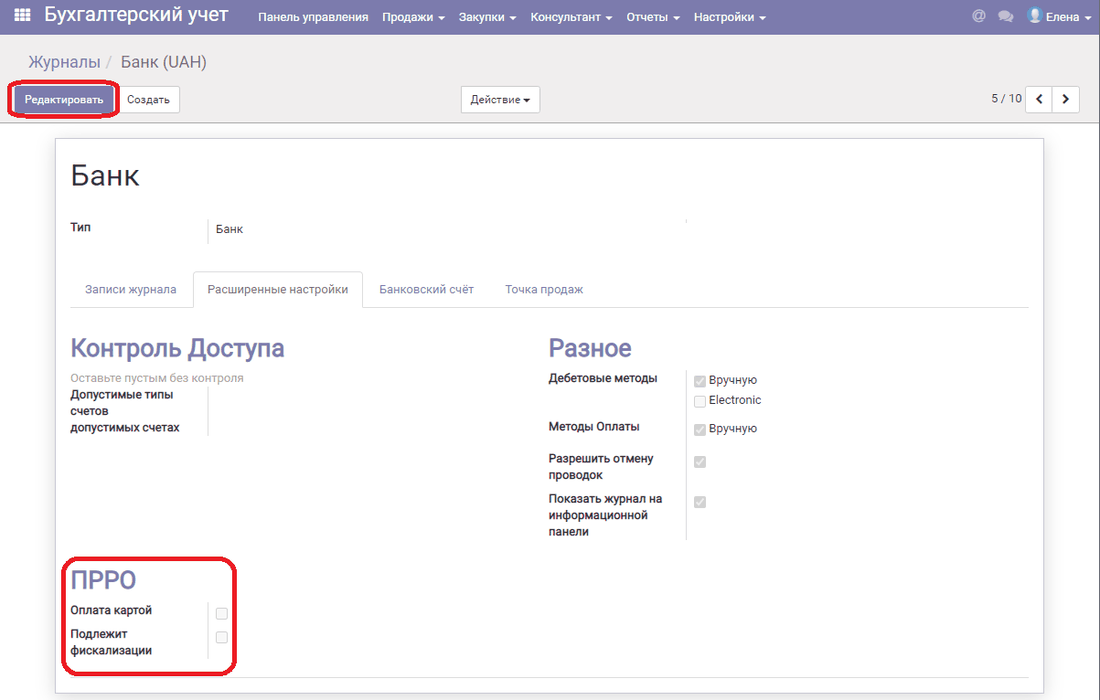
You can also select the "Card payment" flag if you accept payments to card accounts.
Next, create a cashier, a business unit and a transaction recorder.
To do this, go to the Cash register module, select the menu item Settings/Cashiers and click Create. Enter the cashier's name - the one that was specified earlier when registering on the tax portal.
Similarly, select the menu item Settings/Business units and click Create. Enter the name of the business unit - the one that was specified earlier when registering on the tax portal.
Finally, create a transaction recorder in the program:
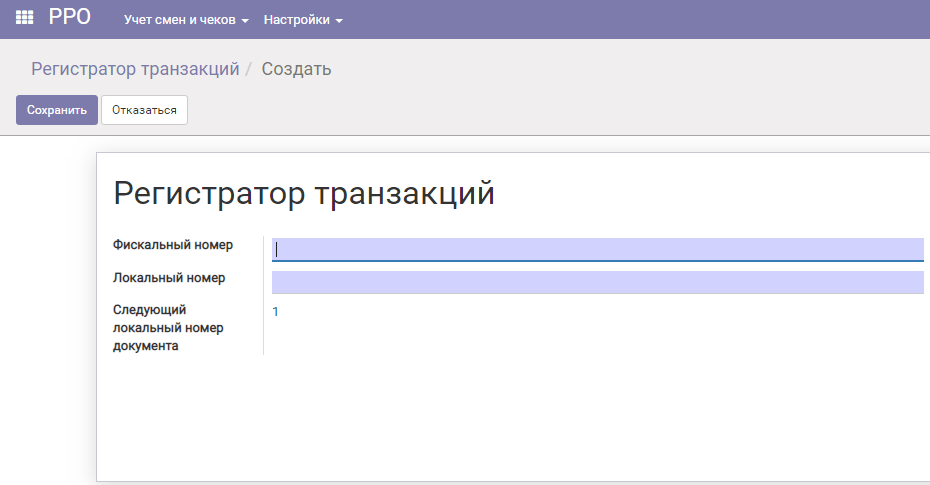
In the "Fiscal number" field enter the PRRO number received when registering on the tax portal, and in "Local number" enter the one you specified when submitting the application.
Then check the connection to the tax server. To do this, go to Settings/Accounts and click Connect to server. If everything is set up correctly, the program reports a successful connection.
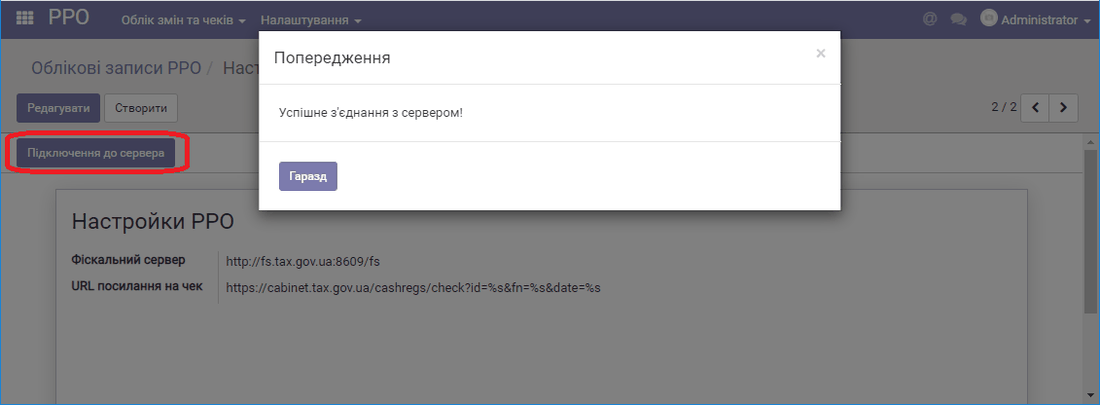
Now you can start working with the software cash register.