Selling in the POS terminal
Introduction
The Cash terminal module (POS) is designed to provide cash register functions in a web browser. You can use it for sales in a store, a sales floor or a point of sale. You can sell products using a computer (laptop) or a tablet with any web browser installed (Google Chrome, Mozilla Firefox, Opera, Safari, Microsoft Edge, and others). You can also connect a barcode scanner (for quick product selection), a receipt printer and automatic scales for weighing products. In this article we describe working with the module without additional devices - if needed, contact us and we will help you set them up.
The following topics are covered in separate articles:
- Cash terminal setup: creating and configuring POS terminals.
- Reports in the cash terminal: reports by sales sessions.
To work in the POS terminal, click the icon of the corresponding module:
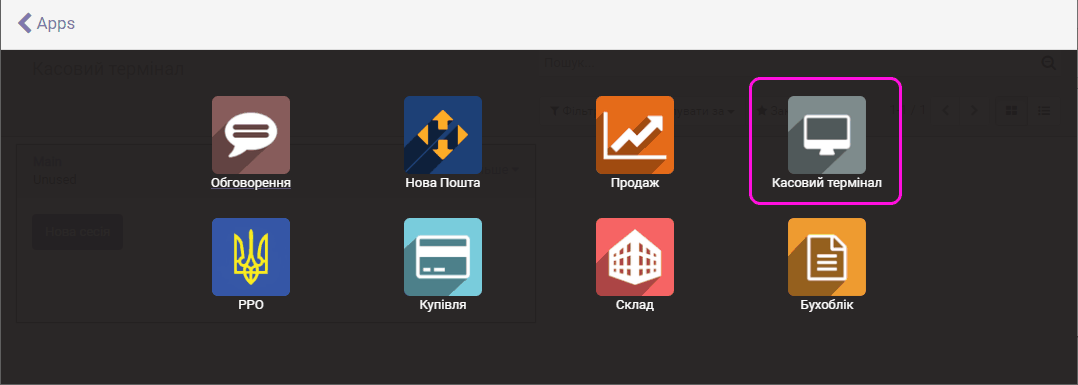
The POS dashboard opens.
Dashboard. Point of sale terminals
The dashboard shows the list of POS terminals that exist in the program and to which your user has been granted access. The program usually has one POS terminal named Main. You can rename it and also create an unlimited number of POS terminals. For details, see the article Cash terminal setup.
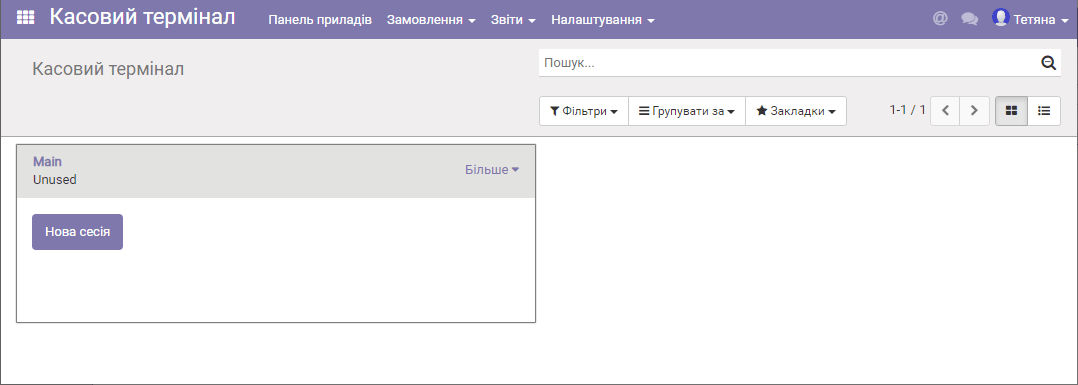
The label "unused" means that no user is currently working with this POS terminal. Otherwise, the user name is shown instead of "unused".
To start selling at the register, products must be created beforehand.
Opening a sales session
Click New session:
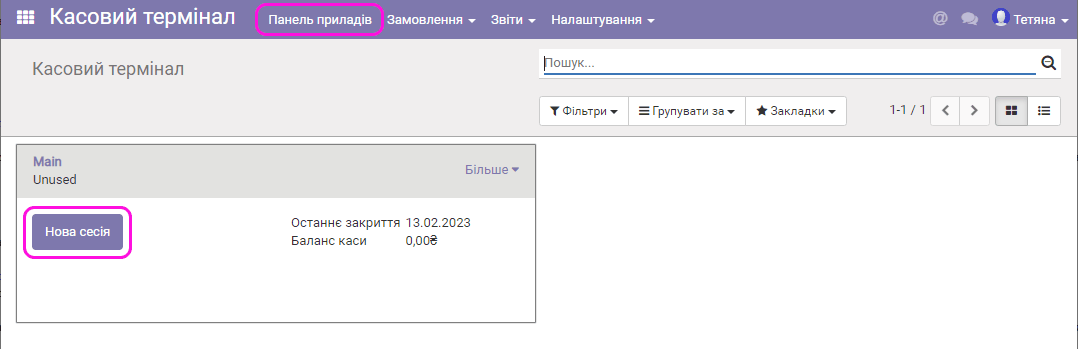
The form for the opening cash balance appears:
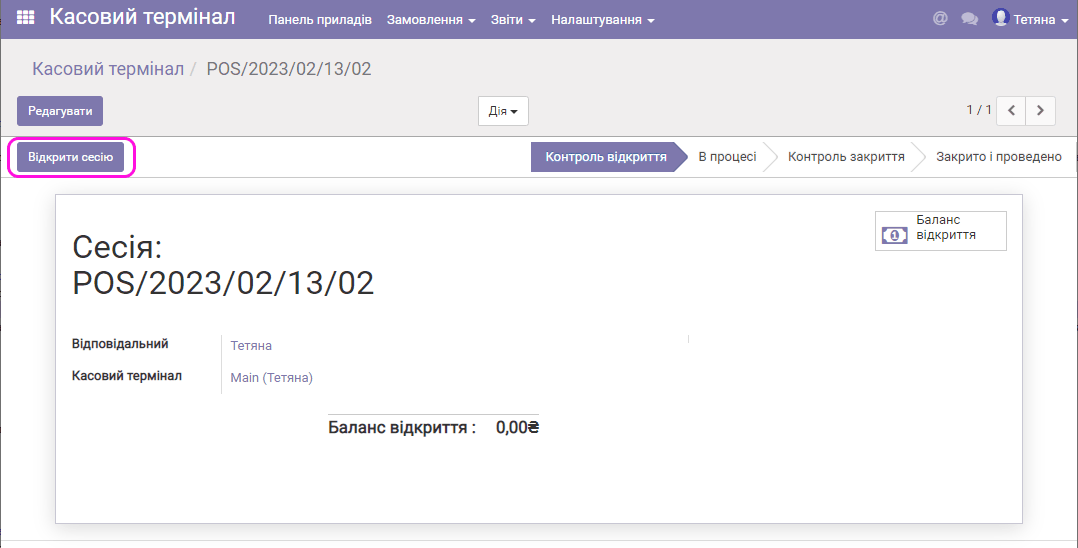
Click Open session and then Continue selling.
Selling products. Printing receipts
After the products are loaded, the register window appears:
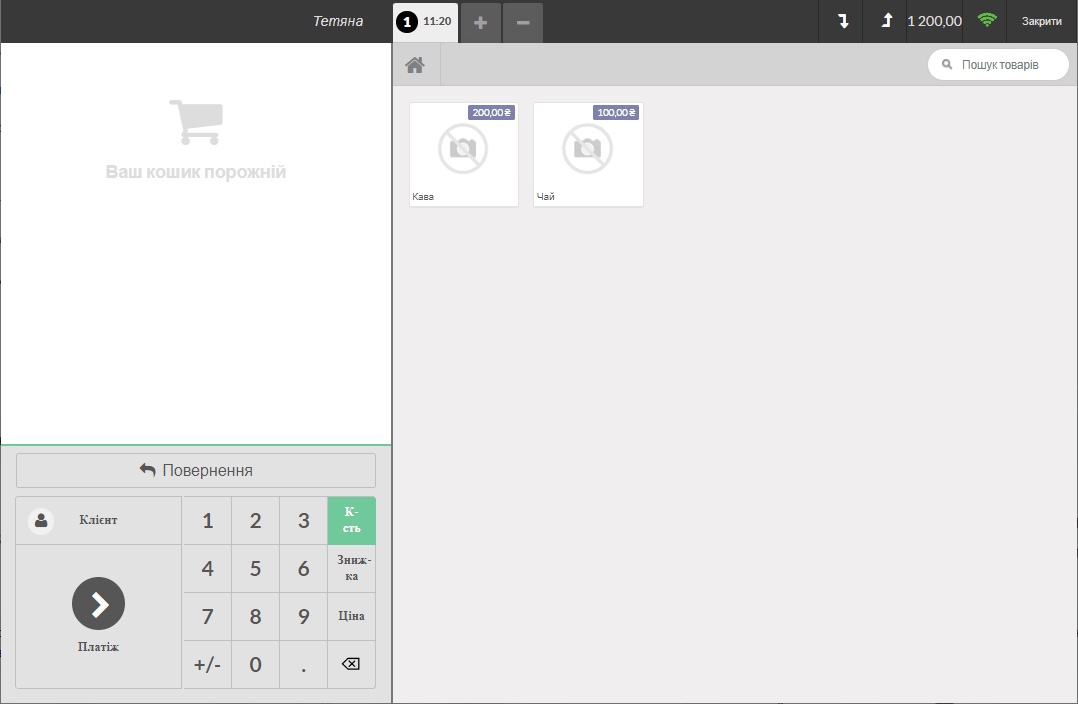
This is the window of the virtual register. Using the mouse or a barcode scanner (if the product has a barcode entered), you can select products into the basket (build a receipt):
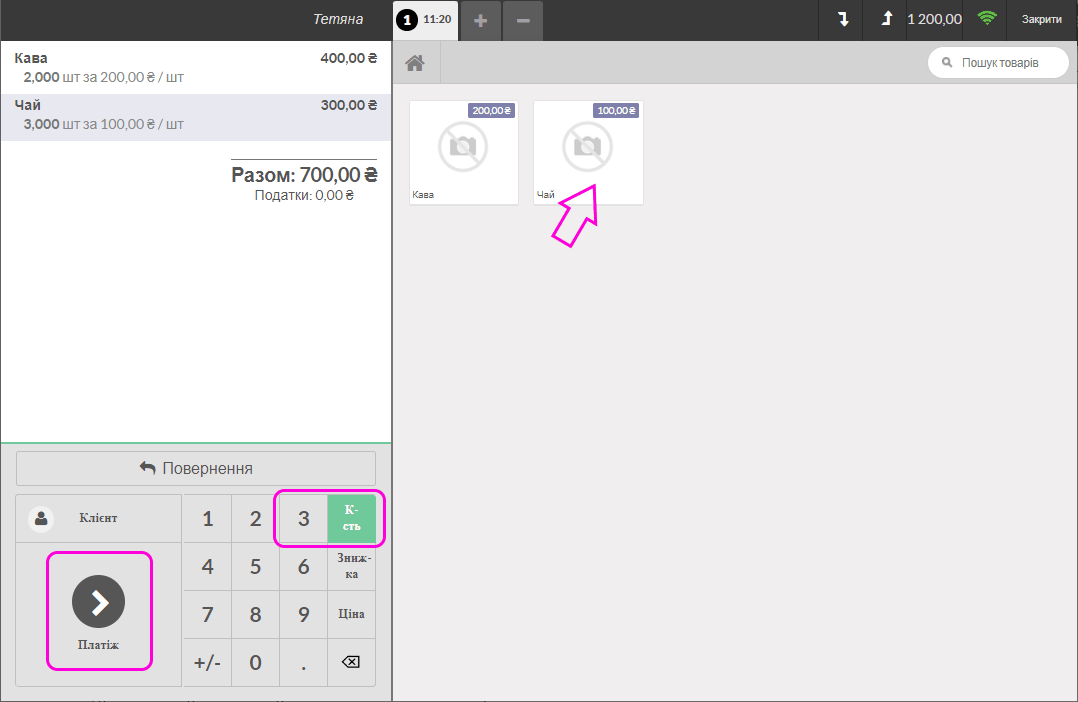
After selecting a receipt line with the mouse, you can change the quantity of products in the receipt with the Qty button and the number keys, specify the discount percentage for the selected item with Discount, and change the product price in the receipt (set a new one instead of the one in the register) with the Price button.
Click the Payment button to proceed to payment:
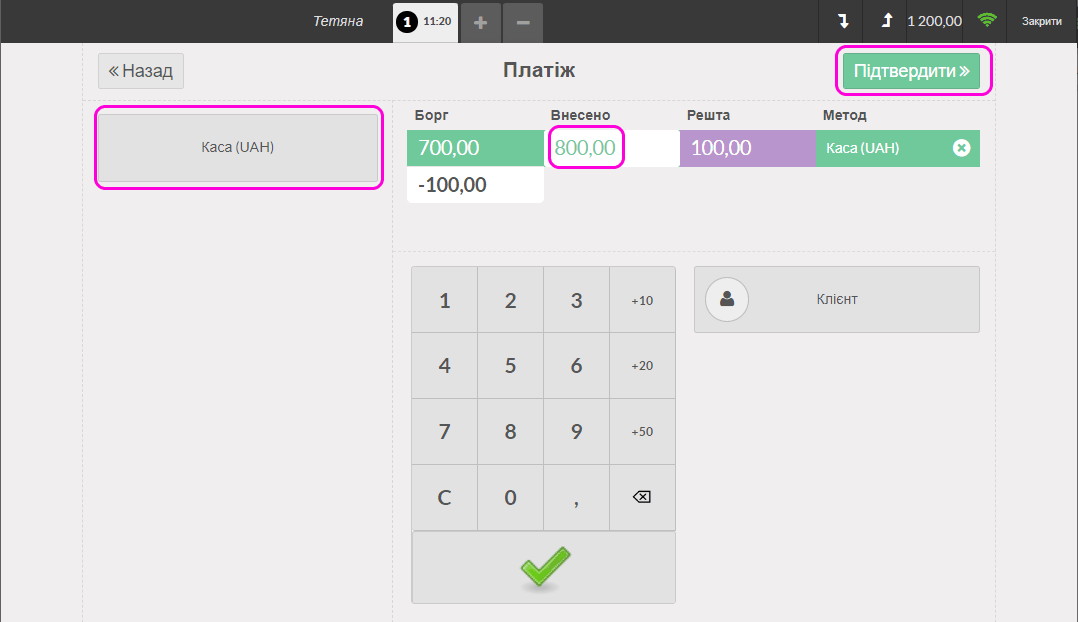
Usually one payment method is configured in the POS terminal - cash. The Cash journal is used to register such payments. You can configure any number of payment journals in the POS terminal. Using the numeric keypad, enter the cash amount received from the customer; the program shows the change, if any. If the payment is exact, click the green check mark under the digits. Then click Confirm.
After the payment is confirmed, a window with the receipt opens, which you can send to print:
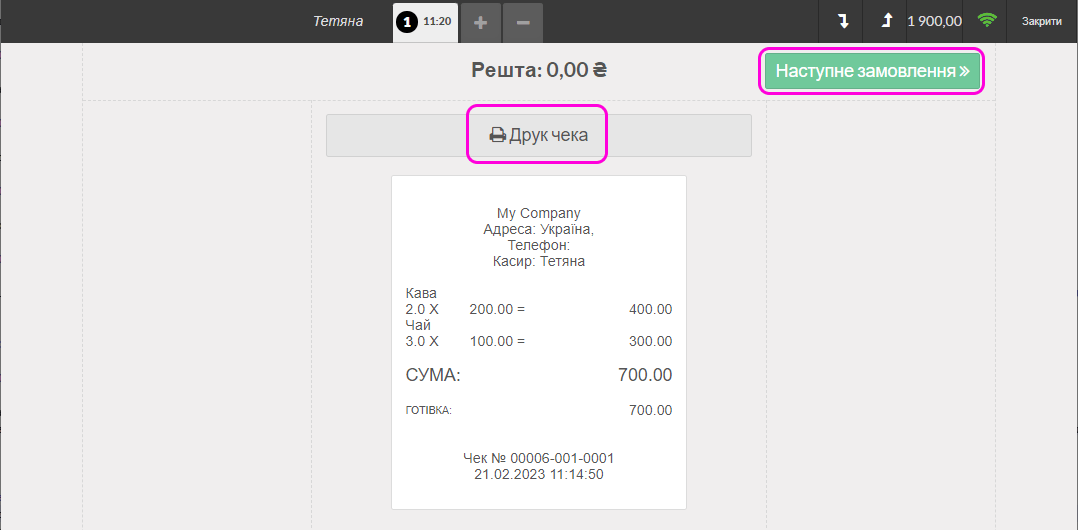
The receipt header contains data about your company that was entered in the corresponding settings. If a PRRO (software cash register) is used, the fiscal number and other data required by tax regulations appear here.
Click Next order to return to the register.
Returning products
To return products at the register, you need to know the reference (number) of the receipt by which these products were sold. If the customer comes with the receipt, this number can be seen directly:
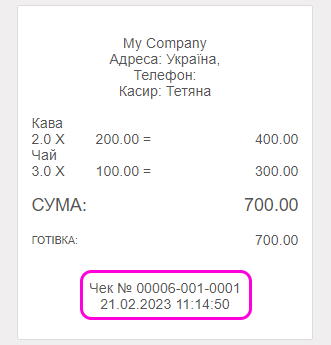
To find a receipt by sale date or other attributes (customer, amount, etc.), go to the list of orders - the menu Orders/Orders:
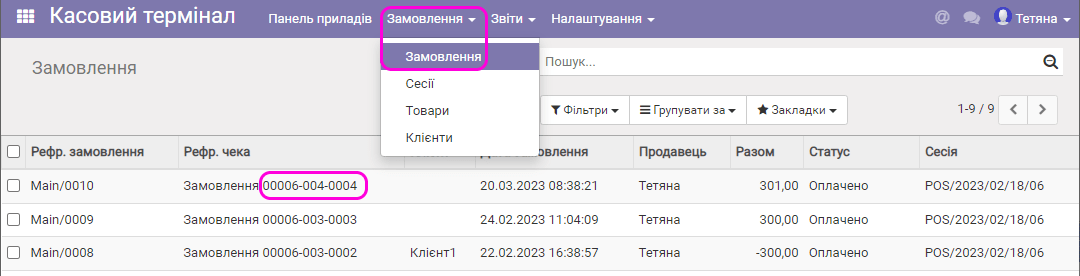
Then go back to the open session at the register and click the Return button:
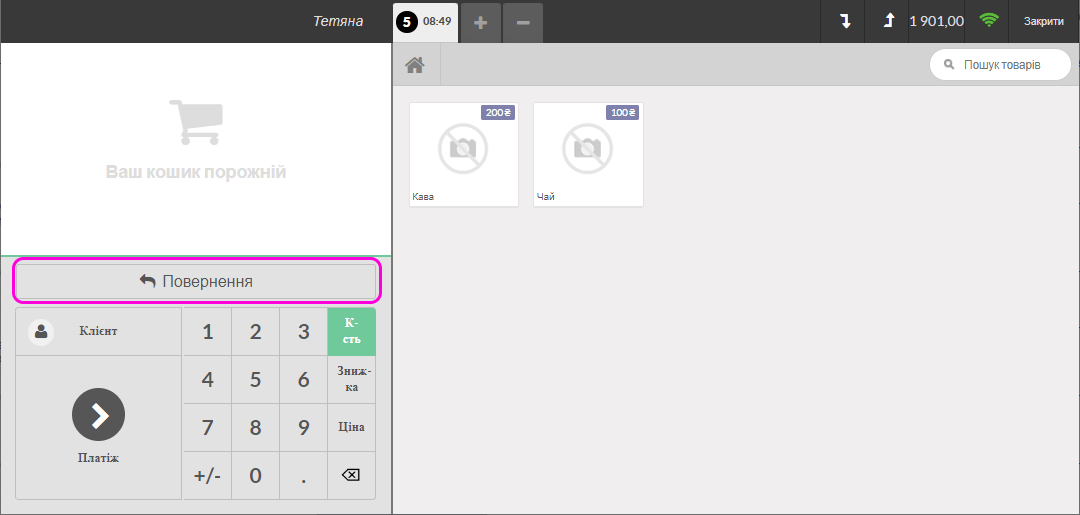
In the next form, enter the number of the receipt to return:

Click Return again; the return order appears. All amounts in it are shown with a minus sign:
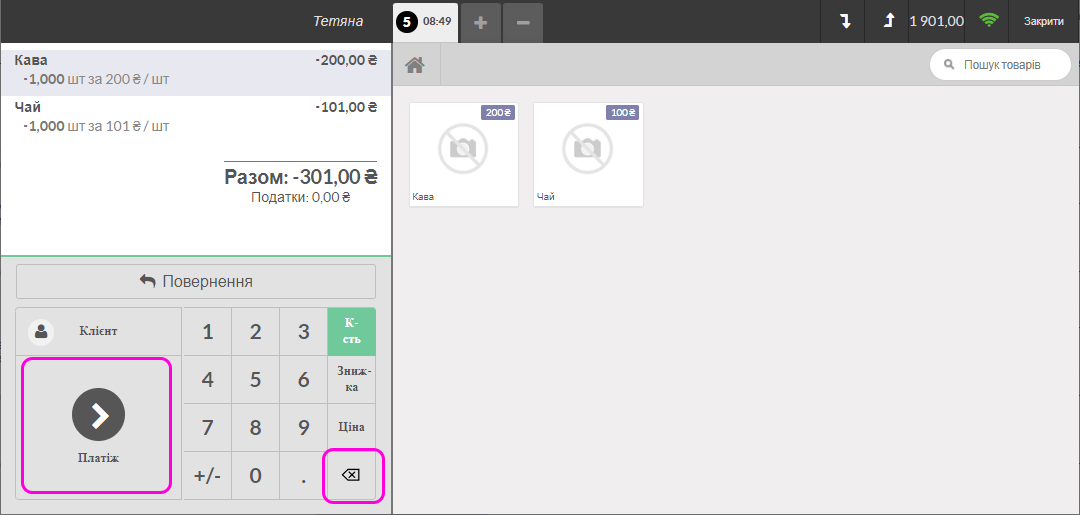
You can edit this order (return receipt) by removing the items that do not need to be returned. Then click Payment, select the sales journal and click Confirm.
The return will be processed. The funds will be debited from the selected journal.
Viewing the balance. Cash in and cash out
The program lets you view your register balance by the cash journal and also register cash in and cash out. The corresponding elements are provided for this:
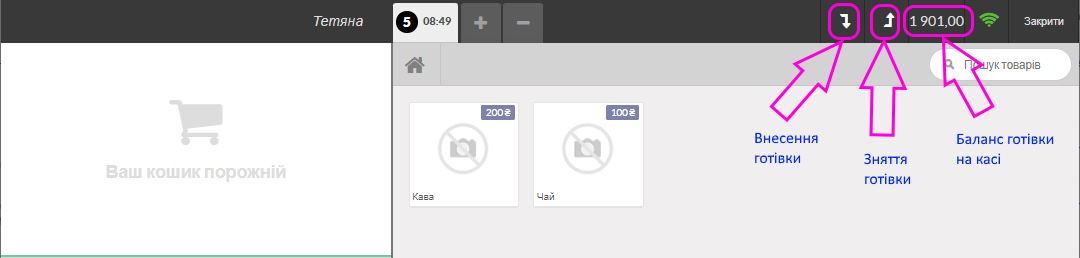
Click, for example, the "Down" arrow; the cash in form appears:
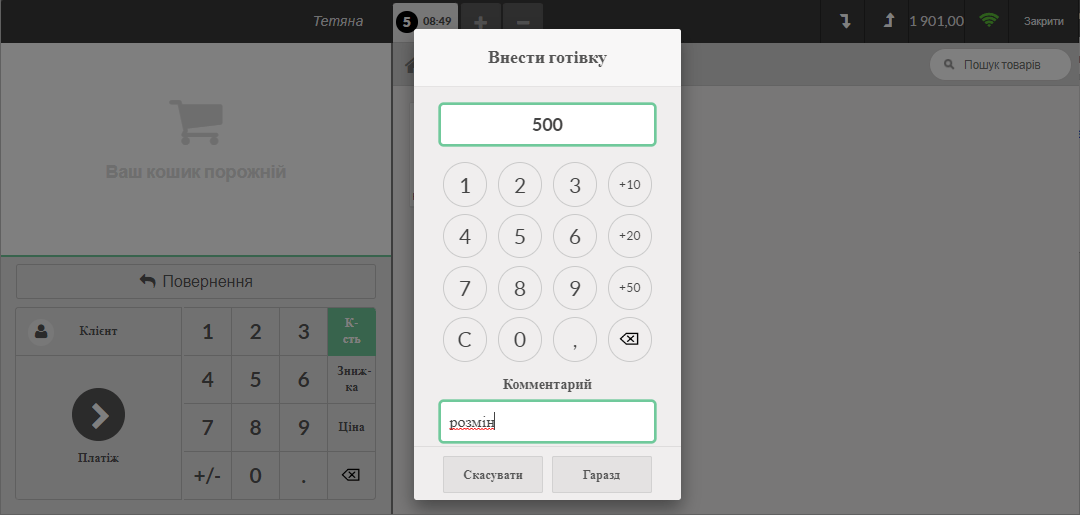
Using the digits on the form, enter the amount of cash in and, if necessary, a comment on this operation. Click OK. The cash in operation is registered and the register balance increases.
Selling with a barcode scanner
If the barcode scanner works on your machine, for example, you can scan any barcode into a text editor, it will also work in the cash terminal of ERP FOSS. First fill in the barcode field in the product cards (this can be done with the same scanner), and then at the register you can select products for the order using the barcode scanner.
Finishing work at the register. Closing the session
To stop working at the register, click Close and immediately Confirm; you return to the module dashboard:
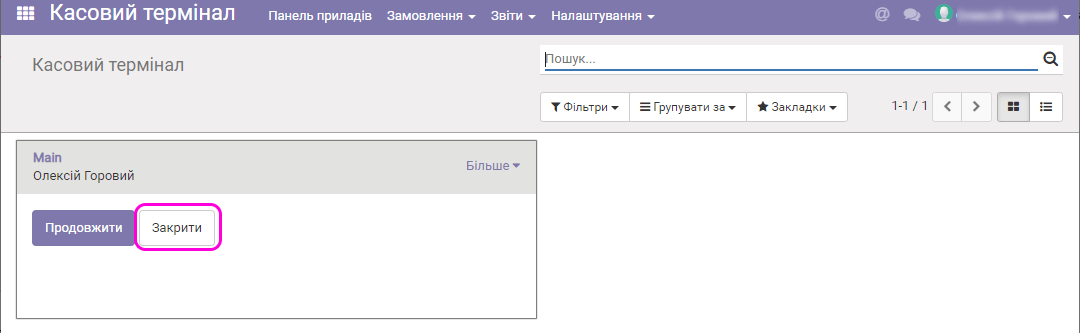
If you had a break in work, you can click Continue and the session will be resumed - the cash terminal window appears again.
To end the session, click the Close button; the window with the closing balance of the sales session appears:
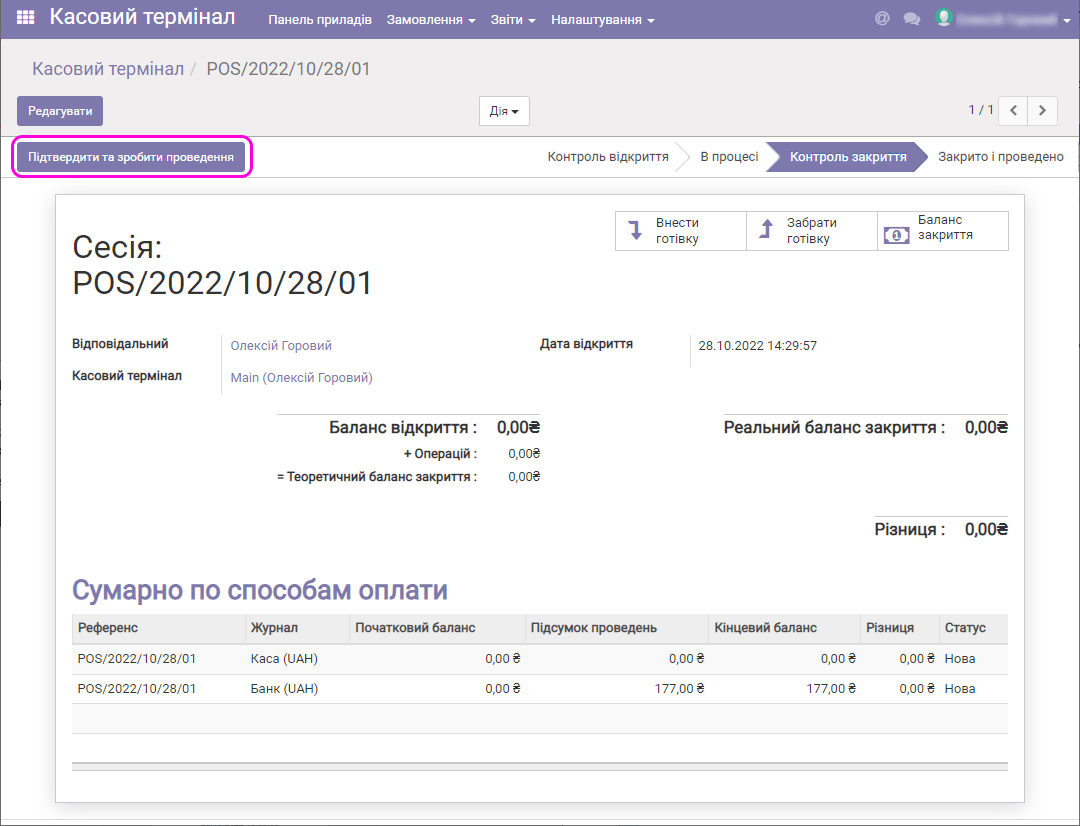
Click Confirm and post entries; the session is closed and all accounting entries are made. The register is ready for opening a new session.