Warehouse locations, routes and drop shipping
Note: In this article we give examples of using various warehouse options. You do not have to use them, but we recommend getting familiar with them. By default, the application lets you purchase, sell and store products without additional settings.
Level of using warehouses and locations
In the general case, the default application setting Manage only 1 warehouse with only 1 warehouse location is enough for you. In this case all products arrive at the location WH/Stock, are stored there and are shipped from there to customers. This model is justified if you do not need to know exactly where your product is. But if you have a large product range, you can create an unlimited number of product locations and move products between them. You can also use several warehouses. The difference between a warehouse and a storage location is that a storage location is inside a warehouse. In general, working with one warehouse or with several is identical. Therefore, we will look at working with one warehouse with several storage locations. To get this feature, set the option Manage only 1 warehouse consisting of several warehouse locations. After that, the Internal transfers window appears on the Dashboard, and the options Locations and Operation types are added to the Settings section.
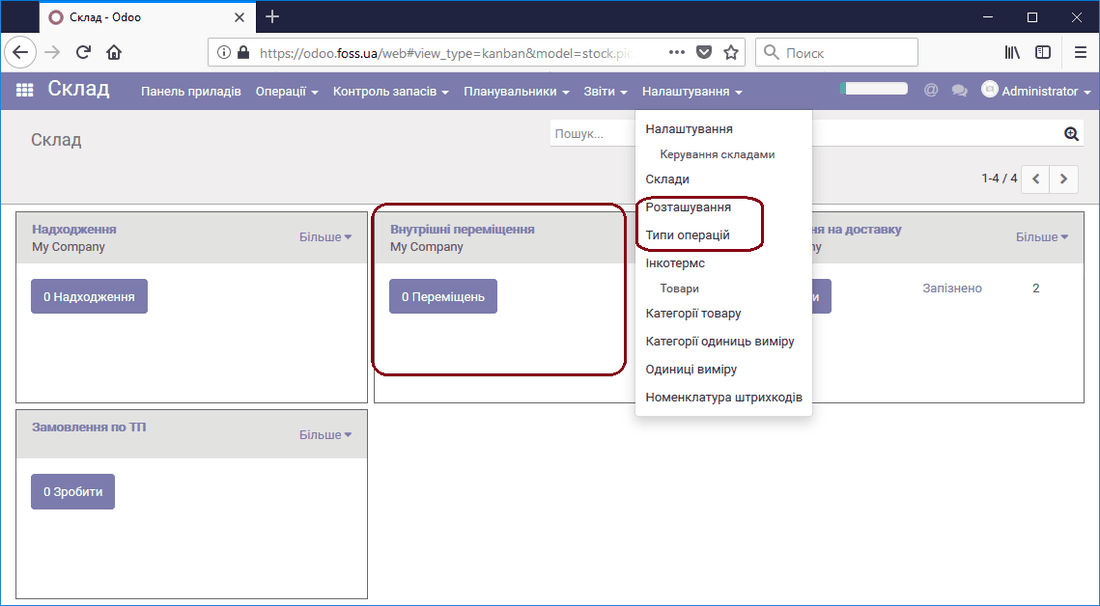 Dashboard for several locations
For a better understanding of how the application works, let us look at an example of creating a transfer from one storage location to another. What is described below also applies to several warehouses.
For example, we need to create a new product location, move products to it and view the list of products stored there.
Go to the menu item Locations and click Create. Select Internal location as the location type. You can also specify the localization of this location.
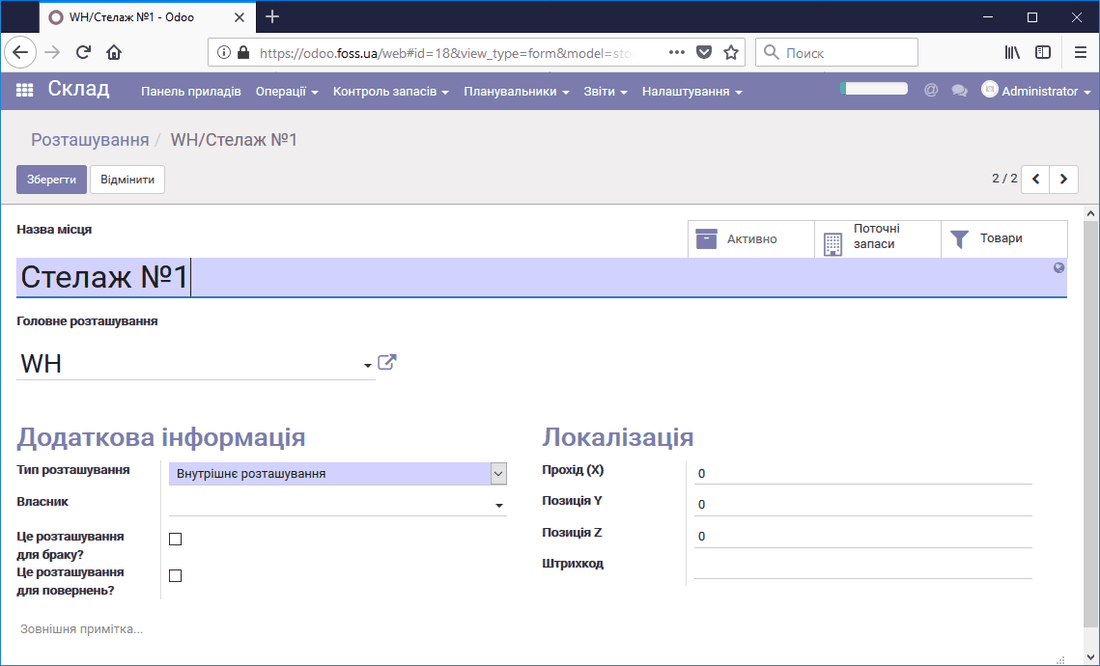 Creating a product location
After saving, we have two product locations: one created by default and the other created by us.
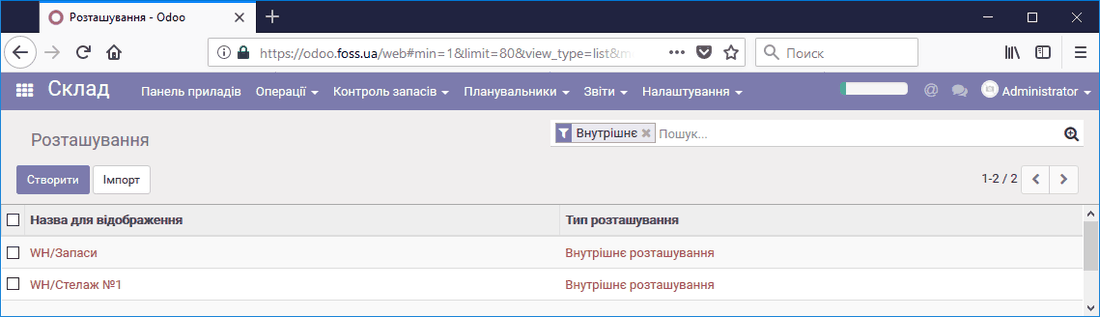 List of locations
Let us move 5 units of the product from one location to the other. To do this, go to Dashboard/Internal transfers/More/Transfers. As a result, a transfer form is created, in which you need to specify the required data, as shown in our example.
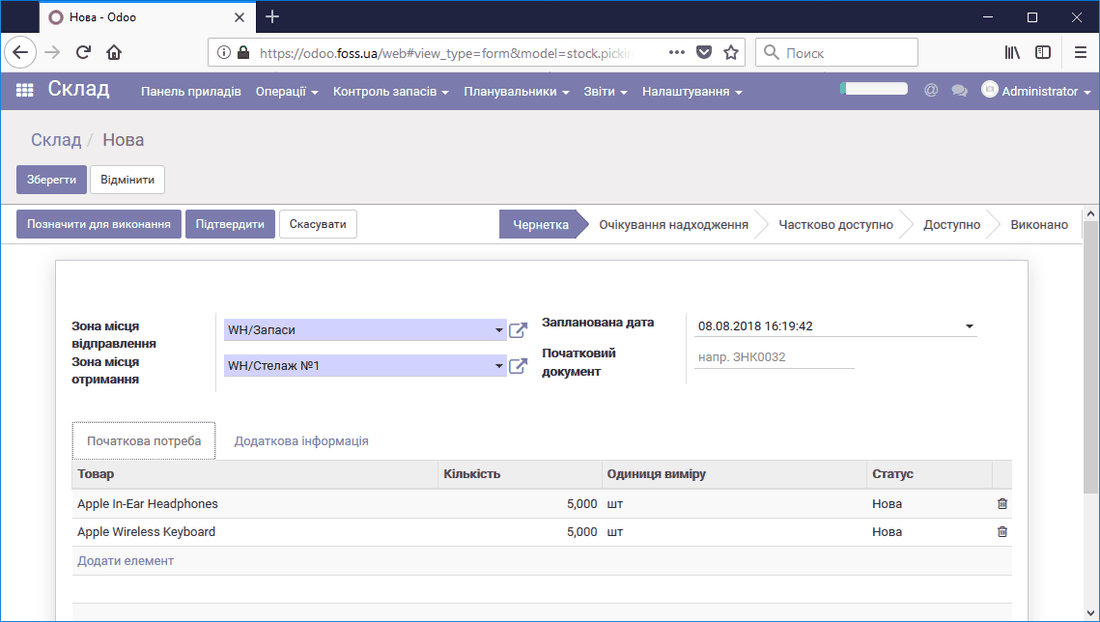 Moving products
After the transfer is confirmed, we can open our location
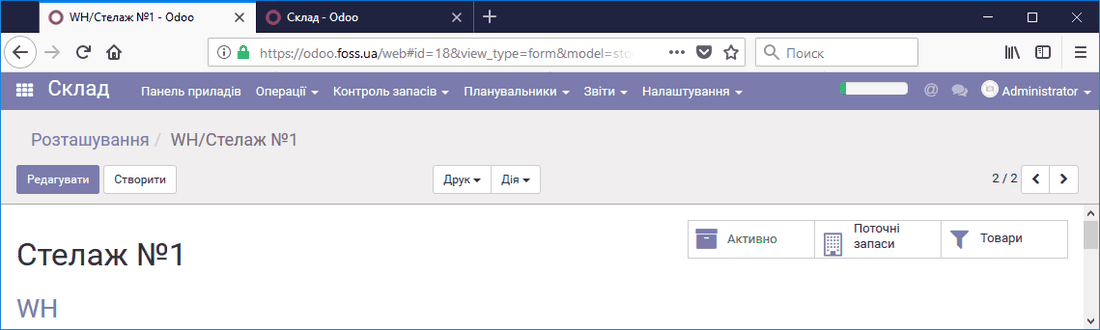 Location Rack No.1
and view the products stored there by clicking the Products button.
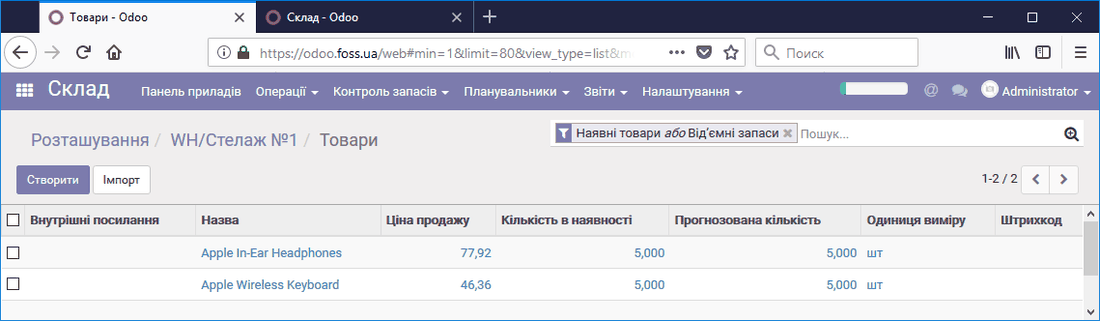 Product list
On the other hand, if we open our product from the general product list and then click the On hand button, we see where and in what quantity this product is stored.
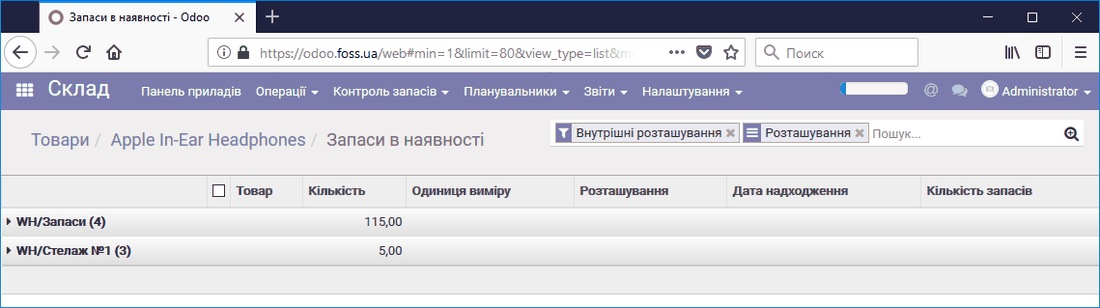 Product storage locations
Routes
To activate routes, set the option Advanced product routing using rules. Using routes as they are configured by default lets you, for example, organize direct deliveries from your supplier to your customer without using your warehouse, receive and ship products in two or three steps, and provides other capabilities. You can also create your own product movement routes.
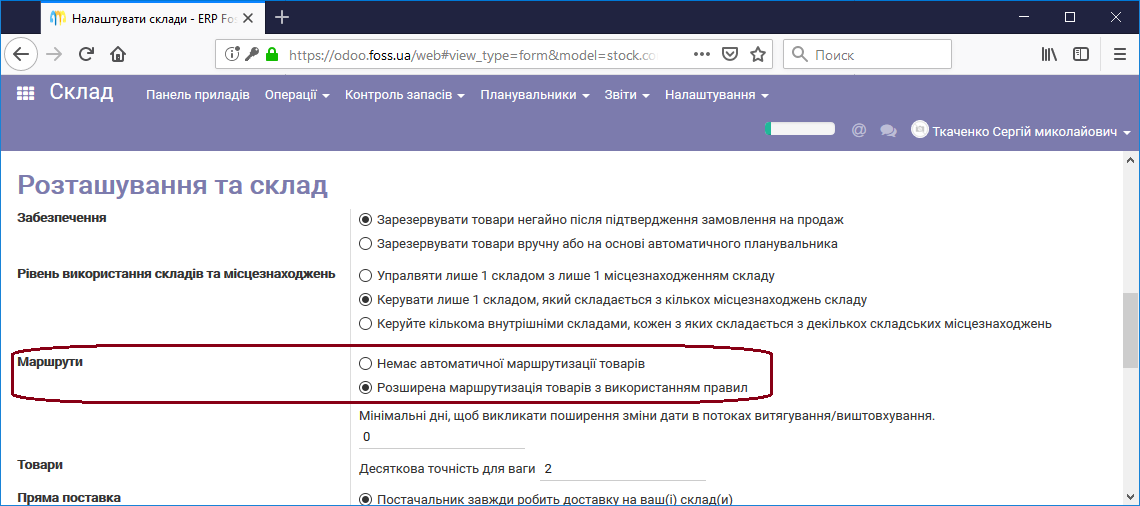 Enabling routes
The application lets you receive and ship products in one, two or three steps. These operations are performed based on Routes. To enable these features, open from the menu Warehouse/Settings/Warehouses the warehouse for which you want to set up this option.
As an example, we will set up Incoming shipments in three steps and Outgoing in two.
Let us make a product purchase without performing the delivery and go to the control panel of the Warehouse module. We see that we have to perform three delivery operations. The first is Receipt, the other two are Internal transfers.
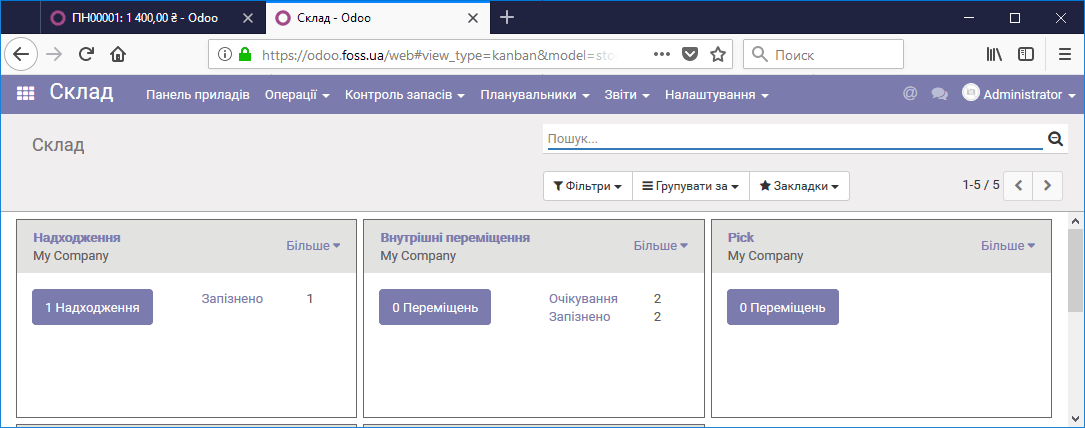 Product delivery in three steps
If we open Internal transfers, we see that they are waiting for other operations.
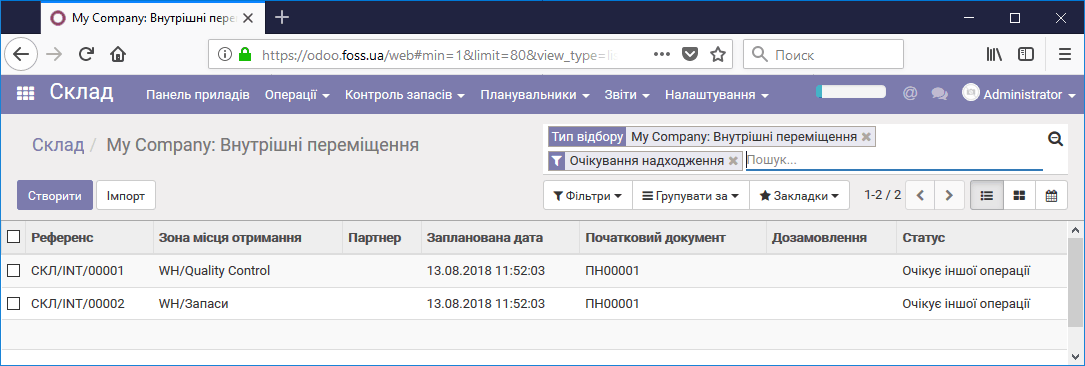 Transfer operations waiting
In turn, the Product receipt operation is available. We can confirm it (First step).
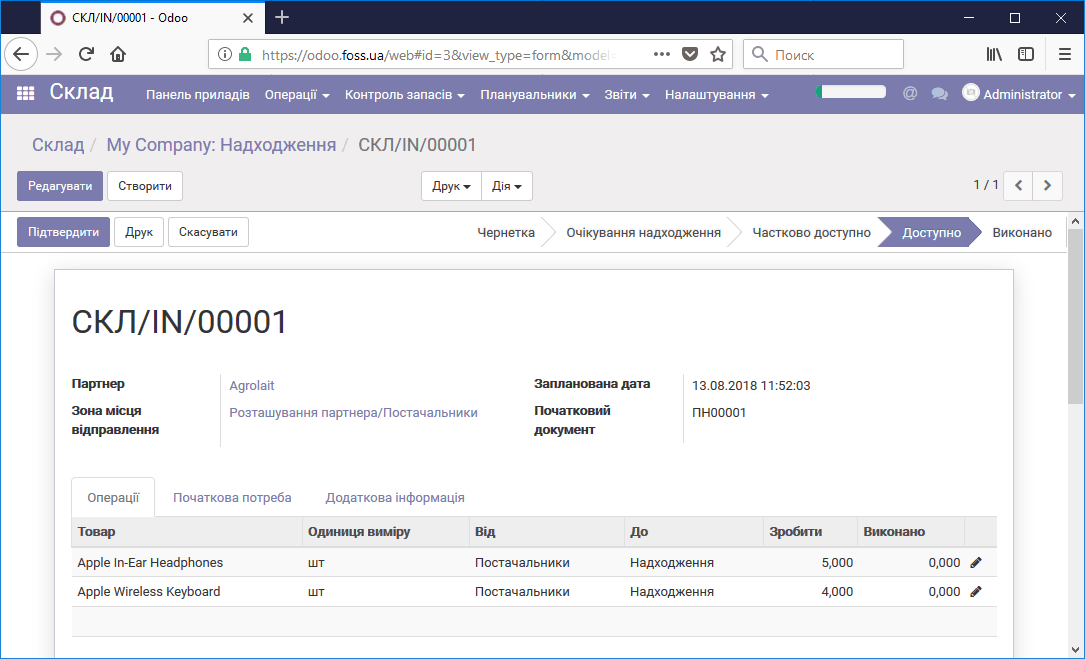 Product receipt
After the Product receipt operation is confirmed, the Internal transfer of the product to the quality control zone (Quality Control) becomes available (Second step).
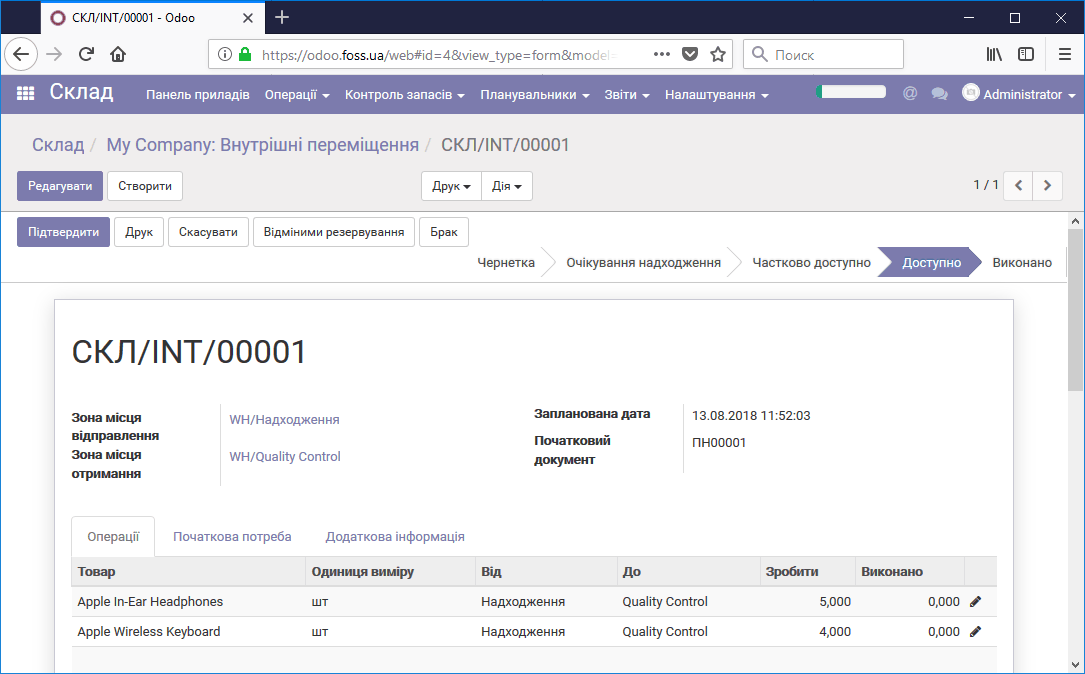 Internal transfer of the product to the quality control zone
While products are being moved, you can track their actual location through the menu Warehouse/Reports/Inventory valuation.
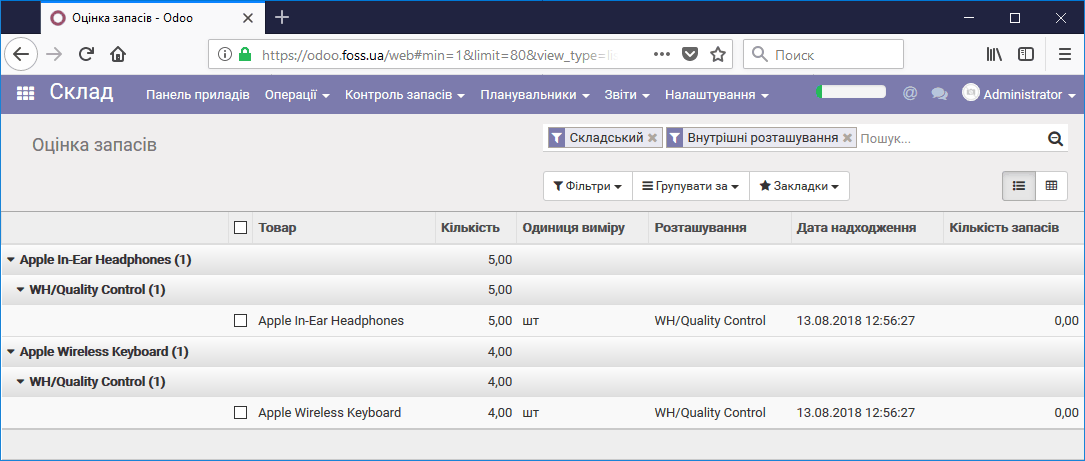 Actual location of products
Now the Internal transfer of the product from the Quality Control zone to the Storage zone is available (Third step).
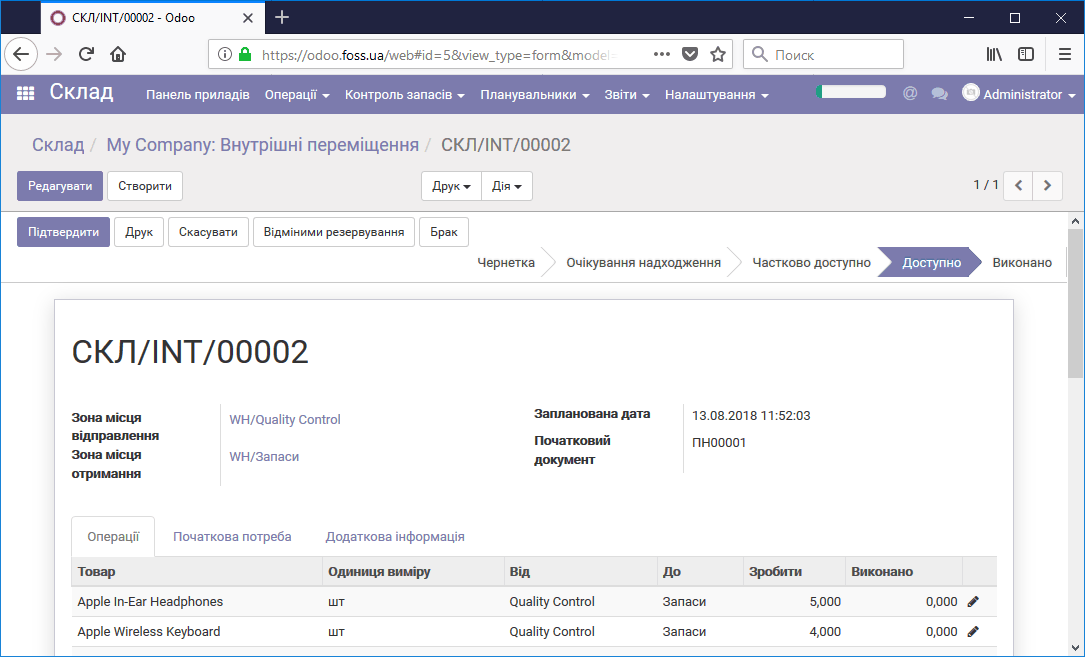 Moving the product to the storage zone
After the last transfer is completed, the product is in the storage location WH/Stock.
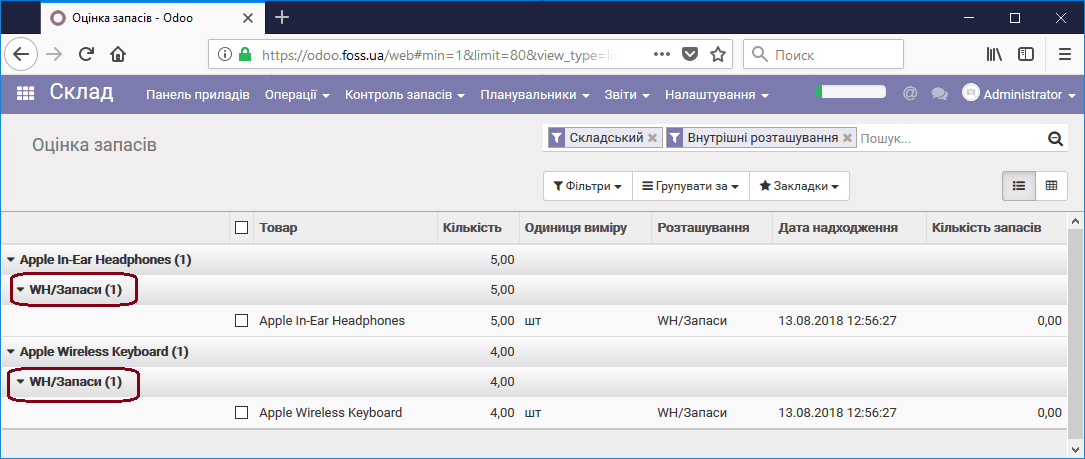 Product receipt into stock
In the same way, when products are sold, their movement goes in two steps. Let us create a product sale and look at the transfers available from the Warehouse module. The first transfer is to the picking zone (Pick), which is already available, and the second is the Delivery order transfer, which becomes available after the first one is completed.
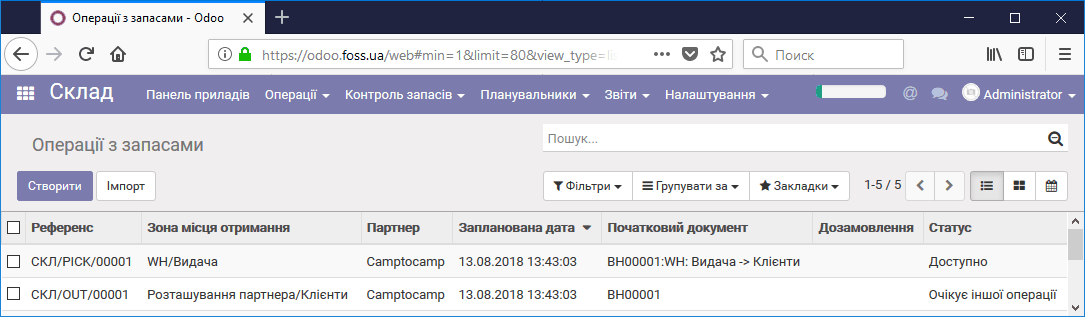 Product shipment in two steps
Transfers are confirmed when shipping products in the same way as when receiving products.
Next we give examples of using routes. If you cannot set up routes yourself, contact us. We will look at how to create your own routes for purchasing, storing and selling a product. For example, we have a product that belongs to a category that must be stored in a refrigerator: ice cream. Let us create such a product and the categoryStore in refrigerator.
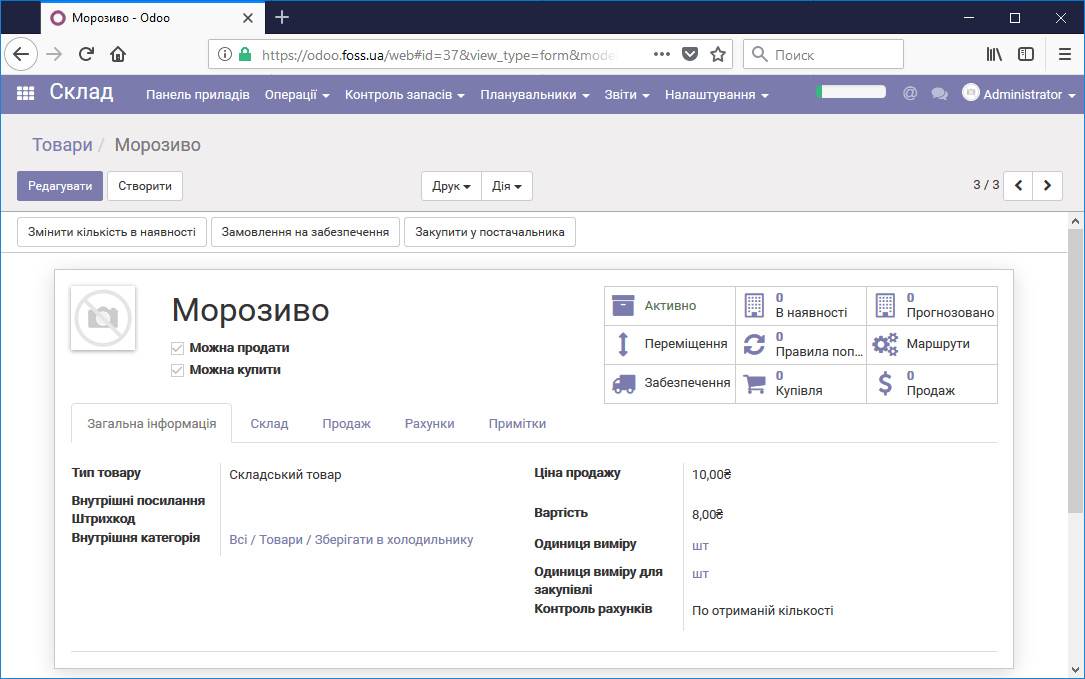 Ice cream product
Our task is to create the storage location Refrigerator and a route for this category that puts the product into the Refrigerator when executed. Then this product must be sold directly from the Refrigerator.
Let us create this storage location. To do this, go to the menu item Warehouse/Settings/Locations and click Create. Fill in the required fields and click Save.
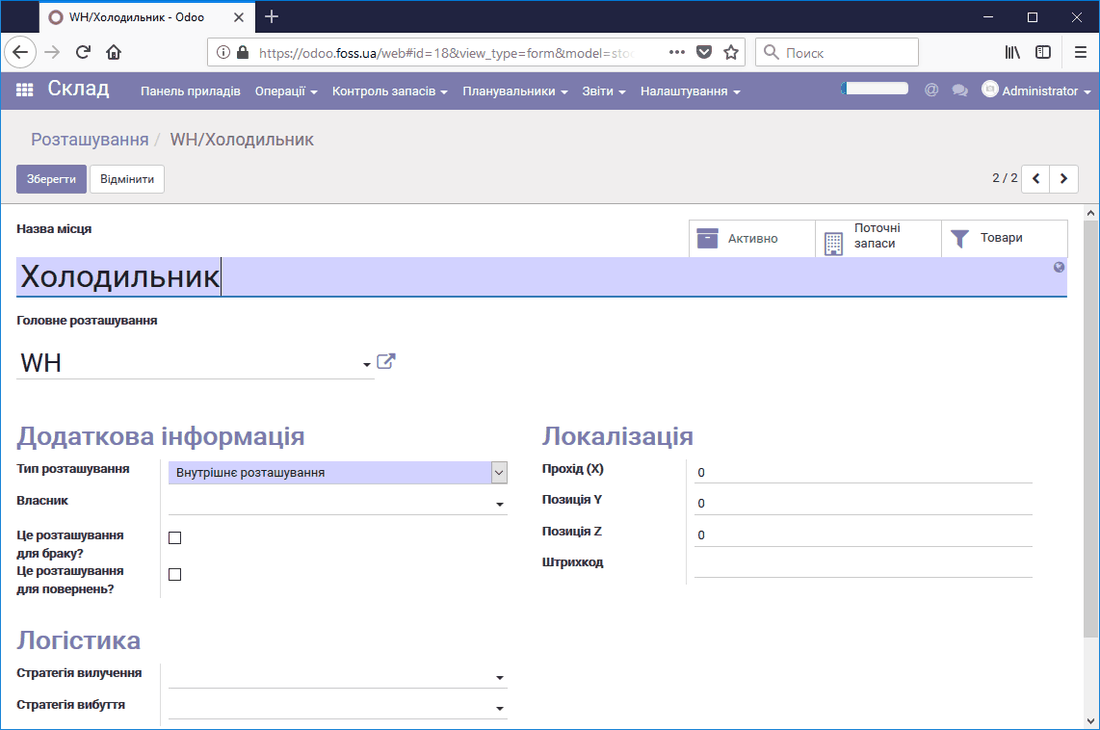 Creating a product storage location
When creating a route, keep in mind that by default a purchased product always arrives at the storage location WH/Stock, so we must create a route that moves our product from WH/Stock to WH/Refrigerator. This route uses the Push rules option. These rules let you move products between storage locations. To create a route, go to Settings/Routes and click Create. Each route can have several Push rules and several Pull rules. Next we look at how they work.
Name the route Put in refrigerator and allow it to be applied to Products.
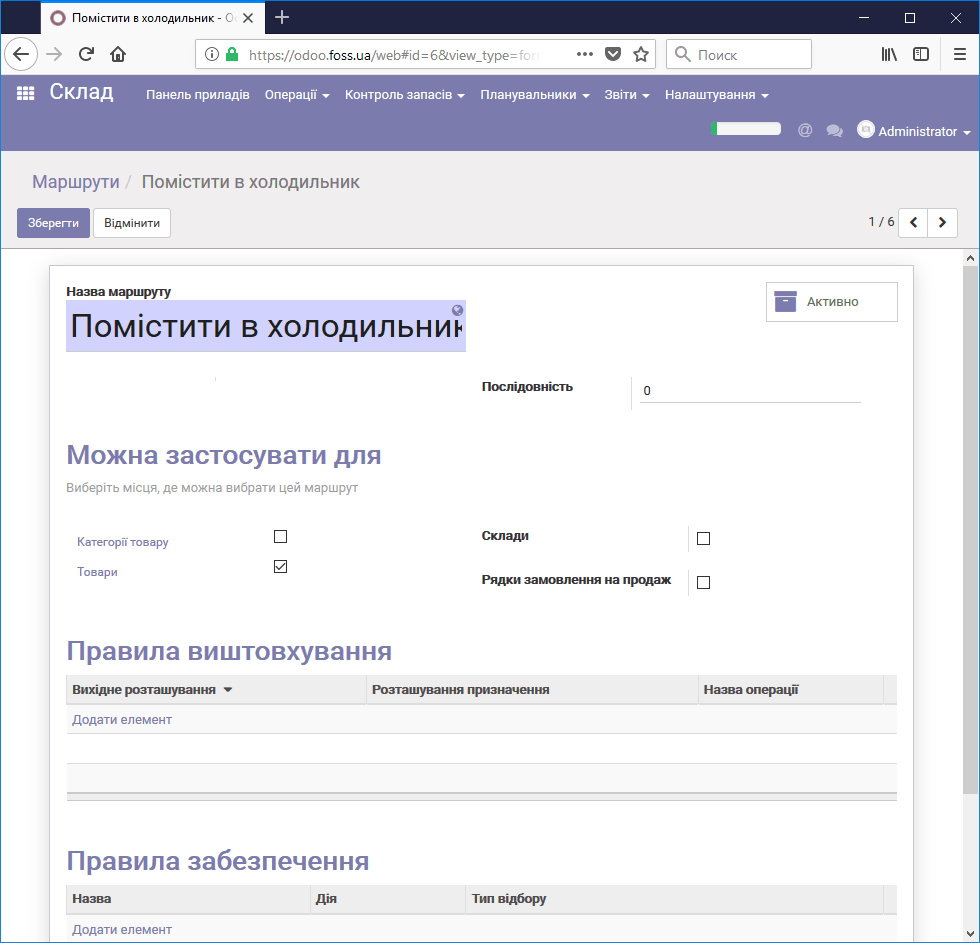 Creating a route using a push rule
Now we need to create the Push rule itself, which triggers when we receive a product with this route set into the storage location WH/Stock. Click Add an item in the Push rules section. Name this rule Move to refrigerator, specify Source location – WH/Stock, Destination location – WH/Refrigerator, Automatic move – Manual operation and Picking type – My Company: Internal transfers.
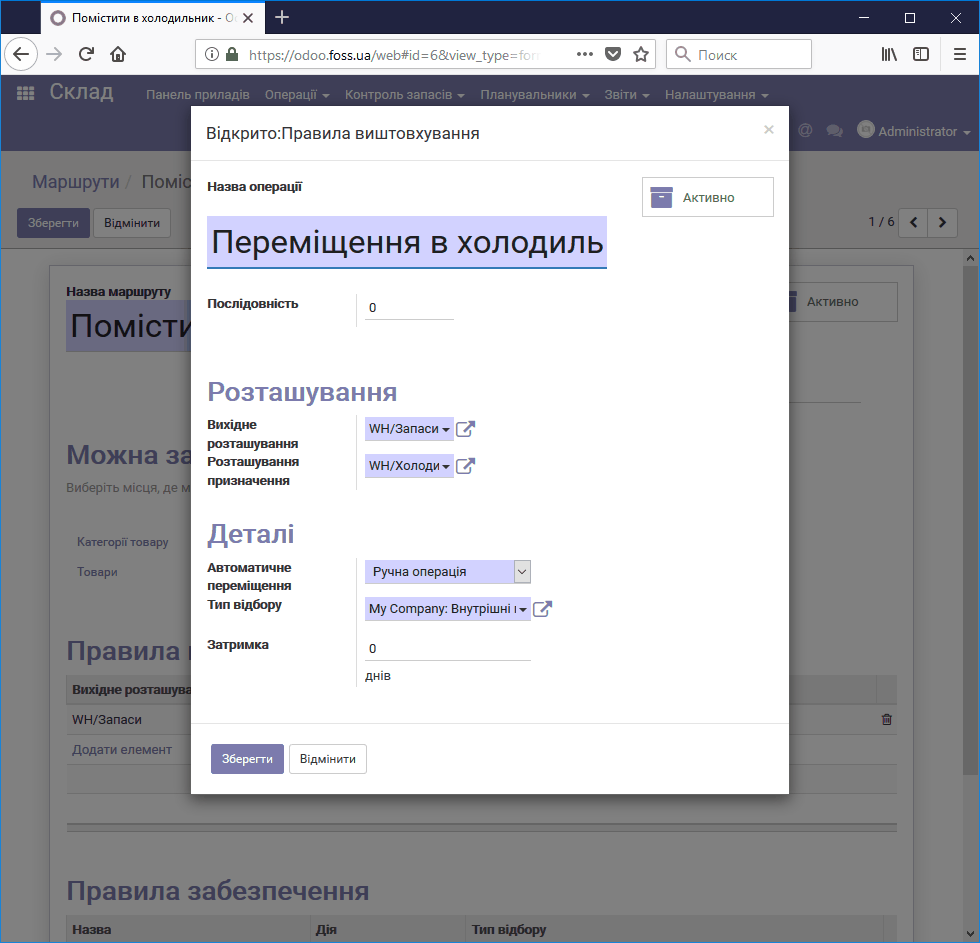 Creating a push rule
After creating our route, assign it to the Ice cream product.
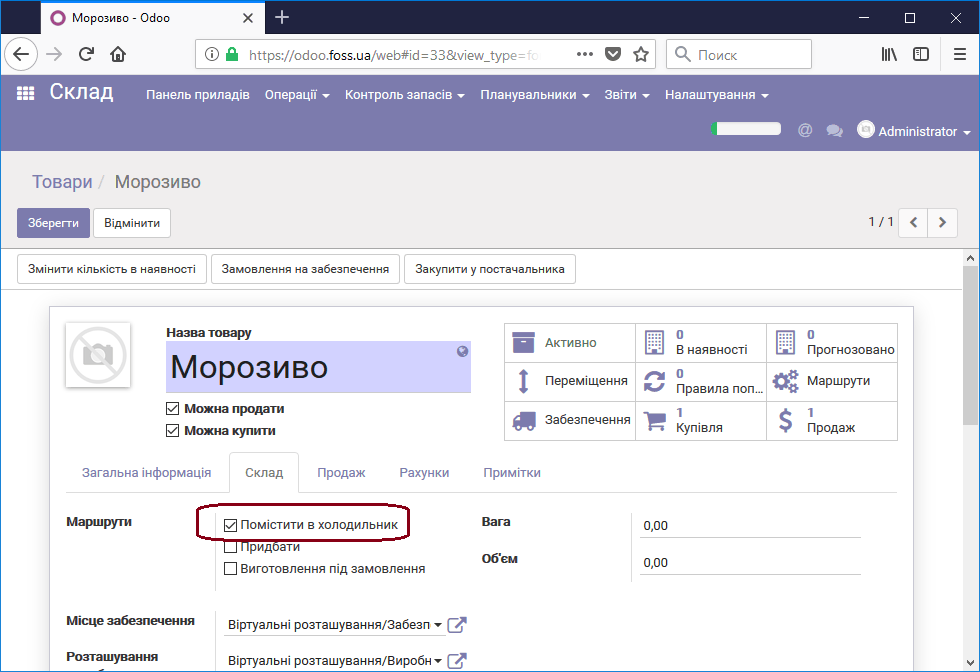 Assigning a route to a product
Let us purchase the Ice cream product and follow its movement. On the Dashboard window we see that we have two product transfers. One transfer is the product receipt itself, and the other is an internal transfer generated by our push rule.
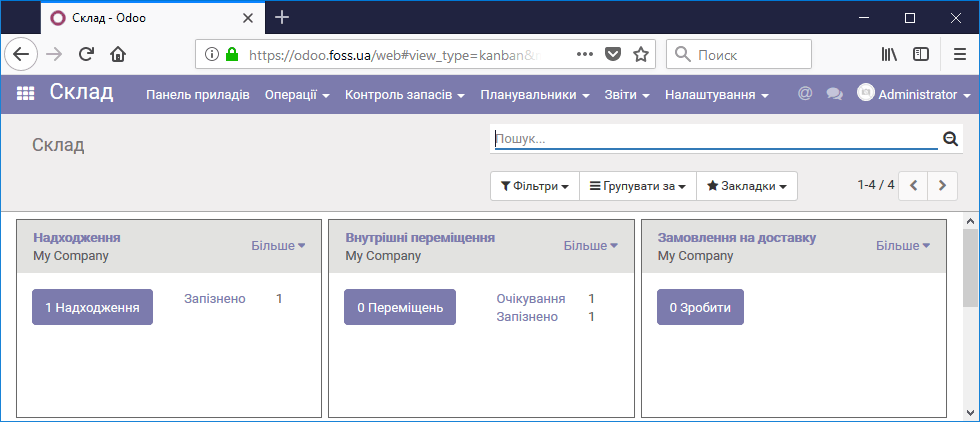 Two stages of product movement
Our internal transfer is shown in the figure below. It is waiting for the product receipt to be completed.
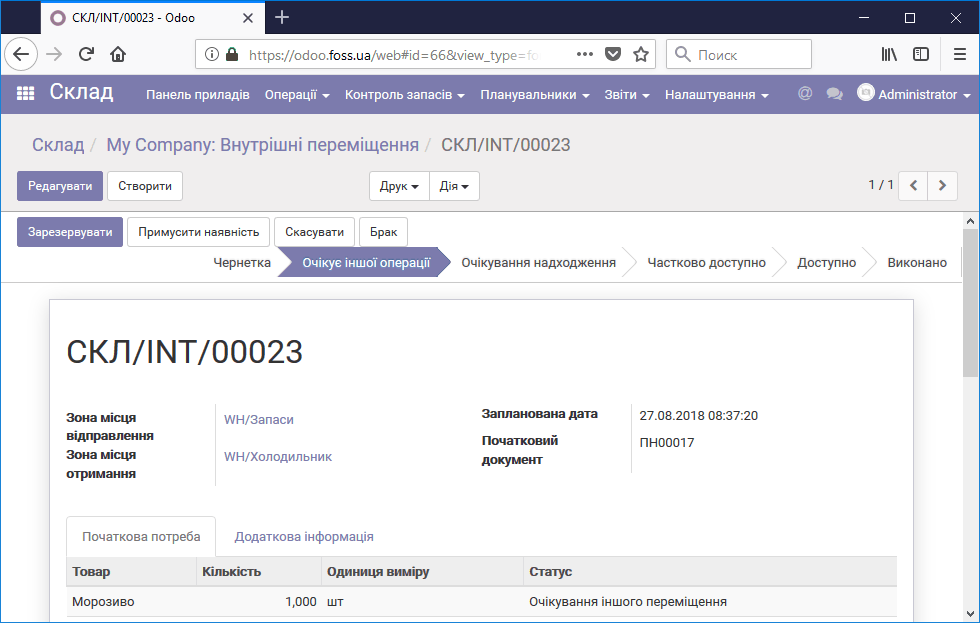 Internal transfer generated by the push rule
After both transfers are completed, we see that our Ice cream product is stored in the storage location WH/Refrigerator.
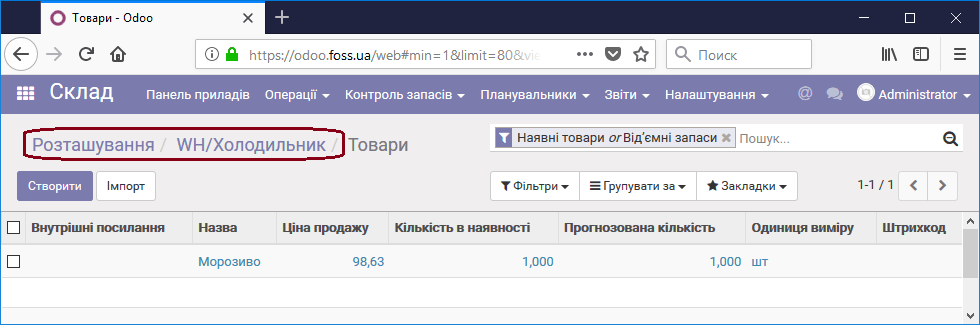 Storing the product in the refrigerator
Now we need to sell this product. Let us create the corresponding route using a Pull rule for selling the product. Name the route Sell from refrigerator and allow its use for products.
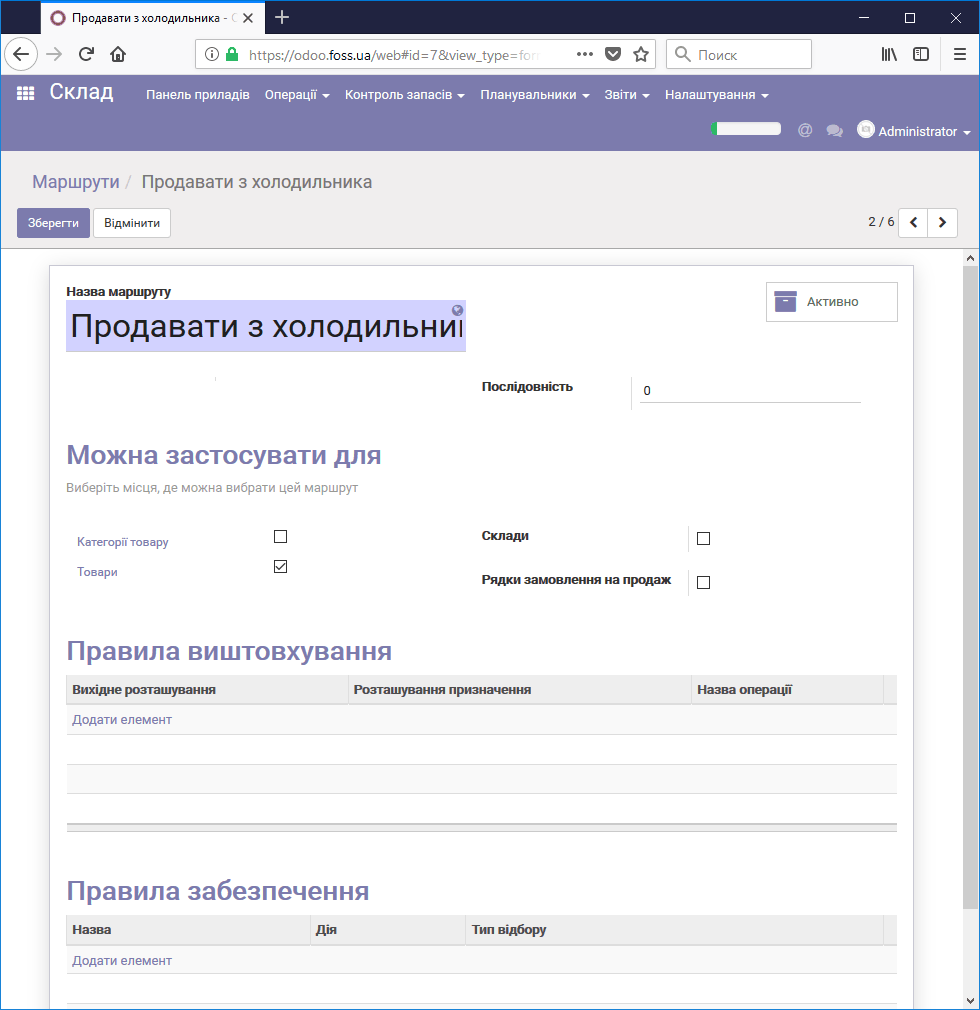 Creating a route using a pull rule
Next, create a Pull rule by clicking Add an item; name it Take from refrigerator and fill in its fields as shown in the figure below.
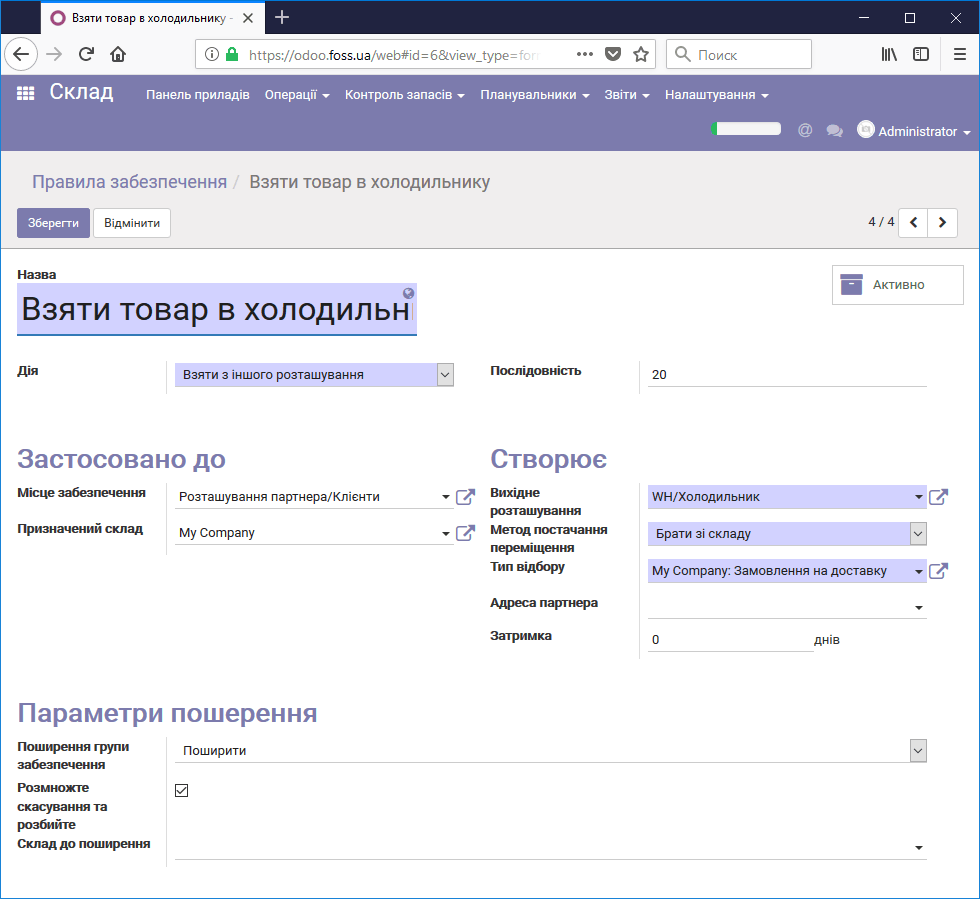 Creating a pull rule
After saving the rule, we get our route.
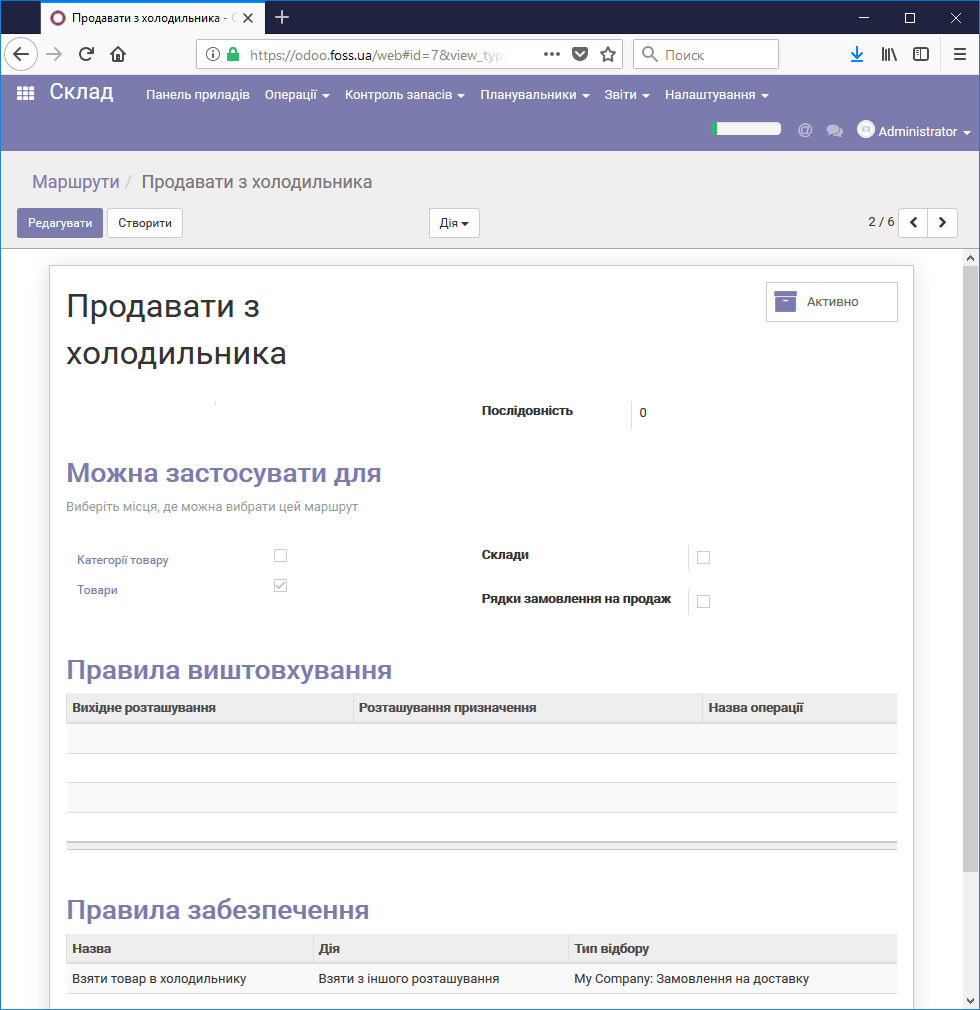 Route with a pull rule
Assign the route to our Ice cream product and make a sale of the product. After the sale is confirmed, on the dashboard of the Warehouse module we see a delivery order. Unlike the previous example (receiving a product), the delivery order is executed in one step.
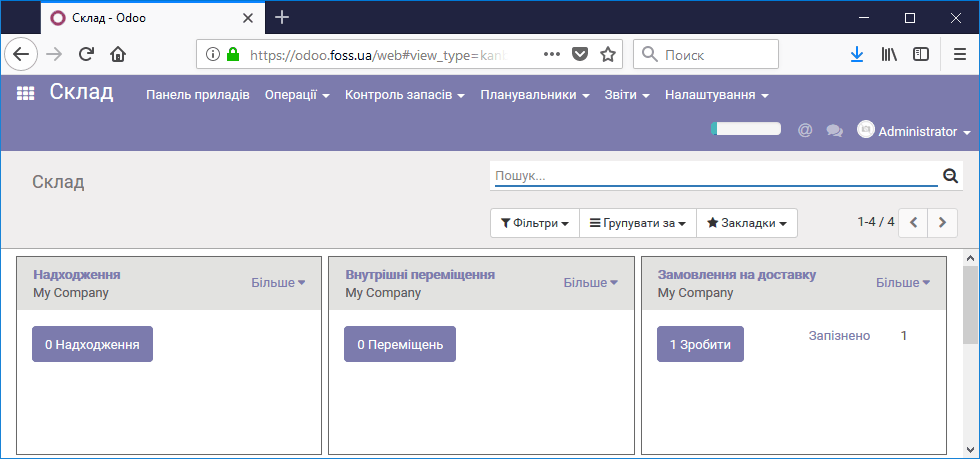 Dashboard of the Warehouse module
When we open the delivery, we see that the product is shipped directly from the Refrigerator storage location.
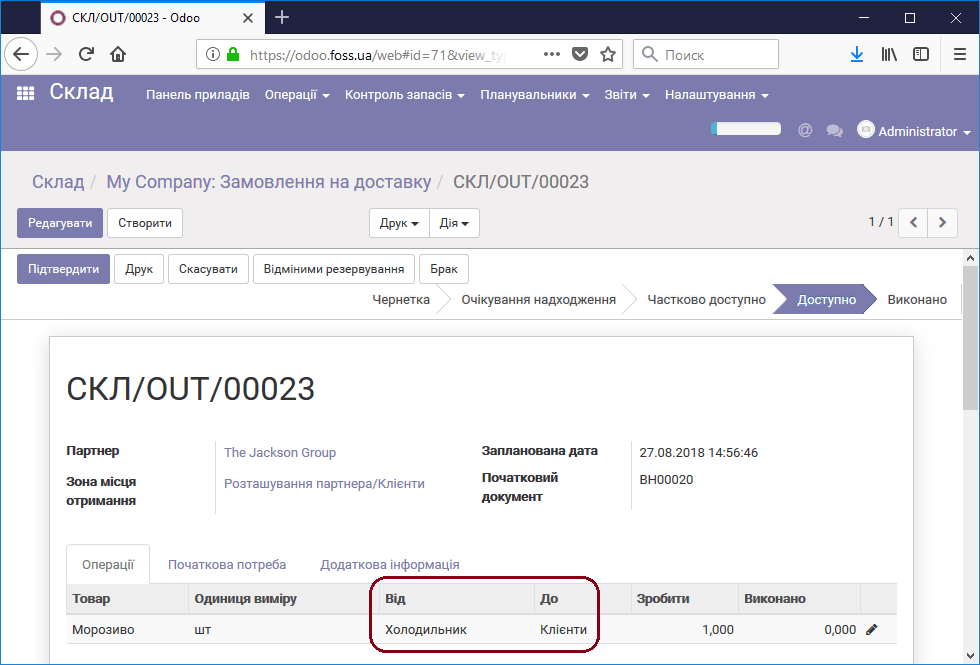 Product shipment
We have looked at examples of using routes to move products. These examples are given only to help you understand how the application works; you can create your own variants or contact us for help.
Drop shipping (direct delivery)
In some cases it is profitable to sell products with delivery directly from your supplier to the customer without unloading the products at your warehouse. This saves time and money, but you must be sure that your supplier will fulfill its obligations on time. To activate this feature, set the option in the menu Warehouse/Settings as shown below:
 Direct delivery option
in the Sales module, in the menu Sales/Settings, set the option as shown below:
 Routes for product sales
Note: routing must be enabled in the warehouse settings, as described above.
For a product that is planned to be delivered directly from the supplier to the customer, select in the product's Warehouse menu at least one supplier of this product.
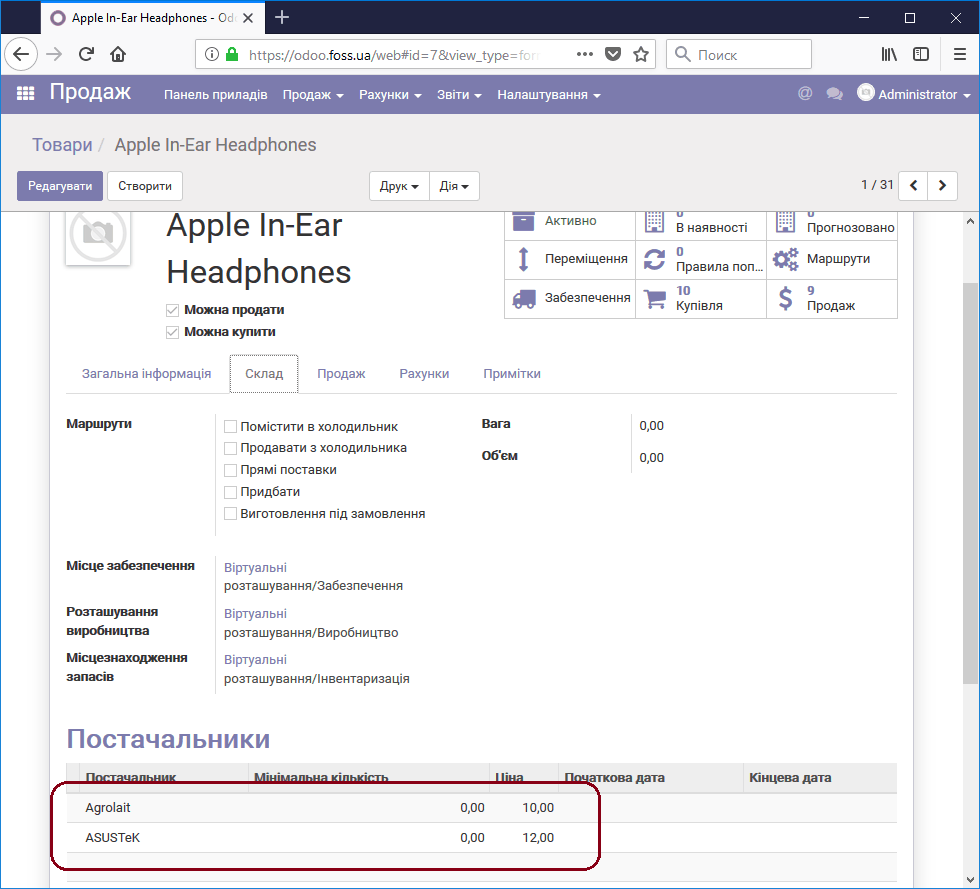 Product suppliers
Next, make a sale of this product by selecting the direct delivery route.
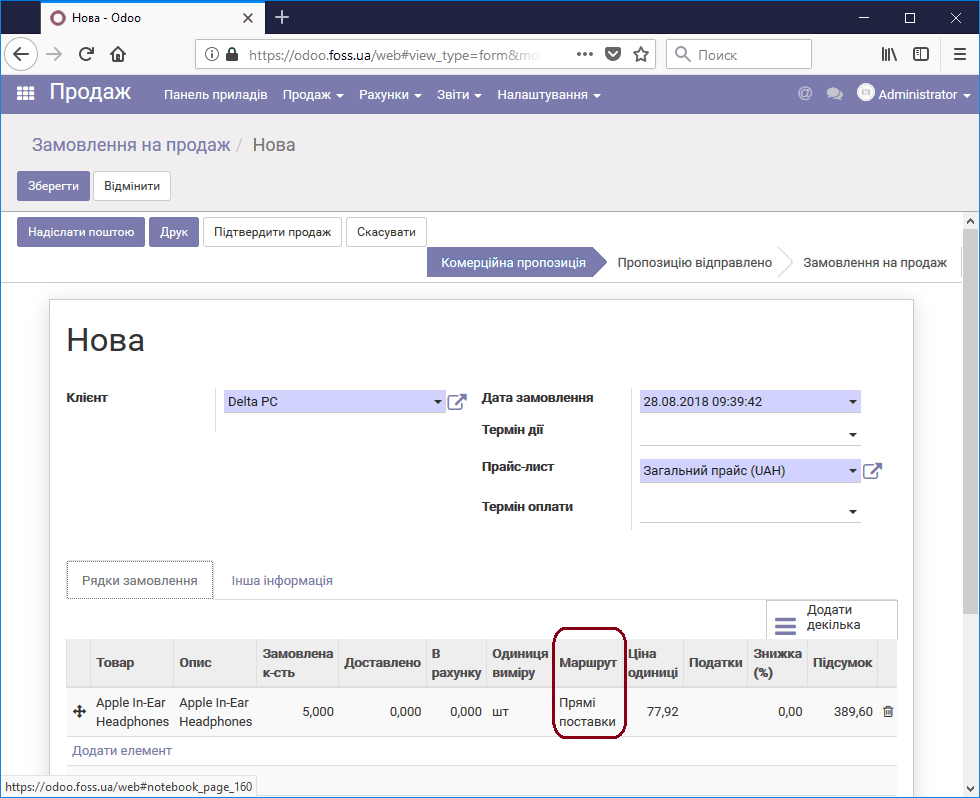 Direct delivery route
After the sale is confirmed, the application automatically generates a Request for quotation in the Purchasing module. The request is generated for the supplier specified in the product settings who offers the most favorable supply terms (lowest price, delivery time, product quantity, etc.).
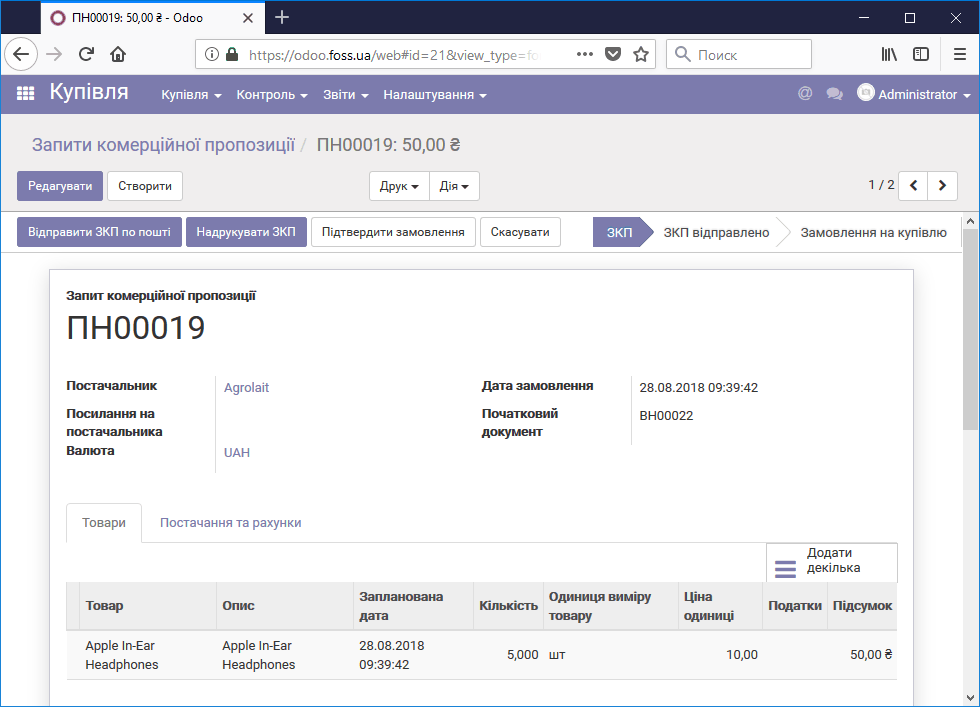 Request for quotation
Click Confirm order, and a delivery of the product from the supplier to the customer is generated in the Purchase order.
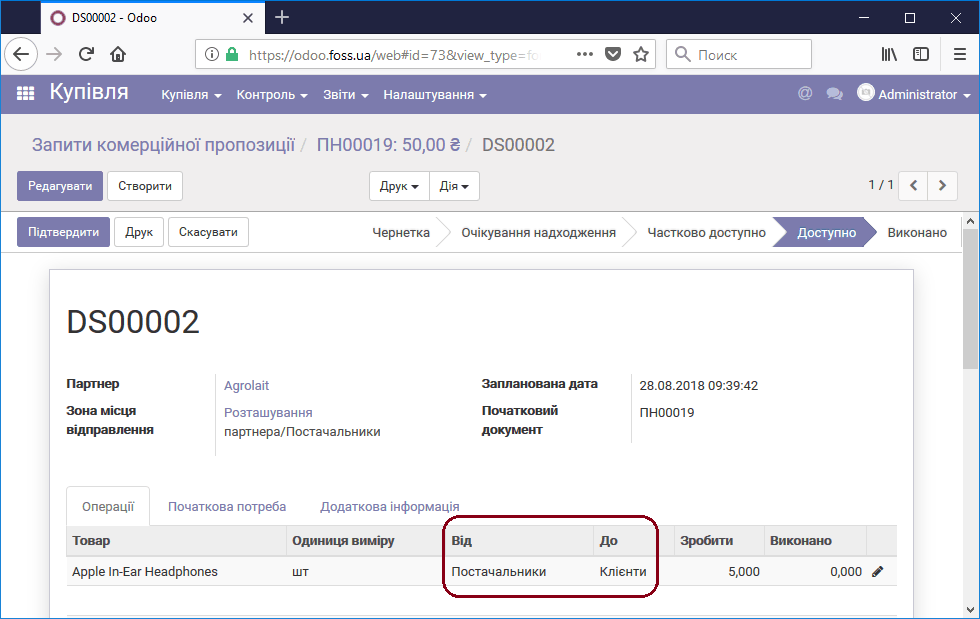 Delivery in the purchase order
The same delivery is also shown in the Sales order that we created earlier.
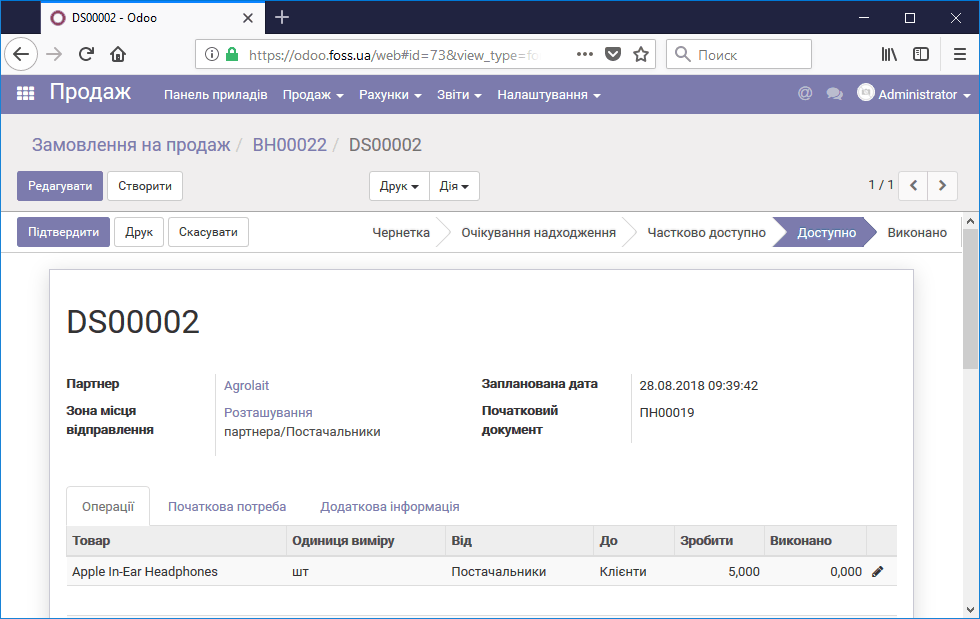 Delivery in the sales order
On the Warehouse dashboard, the product delivery is shown in the Dropship window.
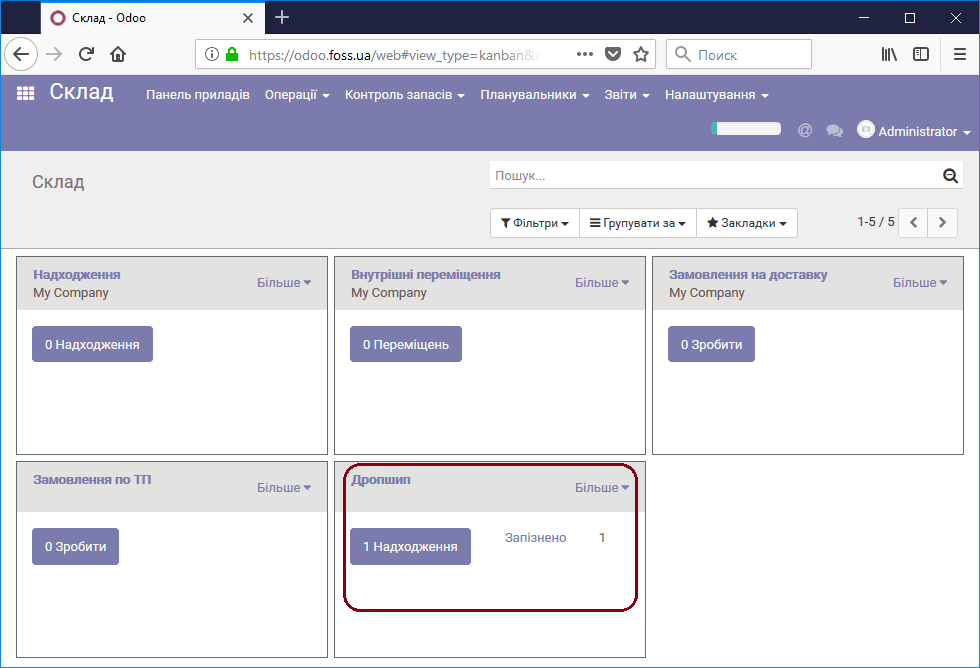 Direct product delivery, warehouse
After the delivery is completed, the products arrive directly from the supplier to the customer.