Working with the software cash register in the basic package
Getting started. Opening a shift
To start working with the PRRO (software cash register) in the basic package, you need to make a number of settings. In this article, PRRO (software cash register) is the program that registers sales as fiscal receipts.
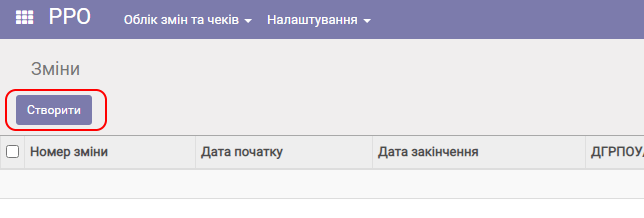
Then go to the RRO module, select Shift and receipt accounting/Shifts in the menu and click Create.
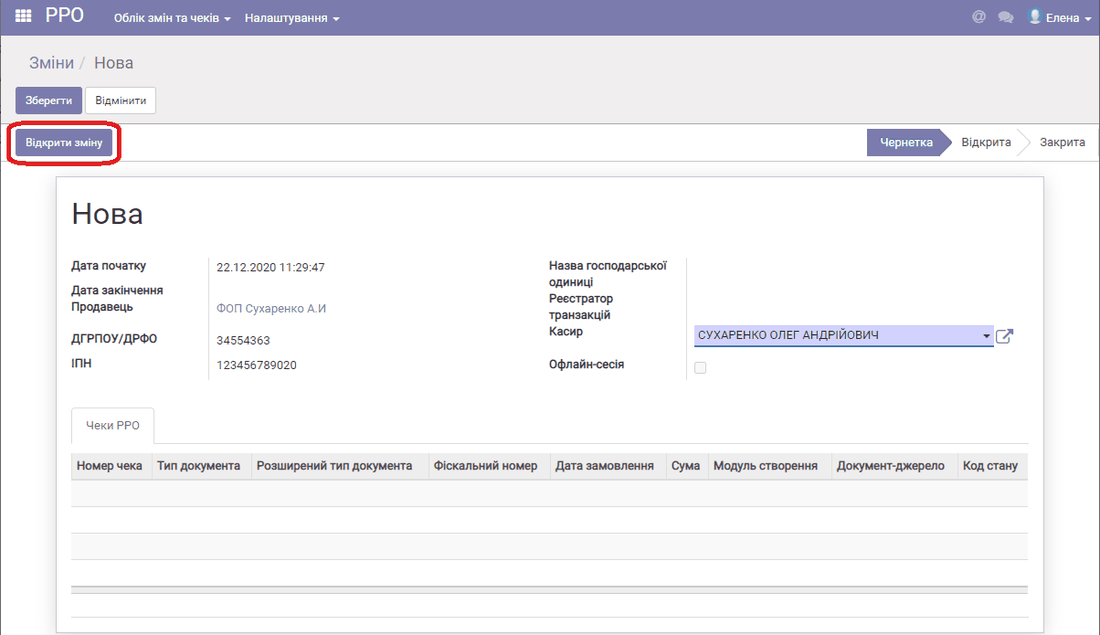
Select the business unit, the transaction recorder and the cashier.
Then click Open shift.
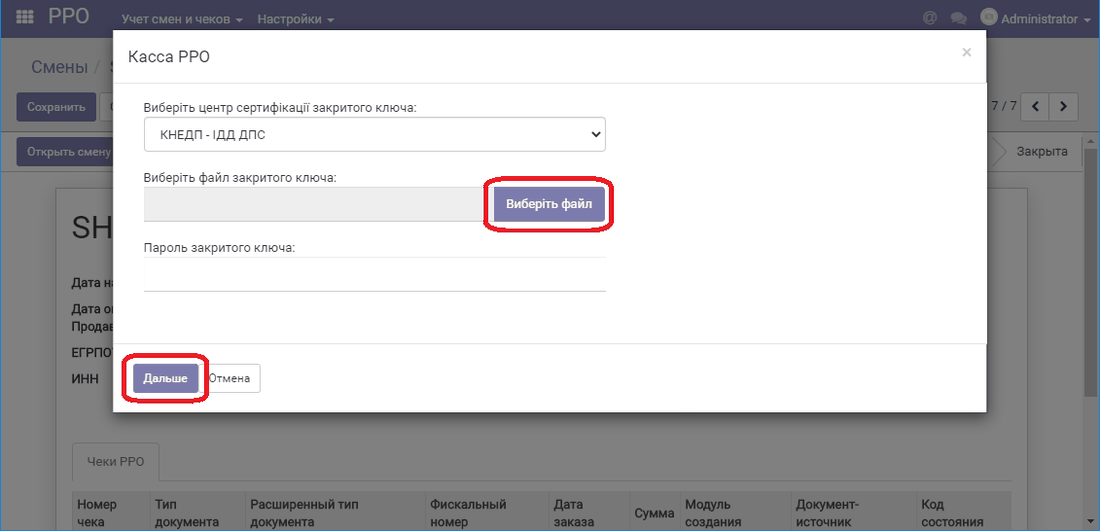
Select the private key file, enter the password and click Next, then OK.
After that the shift has the status Shift open:
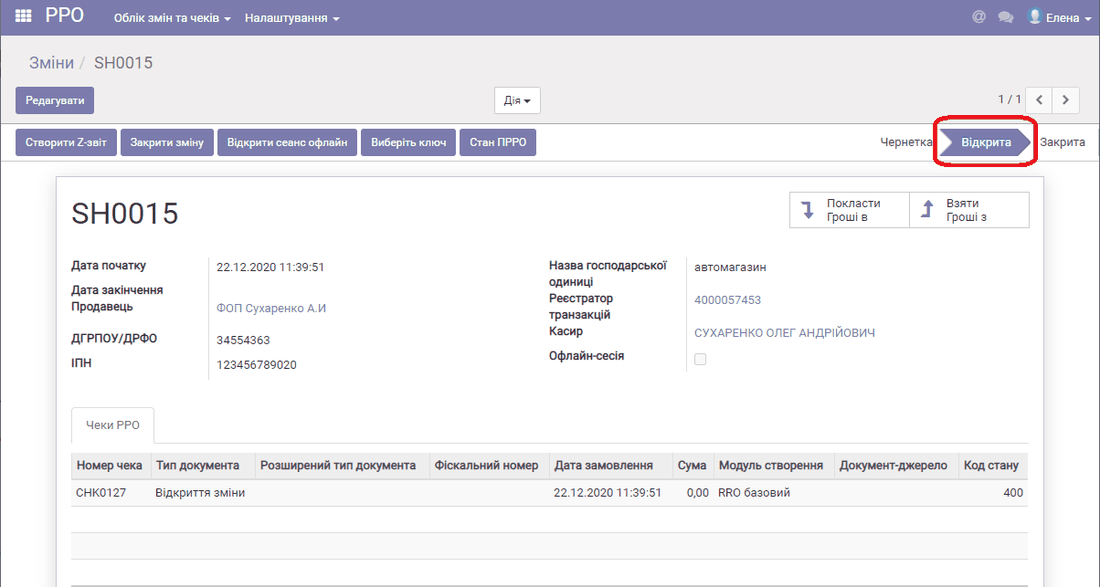
You can then start fiscalizing payments (creating receipts).
Receiving payments. Fiscalization
You can register a payment in several ways.
Let us look at the first option, which creates an invoice. To do this, go to the Sales module, select Sales/Sales orders in the menu and click Create:
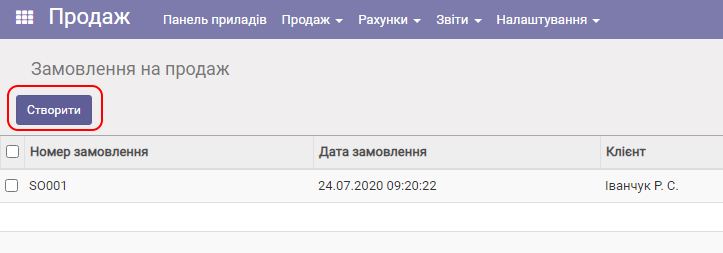
An issue note appears:
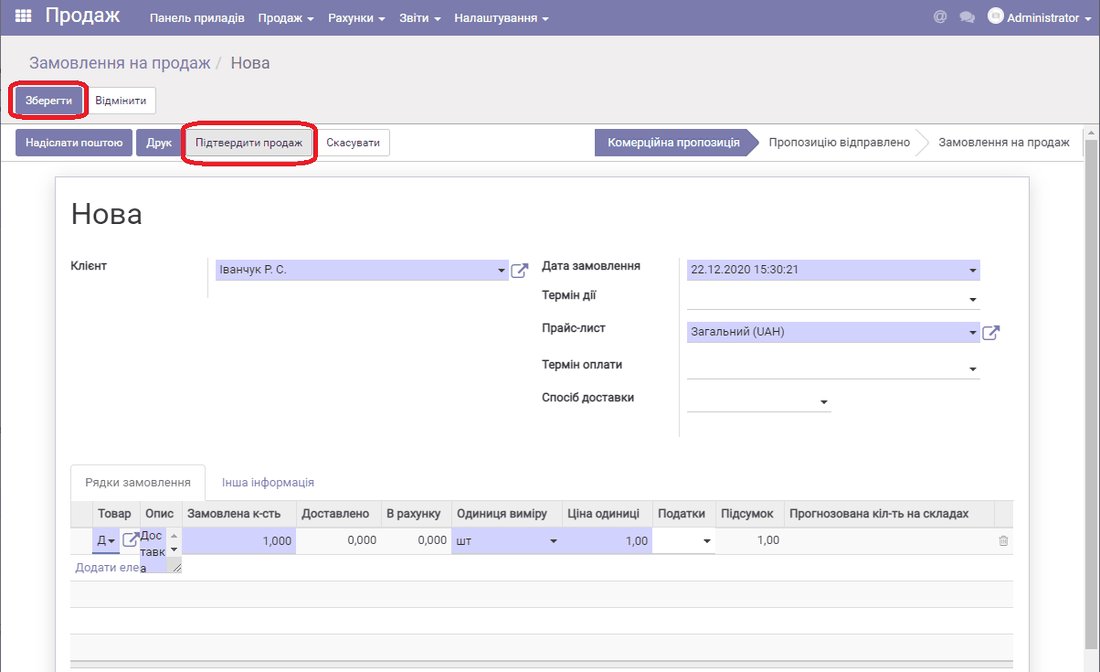
Select the Customer, add products to the note, enter the correct price of the product (service) and click Save/Confirm sale.
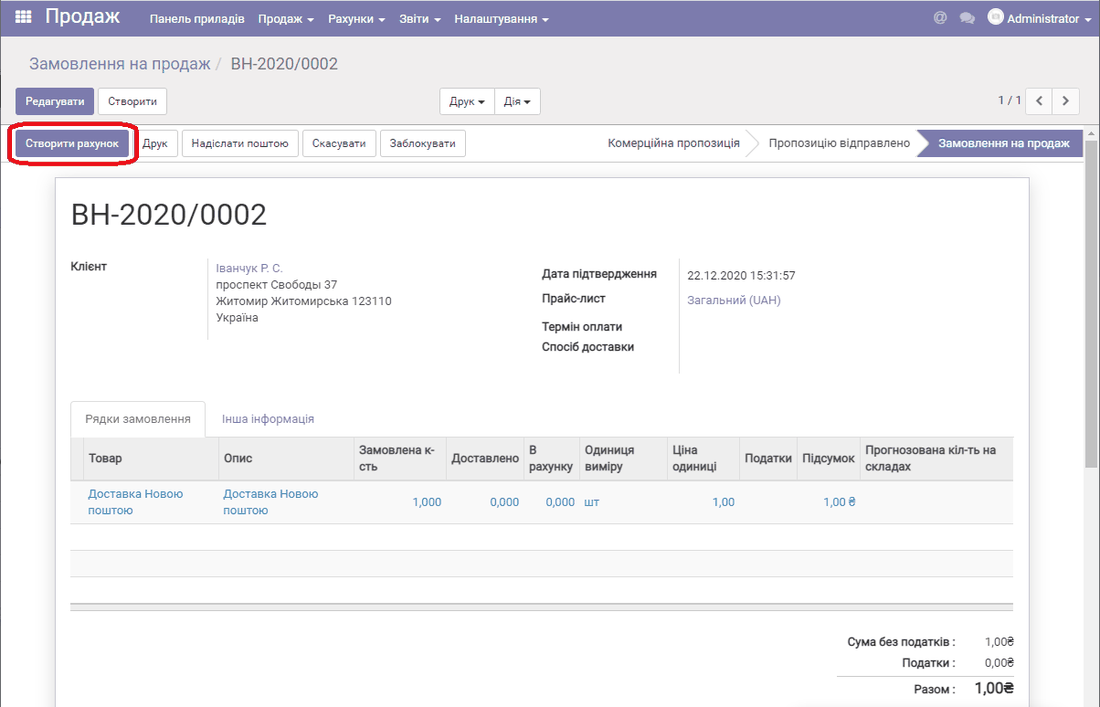
Next, create an Invoice based on the Sales order (the note). To do this, click Create invoice.
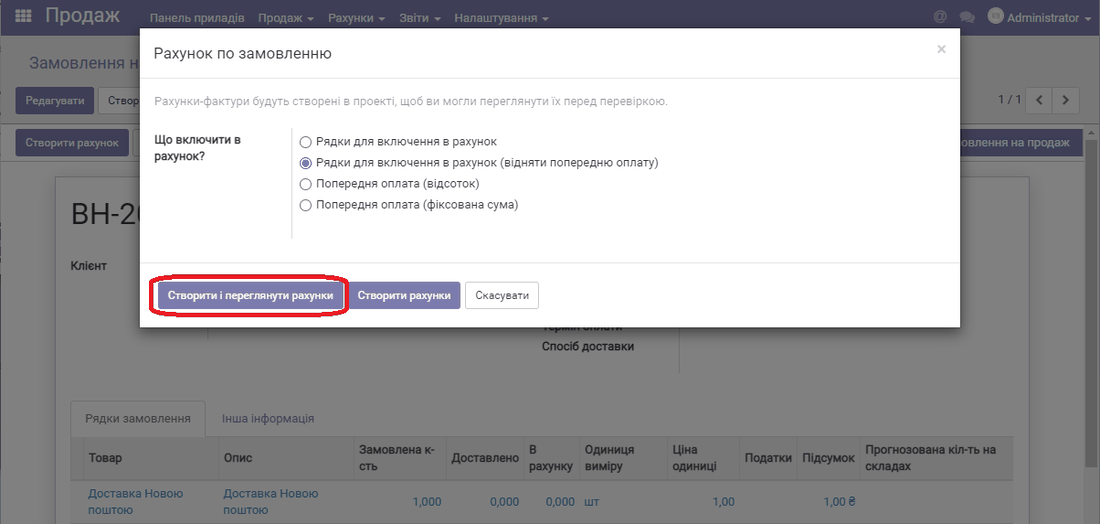
Then click the Create and view invoices button:
The invoice opens. Click Confirm:
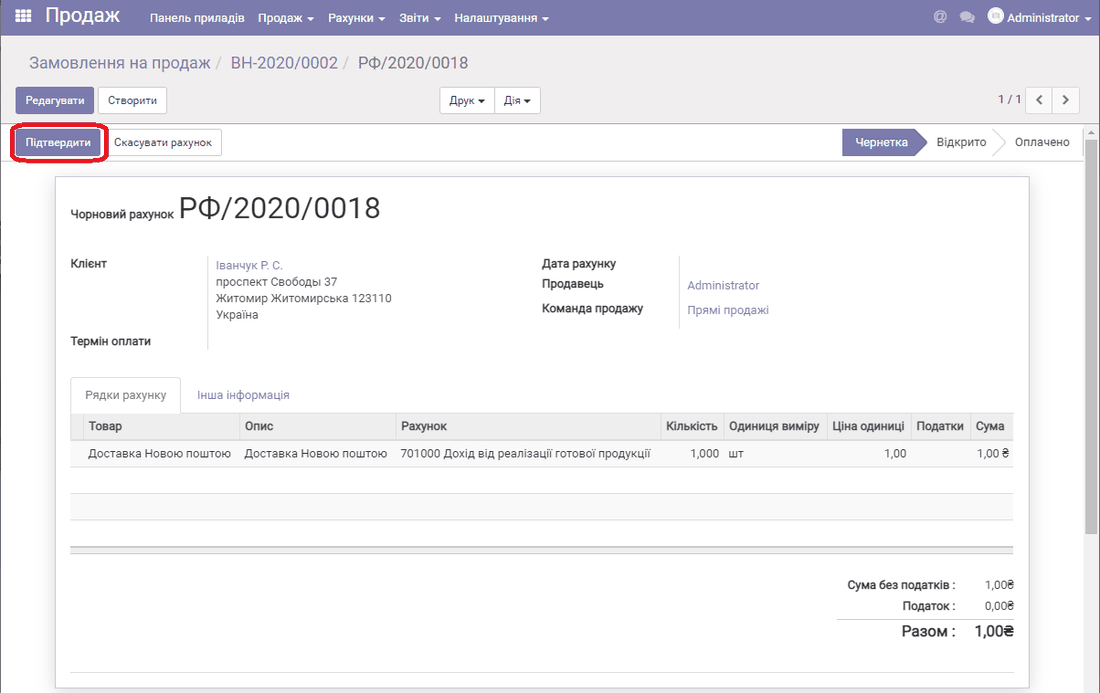
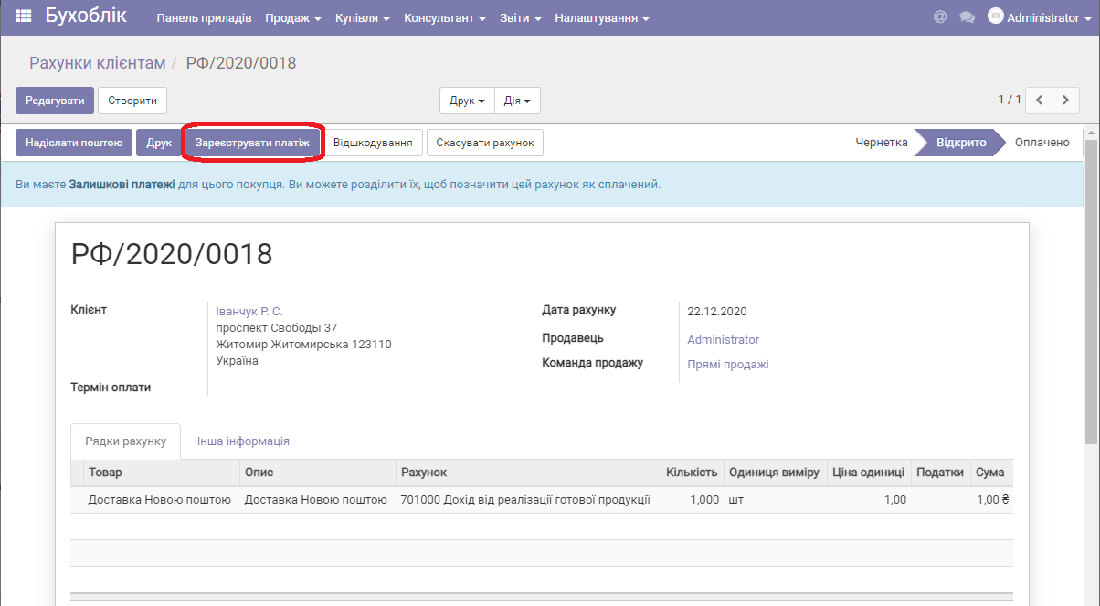
Then click Register payment:
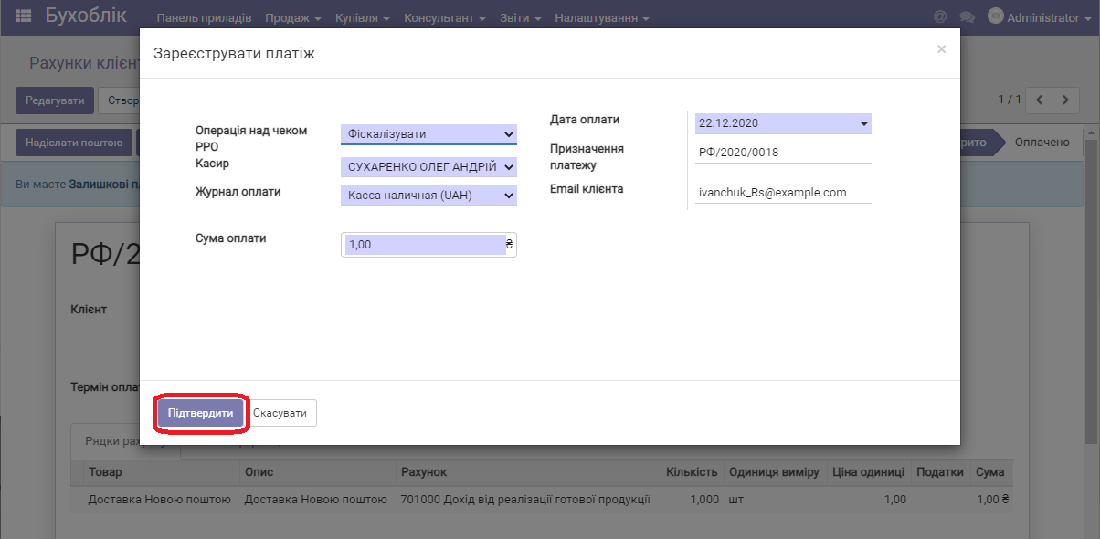
Select one of the RRO receipt operations: "Fiscalize", "Do not fiscalize" or "Fiscalize later":
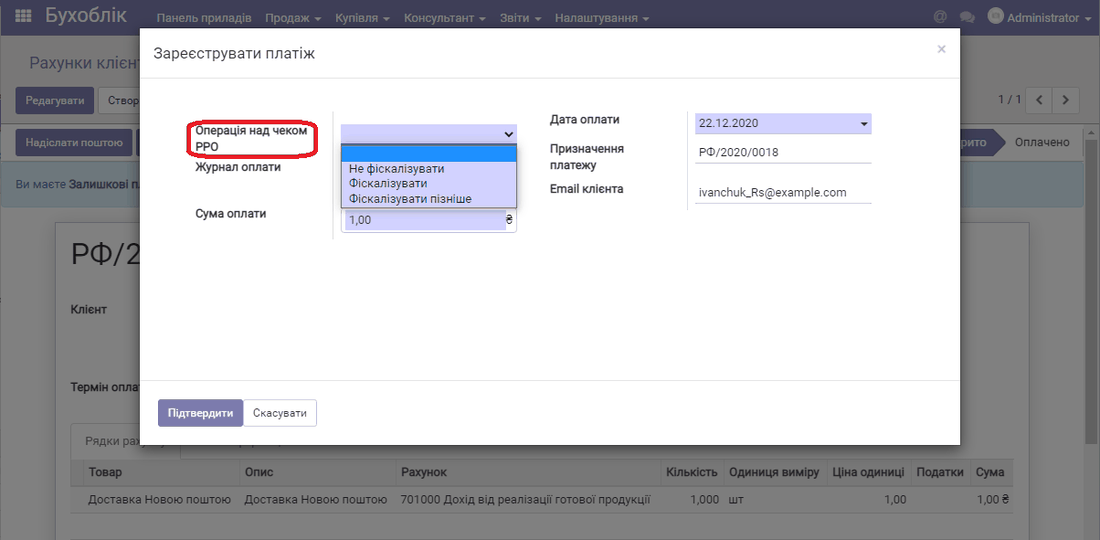
The operations are used as follows:
Fiscalize - the sale is fiscalized immediately, and a receipt with a fiscal number is created.
Do not fiscalize - no fiscalization takes place, and no receipt is created.
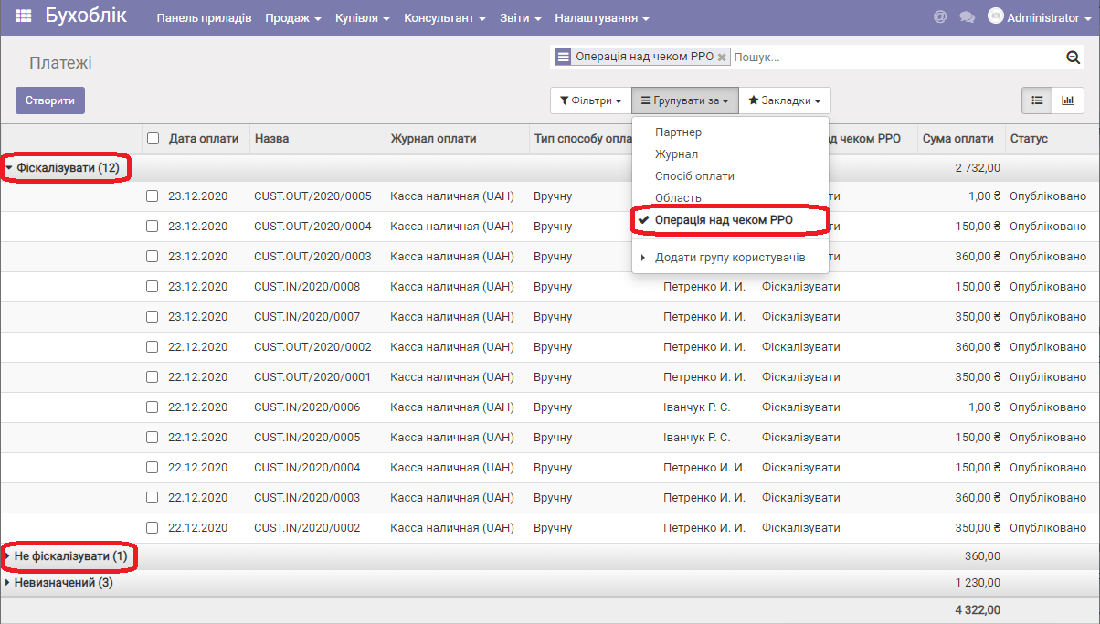
Fiscalize later - use this if you are sure the sale must be fiscalized, but you do not yet have confirmation that the payment was received from this particular customer. When you close the shift at the end of the day, the program tells you that the shift cannot be closed because there are unfiscalized payments.
To find unfiscalized payments, go to the Accounting module, menu item Sales/Payments. Group the payments by RRO receipt operation:
Then select the payment journal through which the payment was received, check the amount and click Confirm:
A window appears warning you to select the payment journal correctly:
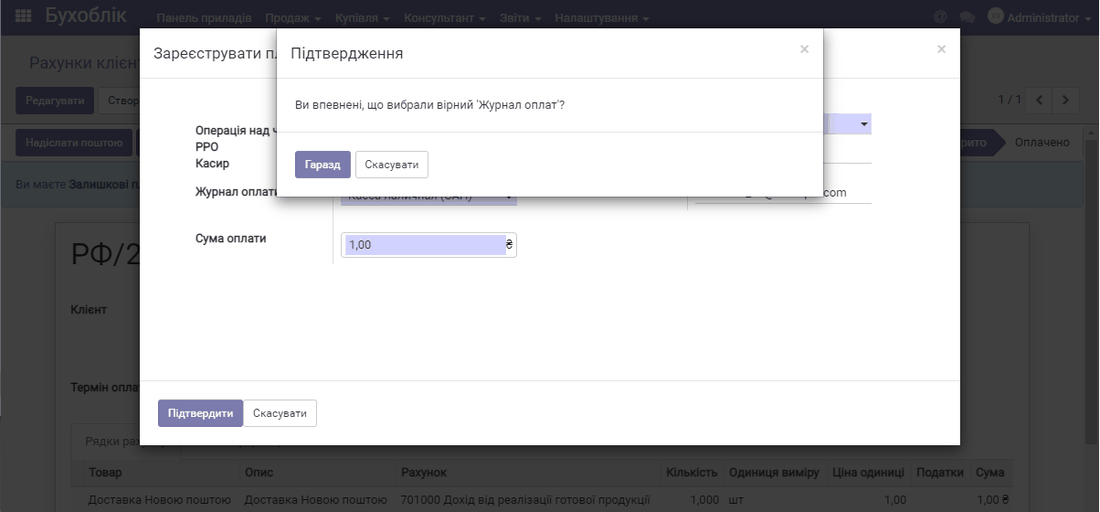
If you make a mistake and select the wrong payment journal ("cash register" instead of "card payment" or vice versa), incorrect data goes to the tax authority. Be careful during fiscalization!
Then click OK. A request is sent to the tax authority server and a fiscal receipt is generated. The program reports that the receipt was sent successfully.
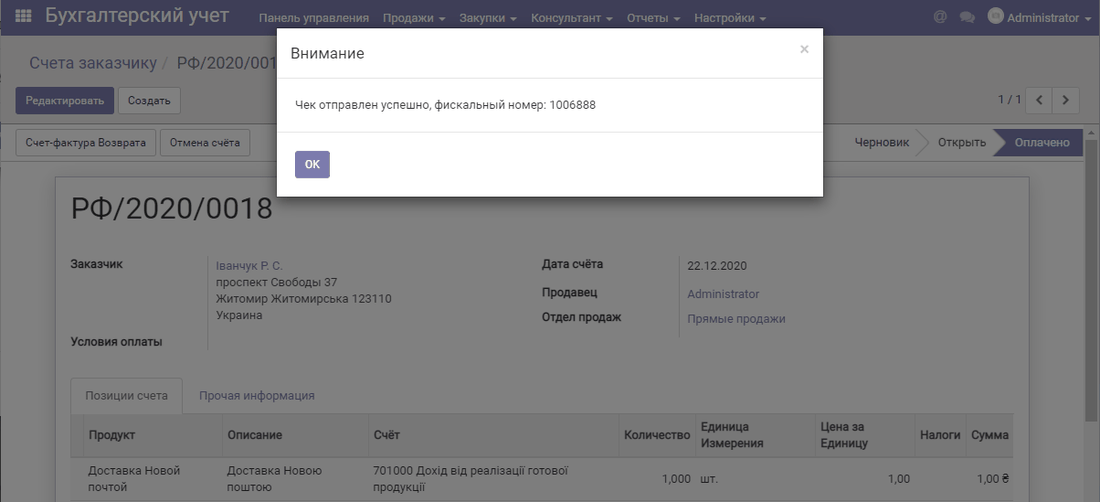
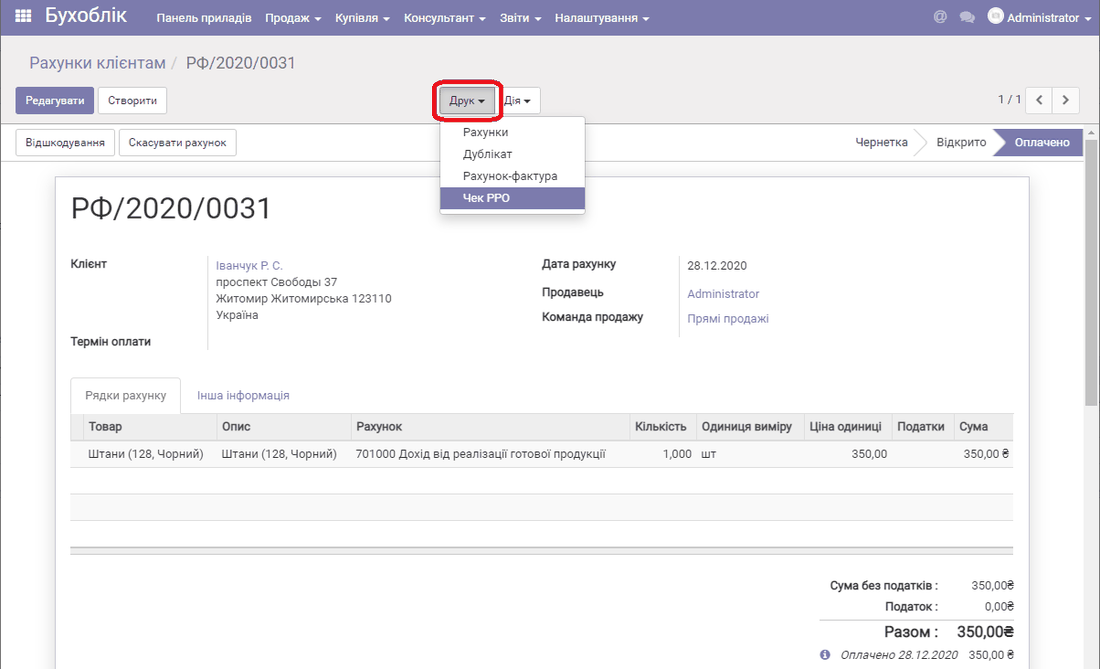
You can print it and send it by email directly from the invoice.
To print, click Print/RRO receipt.
Advance payments (prepayment)
Above we looked at fiscalizing a sale by creating an invoice. It is suitable when you know which product you are shipping. If you take a prepayment for a product, the receipt must state that it is an advance payment.
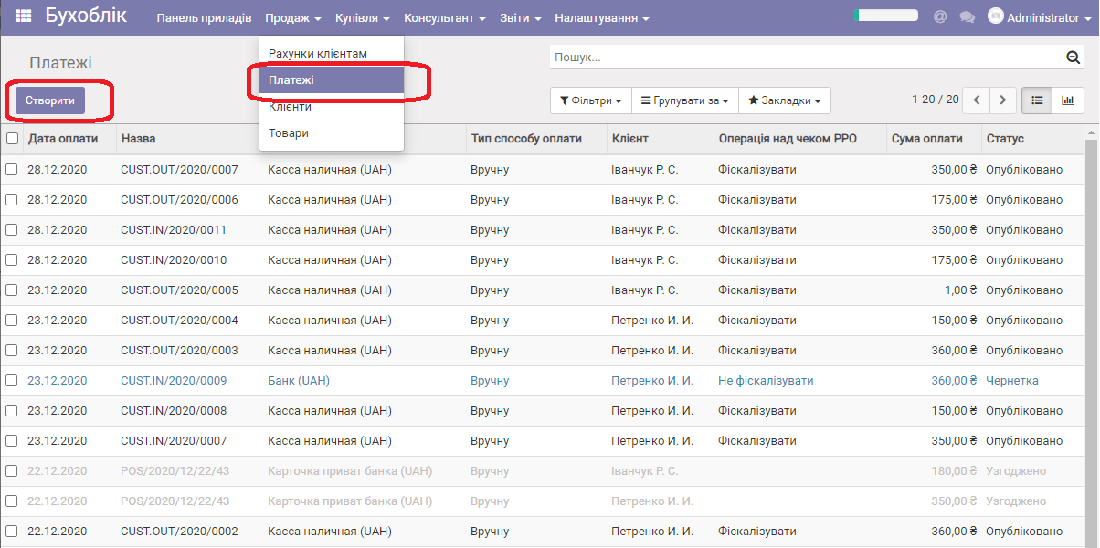
To fiscalize such payments, go to the Accounting module, select Sales/Payments in the menu and click Create:
Select the Customer, the Receipt operation and the Payment journal, enter the amount and click Save/Confirm.
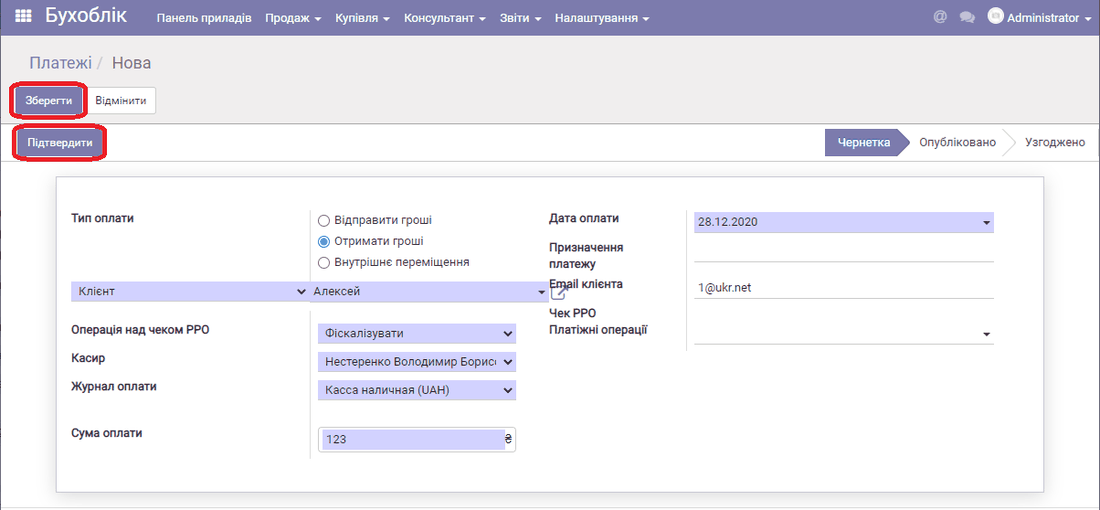
A window appears warning you to select the payment journal correctly. Click OK. A window appears with information that the receipt was sent successfully, and its number. You can print the receipt using the Print button.
At the end of the working day you need to close the PRRO shift and send the Z-report to the tax authority. To do this, go to the RRO module, select the shift and click Close shift. Then click Create Z-report.
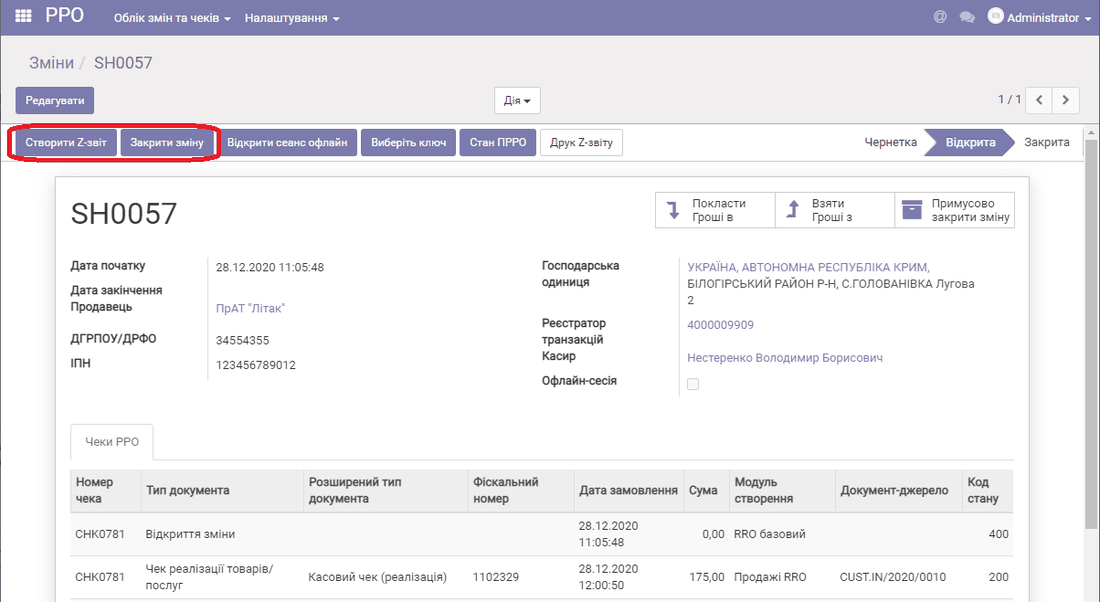
How to refund money for a fiscal receipt
First, find the invoice for which the payment and fiscalization were made. To do this, go to the Accounting module and select the menu item Sales/Customer invoices. If you know the receipt number, use the corresponding filter and find the receipt by its number. You can also search by amount, sale date or customer.
Then open the invoice and click Credit note.
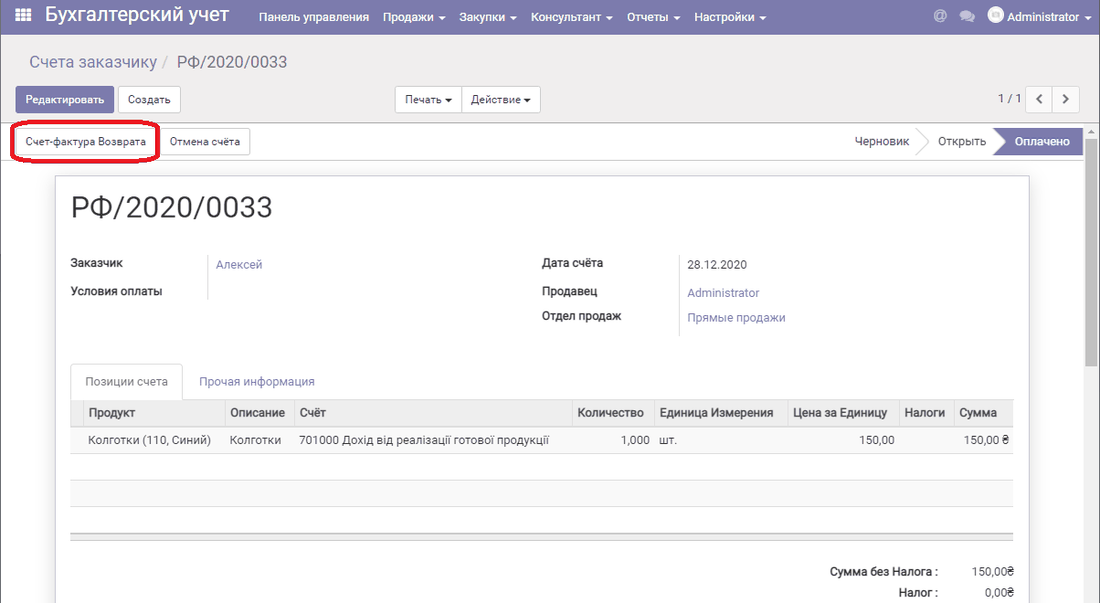
Leave the Method as the one usually selected. Click Create draft return, enter the reason for the return in the Reason field and click Create return.
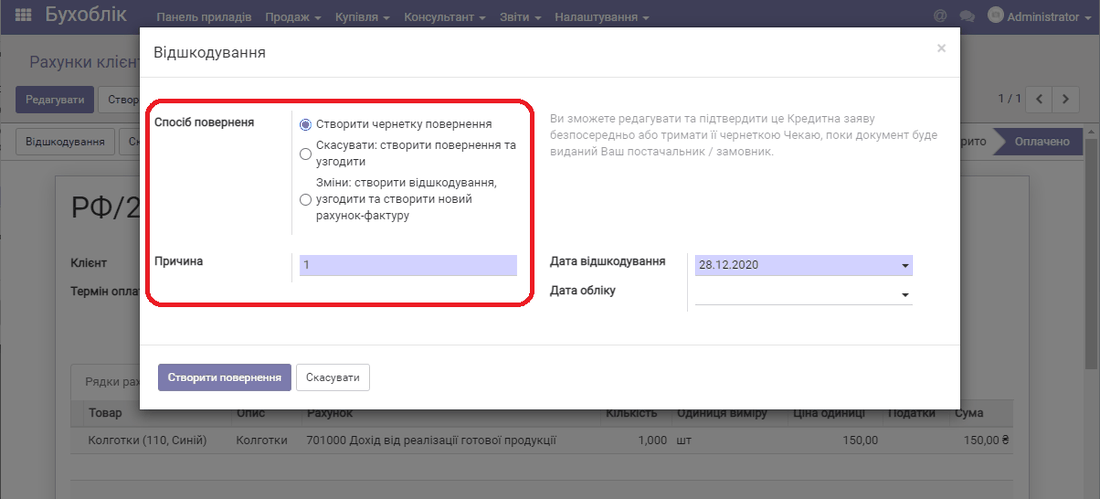
After confirmation, perform Register payment. Then, as described above, select the RRO receipt operation, the payment journal and the return amount. A draft Return invoice is created. Click Approve.